| Latest topics | » fog lights for a ae 101 Wed Mar 27, 2024 12:39 am by jorpakko » WTB: AE101 Levin Body Parts - front and rear Mon Aug 21, 2023 2:26 am by motorsportbd » My 96 wagon Mon May 15, 2023 6:13 am by emmet.harten3 » E10 corolla wagon / estate wind deflectors wanted Mon May 15, 2023 5:32 am by emmet.harten3 » wind deflectors for e10 estate / bz touring top spoiler Mon May 15, 2023 5:30 am by emmet.harten3 » genuine oem moulded Mud flaps  Mon May 15, 2023 5:29 am by emmet.harten3 » Wanted gxi/20v front bumper for e10 corolla  Sat Feb 11, 2023 2:08 am by emmet.harten3 » AE101 arm rest  Sat Feb 11, 2023 1:30 am by emmet.harten3 » Marvin the ZZE122 Wagon Sun Feb 05, 2023 1:53 pm by gold94corolla» 7AGE Blacktop Fri Jan 20, 2023 1:49 pm by gold94corolla» RARE JDM OEM PARTS  Thu Dec 29, 2022 7:47 am by prnguy » Te1 jumper to E1 wont flash codes  Sun Sep 04, 2022 1:44 pm by kaitaiya » AE101 Crotch Vent Install Sat Sep 03, 2022 12:36 pm by gold94corolla» Ae 100 1993 Windscreen issue  Fri Jul 22, 2022 3:15 pm by Yunmiliautoparts » I'M FROM MALAYSIA. HELLO COROLLA AE101/AE111 WORLDWIDE LOVERS! Fri Jul 22, 2022 3:12 pm by Yunmiliautoparts |
| Who is online? | In total there are 7 users online :: 0 Registered, 0 Hidden and 7 Guests
None
Most users ever online was 316 on Thu Nov 25, 2021 1:28 am
|
| Top posting users this month | |
| Statistics | We have 4025 registered users
The newest registered user is JerseyRolla97
Our users have posted a total of 42623 messages in 3011 subjects
|
| Please Donate to the Site | |
|
| May 2024 | | Mon | Tue | Wed | Thu | Fri | Sat | Sun |
|---|
| | | 1 | 2 | 3 | 4 | 5 | | 6 | 7 | 8 | 9 | 10 | 11 | 12 | | 13 | 14 | 15 | 16 | 17 | 18 | 19 | | 20 | 21 | 22 | 23 | 24 | 25 | 26 | | 27 | 28 | 29 | 30 | 31 | | |  Calendar Calendar |
|
| | | Lexus IS300 |  |
|
+30miib14 iLL GT steed CoroZilla trife96 Pitayo trufauru mindbeats Robbiemulc17 jay93FXGT Argew24 BRIDGY John-117 kickfli12 Corollove gilli10 humidade noodlekid ROLLAenthusiast187 Skorp knite magweal gelovash kennydang91 Corolla Sound MirrorEyes Sgt_Lyna topnotch john-905 Kiwi-Corolla 34 posters | |
| Author | Message |
|---|
gold94corolla
Site Administrator


Posts : 5234
Reputation : 181
Join date : 2011-04-29
Age : 37
 |  Subject: Re: Lexus IS300 Subject: Re: Lexus IS300  Tue Oct 14, 2014 4:44 pm Tue Oct 14, 2014 4:44 pm | |
| I've had an itching to put some LED high beams on my car for a while now. I originally wanted to put them in the head lights instead of the high beams, but couldn't find anything that worked. I really liked these from Baja Designs, they seem like the top of the line products, and I liked the 5000k color vs bluer from other sellers. http://www.bajadesigns.com/ProductDetail?ItemNumber=500003 Bought them on Amazon for a little bit cheaper. http://www.amazon.com/Baja-Designs-Squadron-Driving-50-0003/dp/B00JG0AVAO/ref=sr_1_1?s=automotive&ie=UTF8&qid=1412225535&sr=1-1&keywords=Squadron+Xl They come with 3 lens options: Wide cornering, Driving, and Spot. I ordered them with the Driving lens installed, which is a combination of the narrow Spot and wider output (you can see the differences on the lenses). 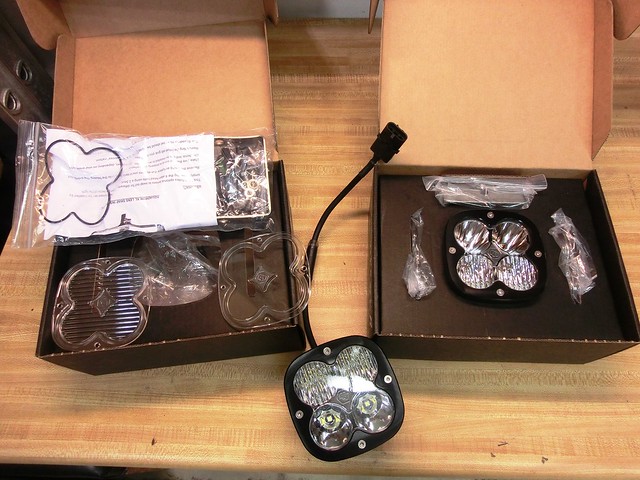 Baja Designs Squadran XL LED Spot Lights by gold94corolla, on Flickr This is just the 2 wide LEDs 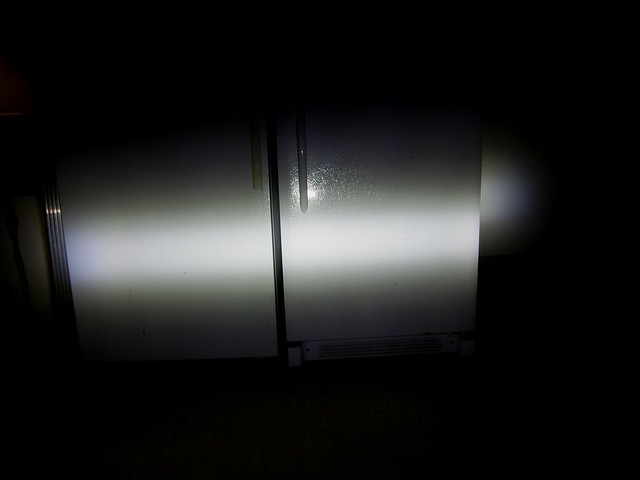 This is the 2 spot LEDs 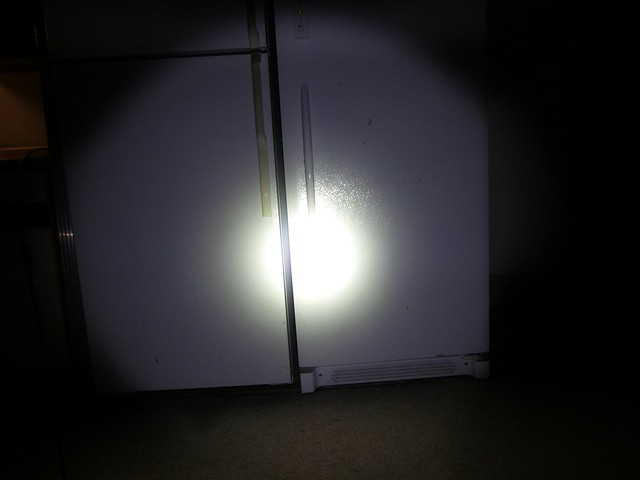 And together, they make a more useable beam than either option alone 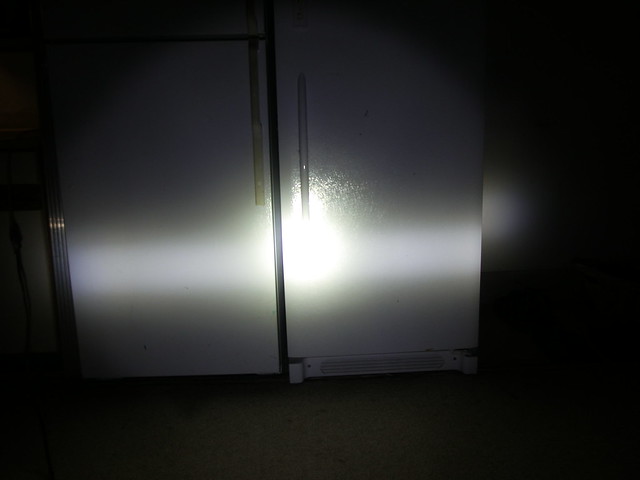 Both of them together 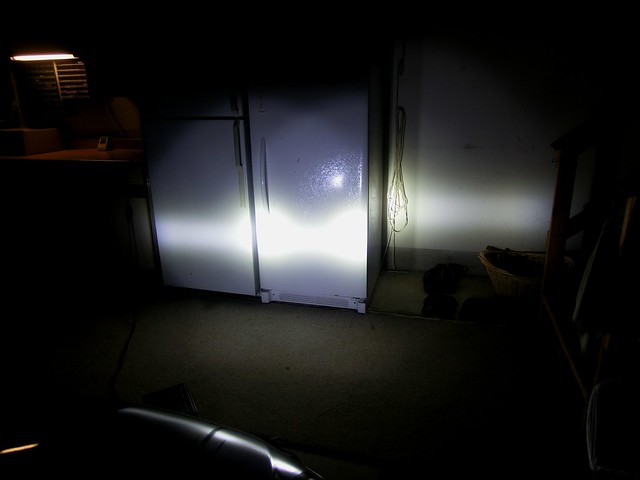 With the stock low beams 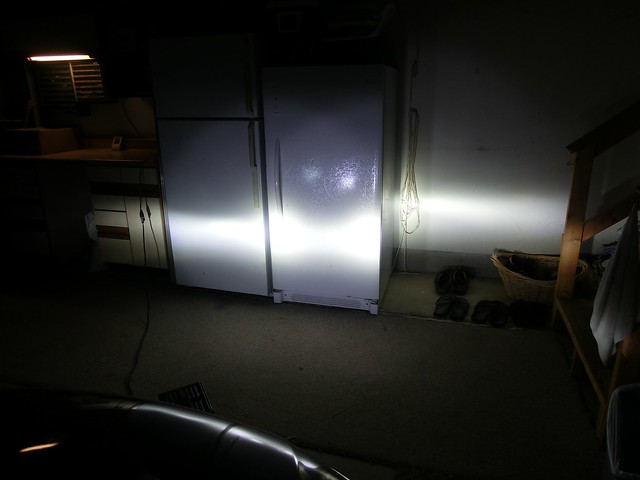 And with the HID kit in the high beams 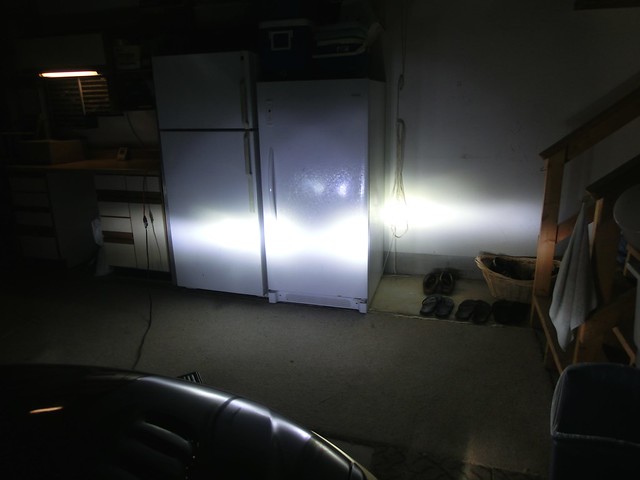 They definitely seem bright lol, and definitely true to their 5000k color (the high beams are 4300k) 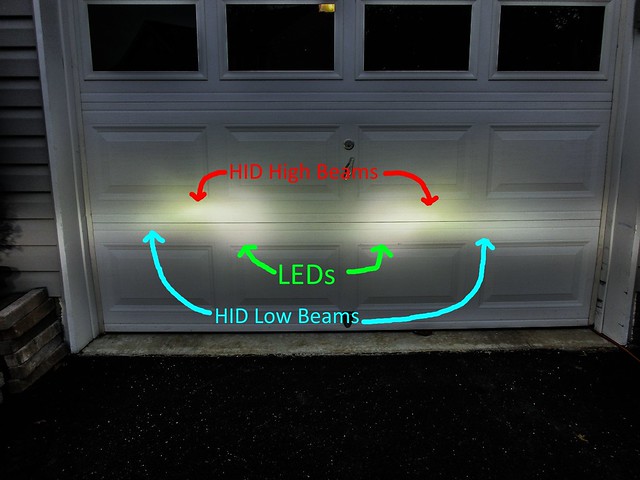 So, time to put them on the car somehow. I decided to put them behind the upper mesh grille so that as much light would pass through as possible. Took apart everything to figure out how I wanted to mount them. 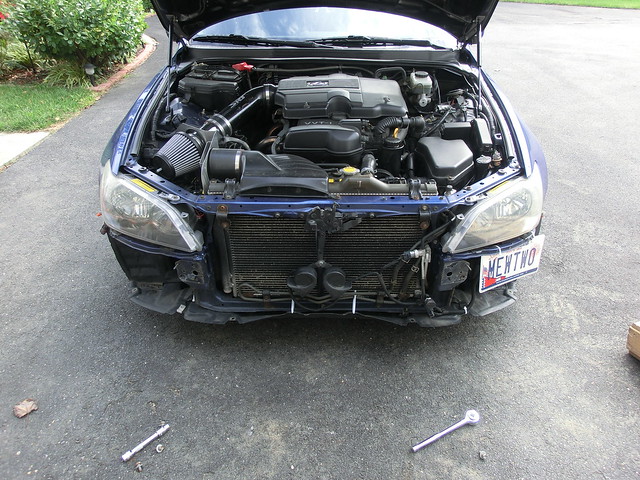 Figured that the easiest way was to fabricate some brackets and bolt them to the back of the crash bar... that would be solid lol. Simply used some right angle brackets, anchored to the crash bar, and with the LED brackets installed on top. 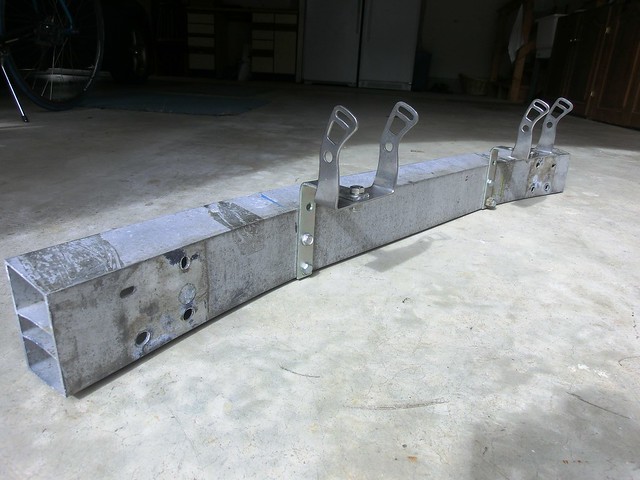 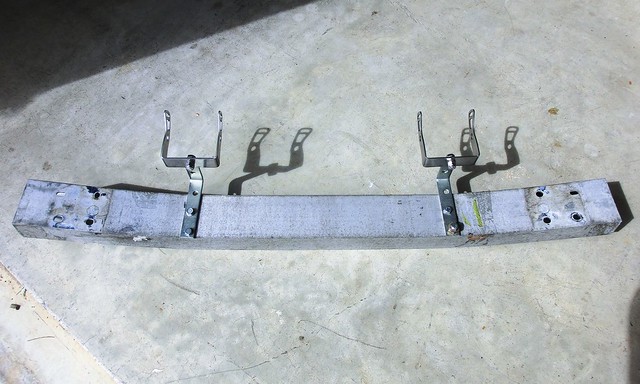 Painted the brackets black to hide them 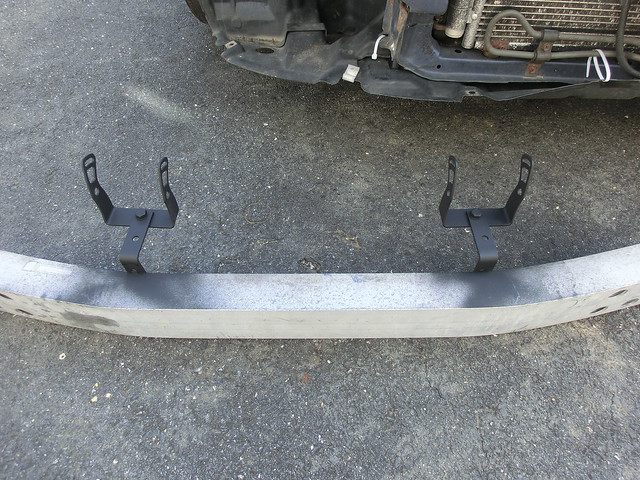 Installed the LEDs into the brackets 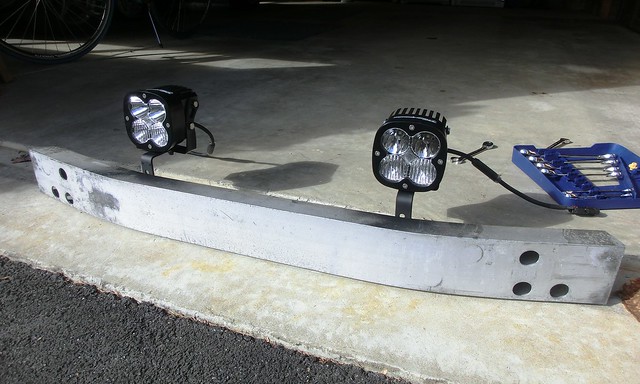 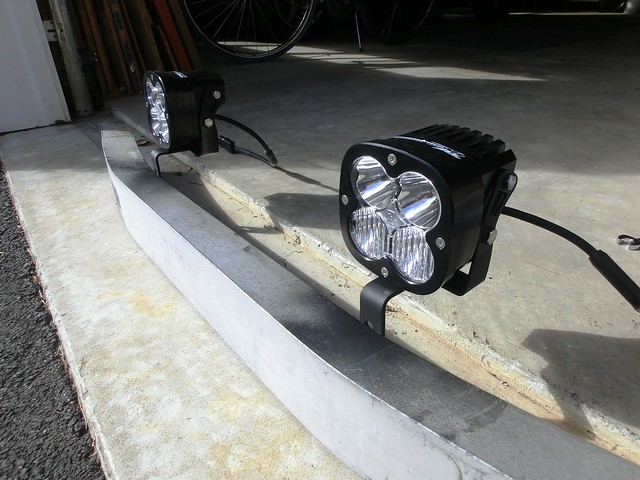 Bolted the bar back on the car 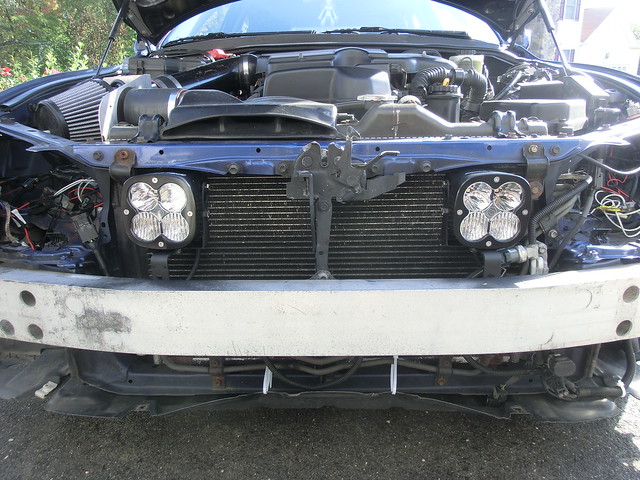 And it was a perfect fit, like I had estimated. 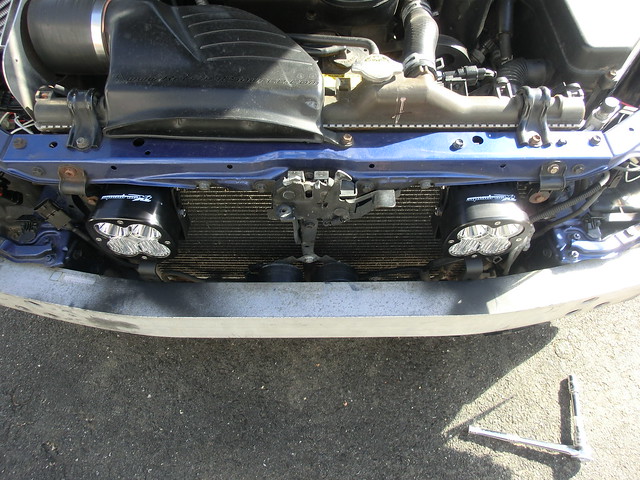 Barely touches the condensor 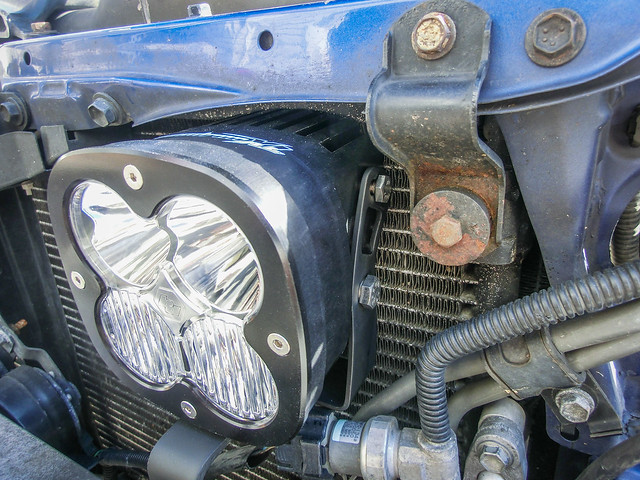 Fits behind the support bracket on this side (the brackets aren't symmetrical, I realized after putting the lights on lol) 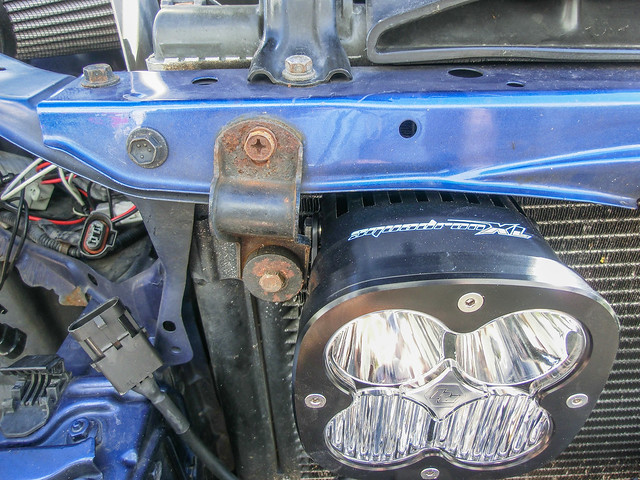 Wired them into the high beams 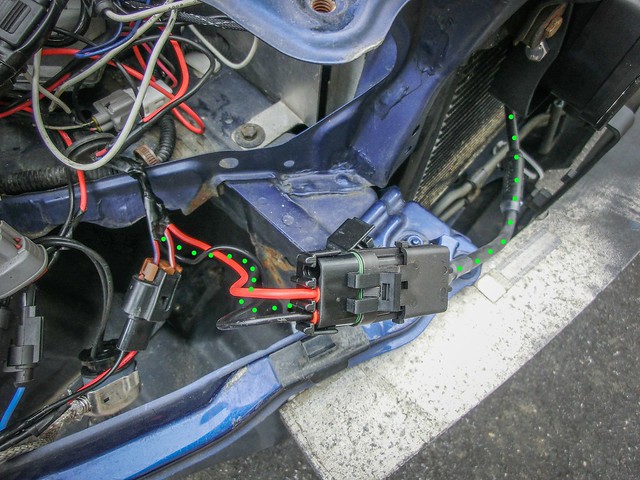 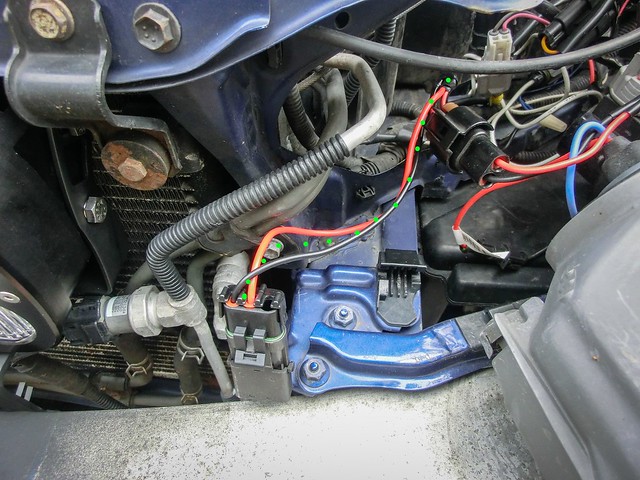 Done     Everything lit up lol 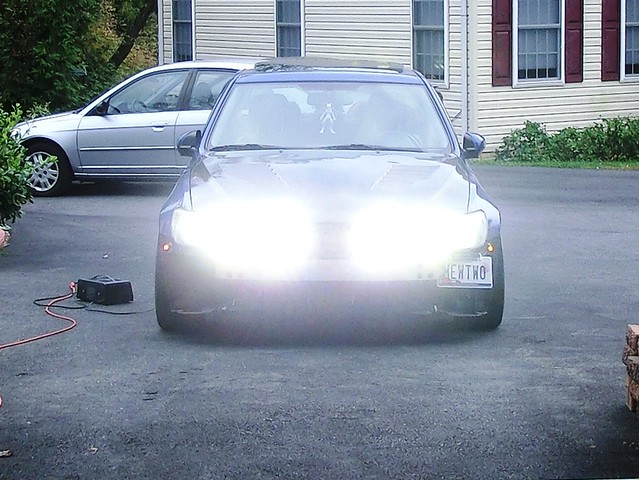  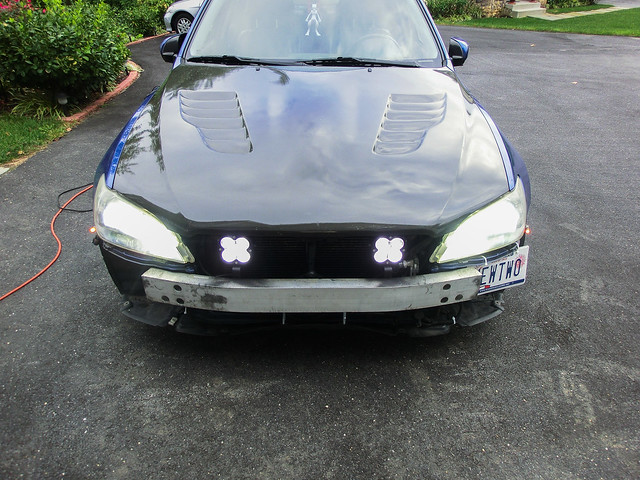 Just the LEDs alone.... my goodness, these things are massively bright lol 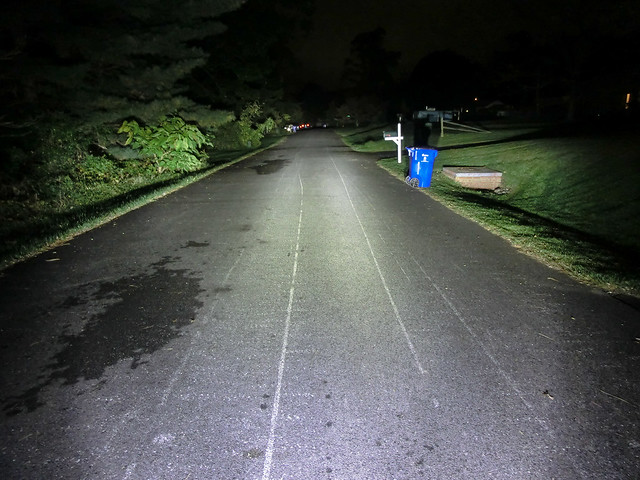 Baja Designs Squadran XL LED Output by gold94corolla, on Flickr You can see the combination of the spot and wide beams, and how either one alone wouldn't be very useful. Love it! Took some pics in the fog tonight 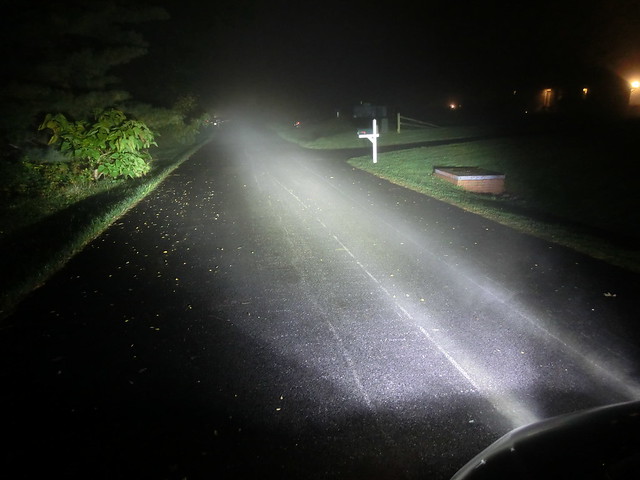 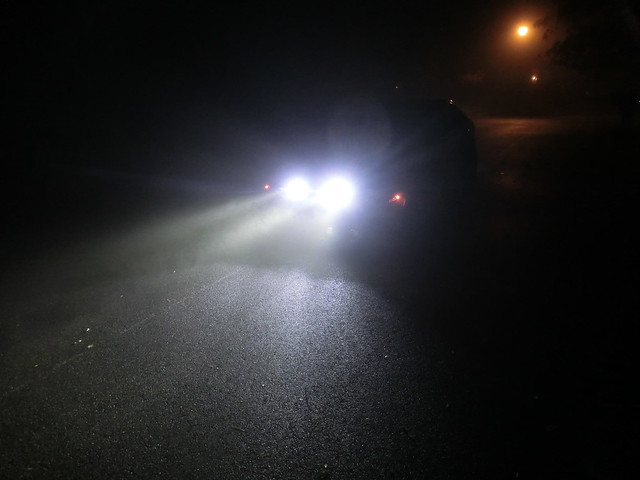 So I guess that's that lol. Yes, they do fit behind the grille perfectly, just enough clearance behind the mesh. I don't have my other 4 high beams hooked up at the moment, so it will be interesting to see how bright it all is when I'm done lol | |
|   | | gold94corolla
Site Administrator


Posts : 5234
Reputation : 181
Join date : 2011-04-29
Age : 37
 |  Subject: Re: Lexus IS300 Subject: Re: Lexus IS300  Thu Oct 23, 2014 12:16 pm Thu Oct 23, 2014 12:16 pm | |
| Continuing where I left off, the LEDs were bolted up to the car. Here's how they fit behind the grille 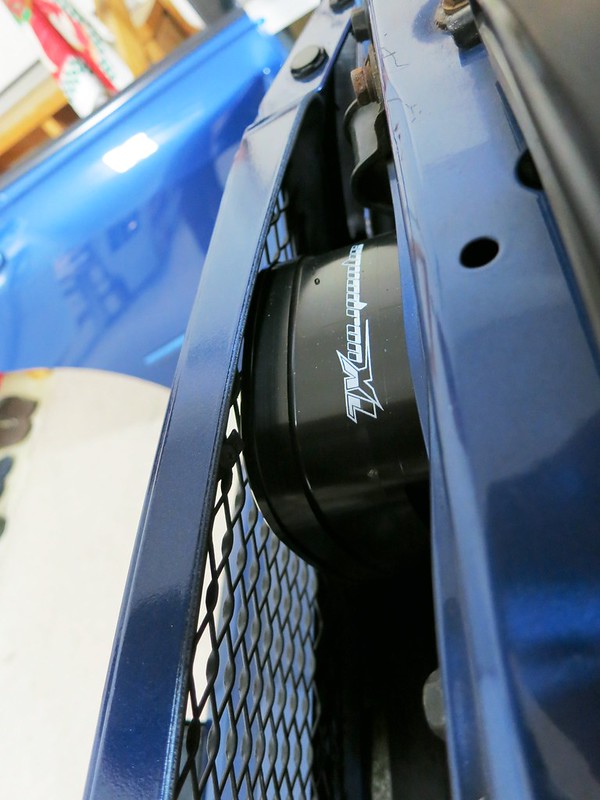 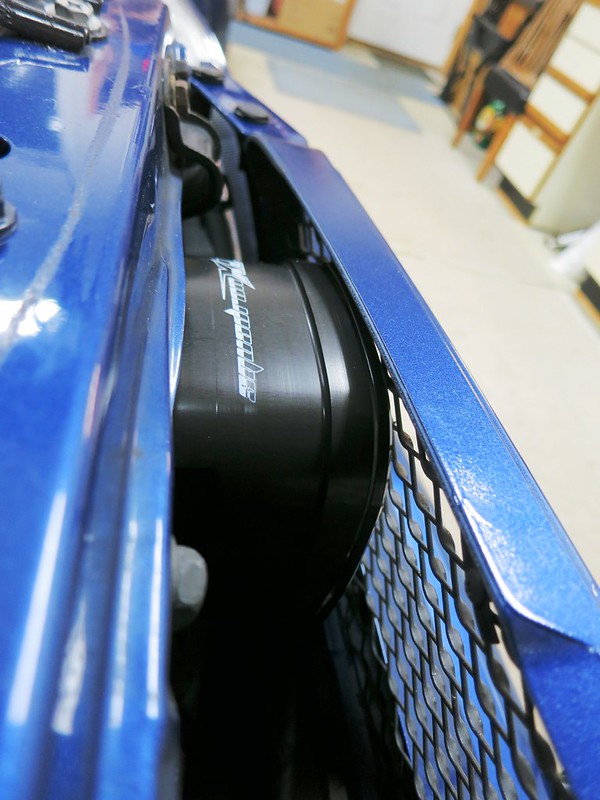 There is literally 0mm of space in front of and behind the light, they just barely touch the mesh grille and condenser. Couldn't have fit them better!! 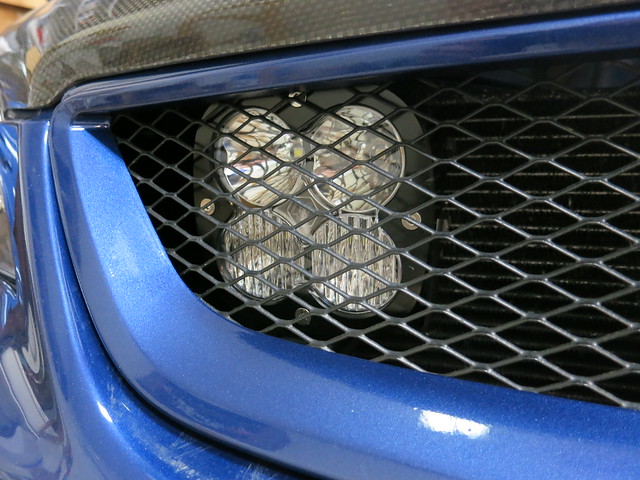 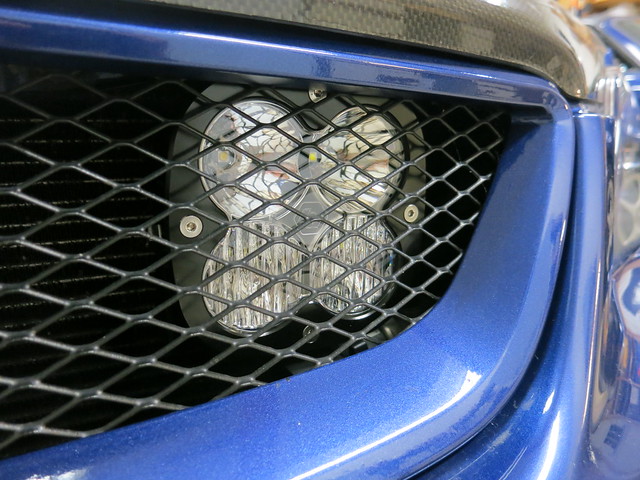 And then, continuing my second head light retrofit from where I left off in August, I finally finished them up. Got some fresh new LS430 projectors and shrouds, again modified to bixenon (but by a different person this time, did a better job). 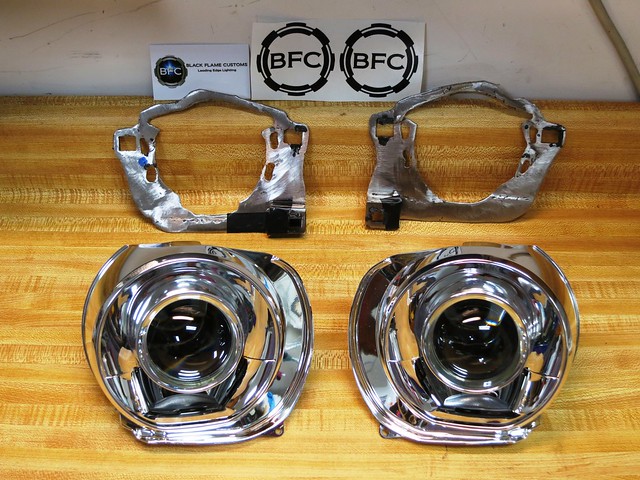 Bolted the brackets from my first head lights onto the new projectors (took many hours of aiming to get just right) 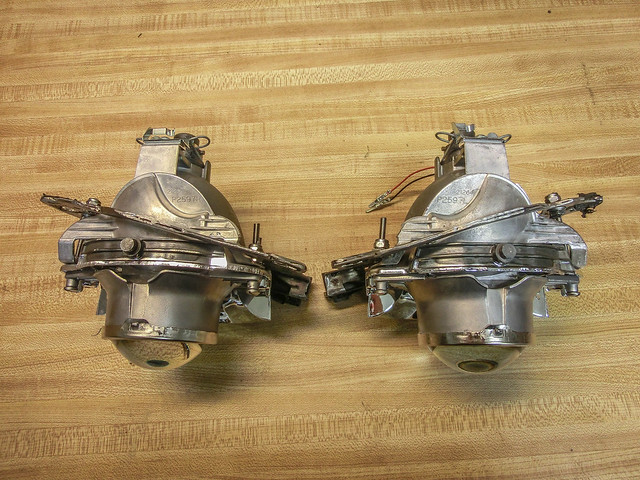 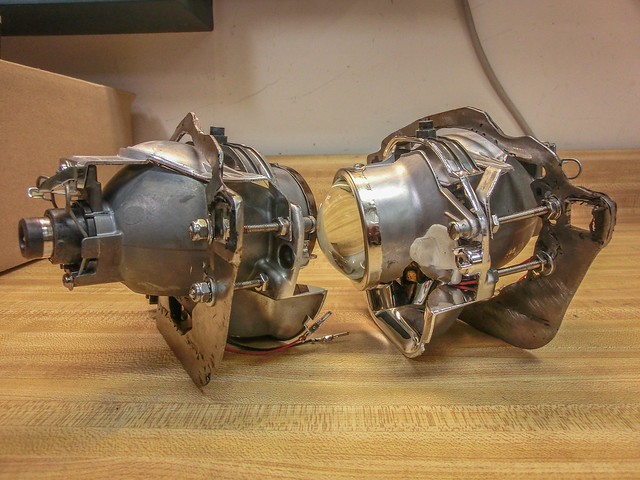 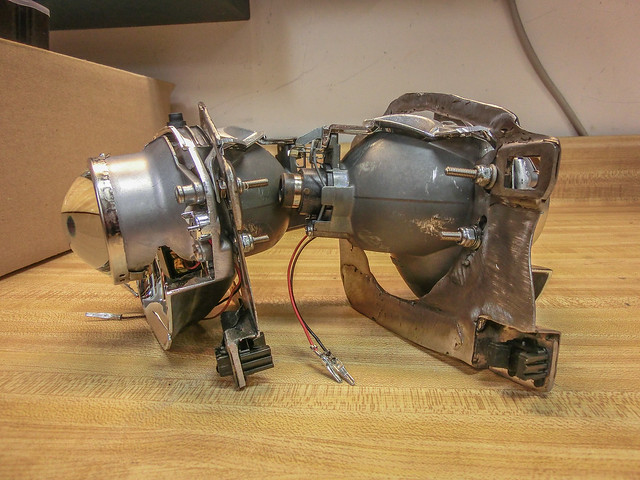 Put them on the car for aiming 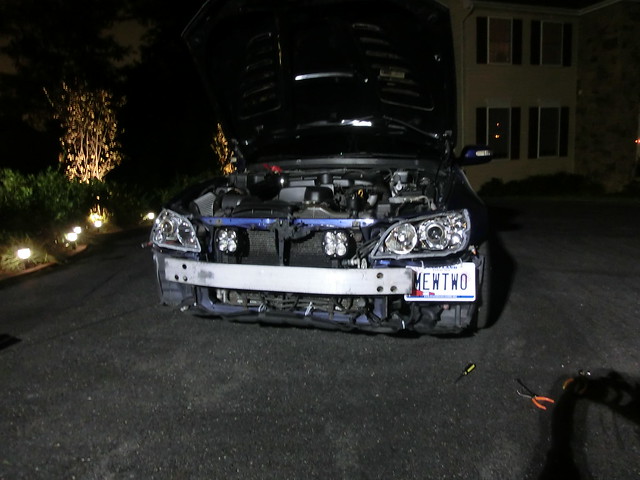 The cutoff is even sharper and has more color than last time! 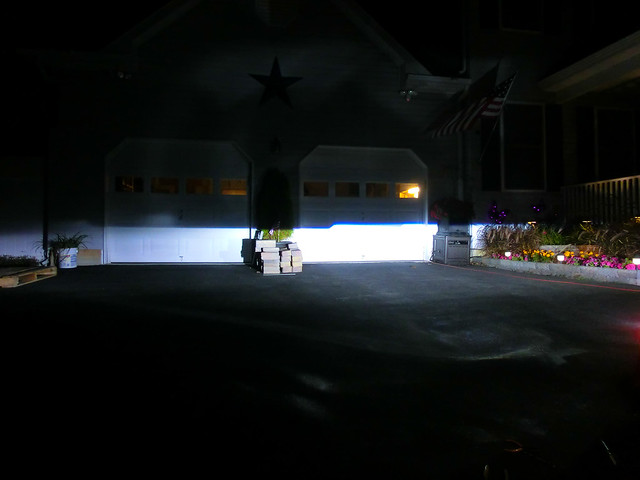 Here's the high beam, just from the bixenon projectors alone (much wider, nicer high beam than the first set) 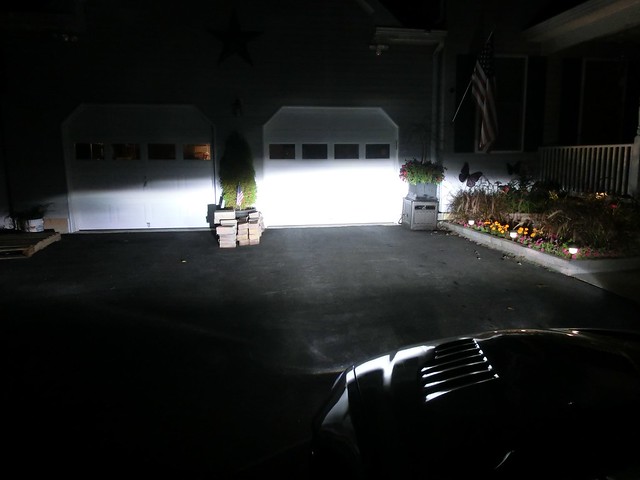 Output of the low beams on the road 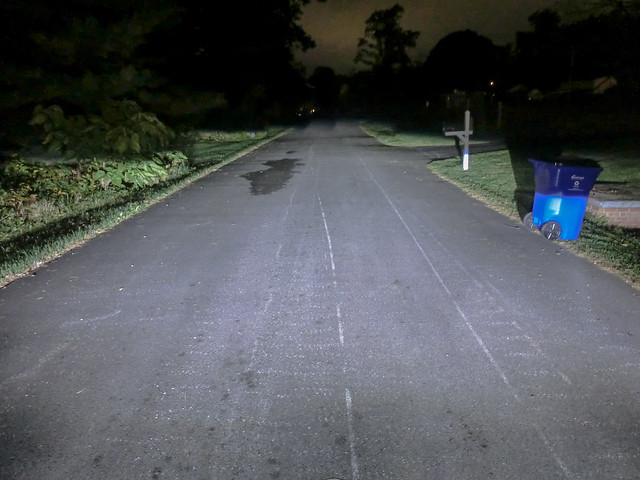 Trimmed the bezels to fit a little better 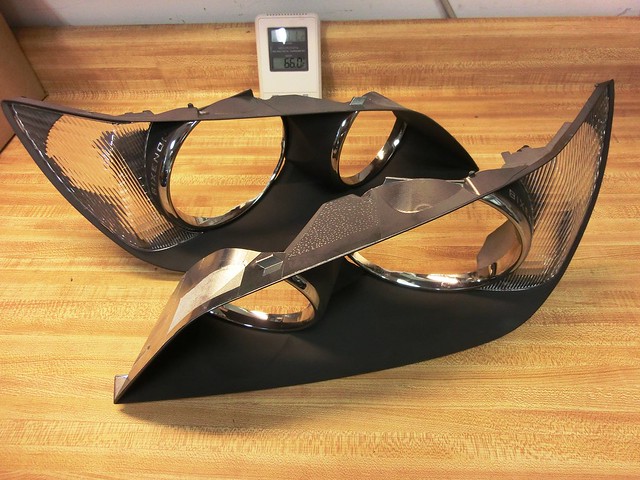 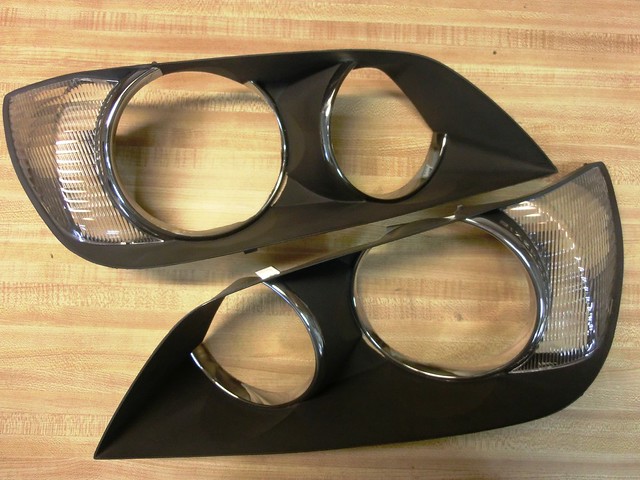 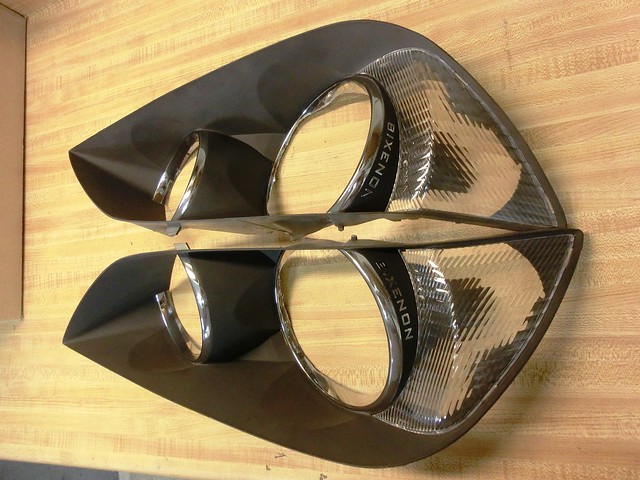 Test fitting 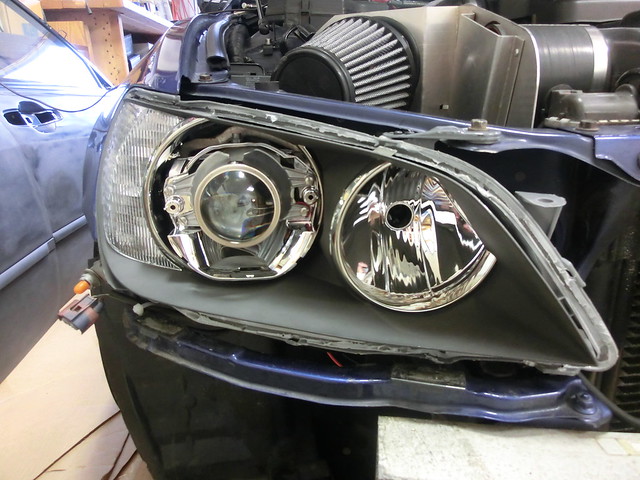 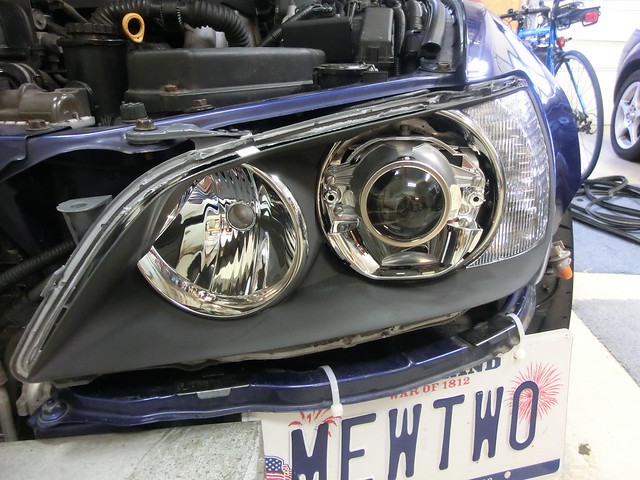 Next up was to trim the shrouds, just like the first time (very time consuming and stressful, though I cut them even better this time around). 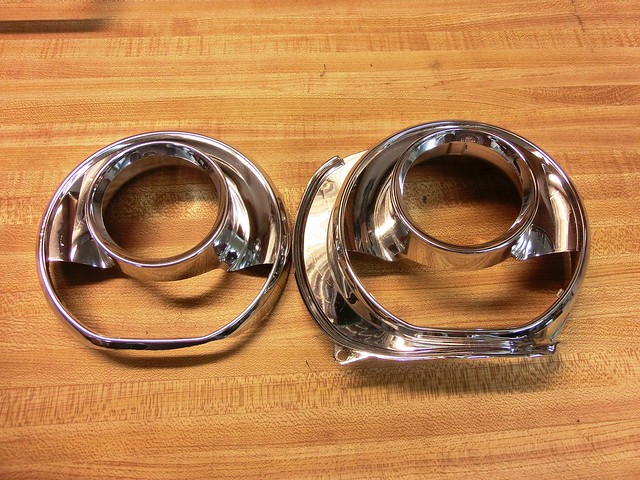 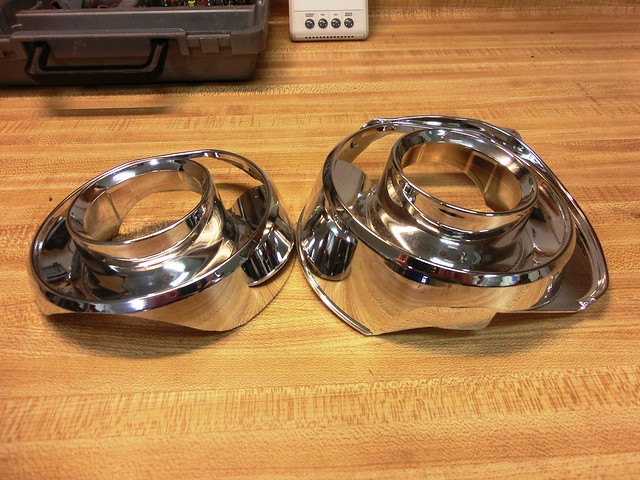 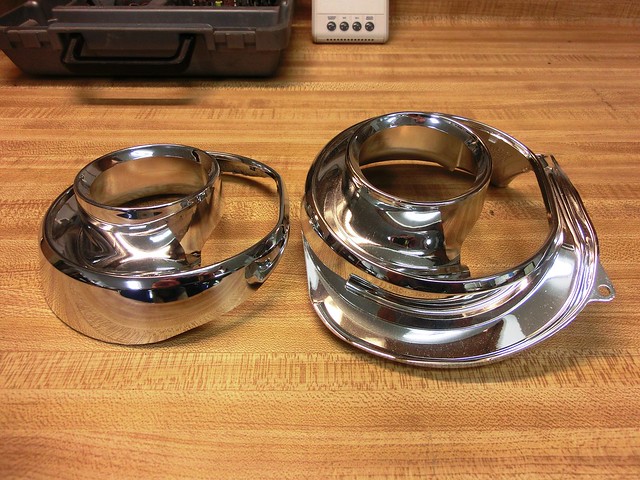 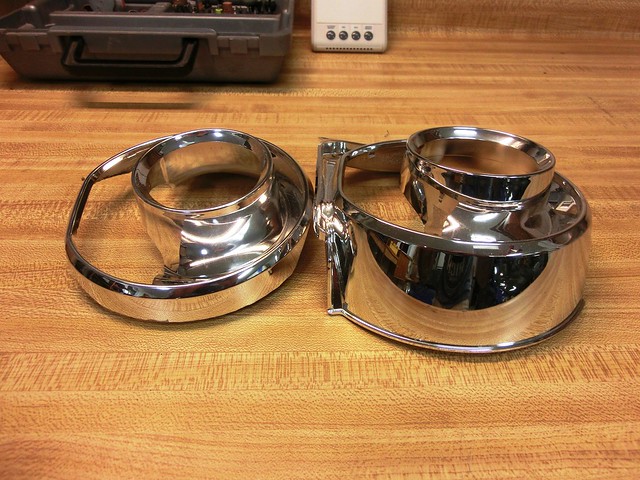 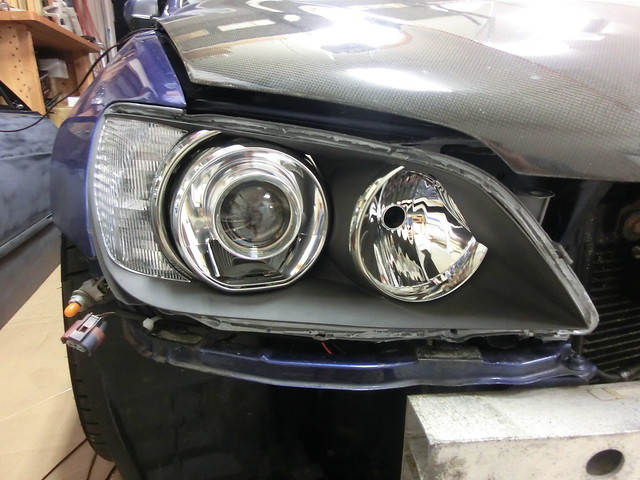 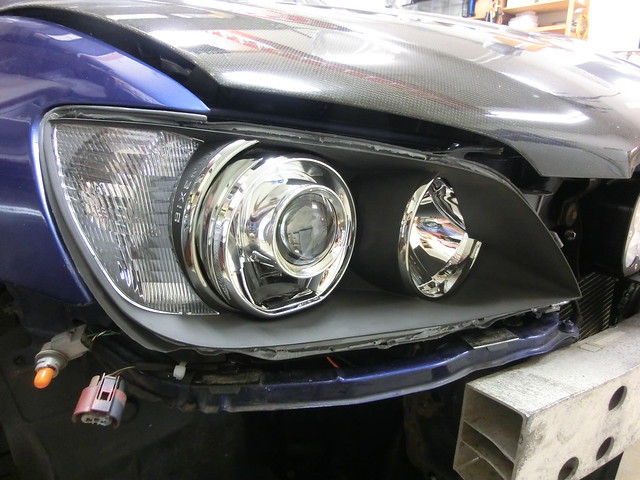 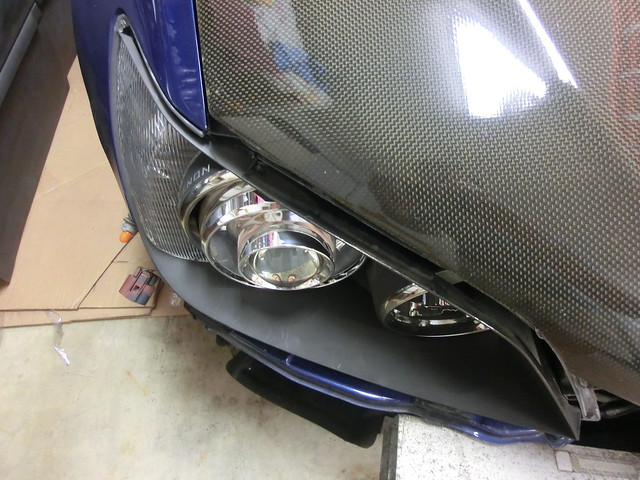 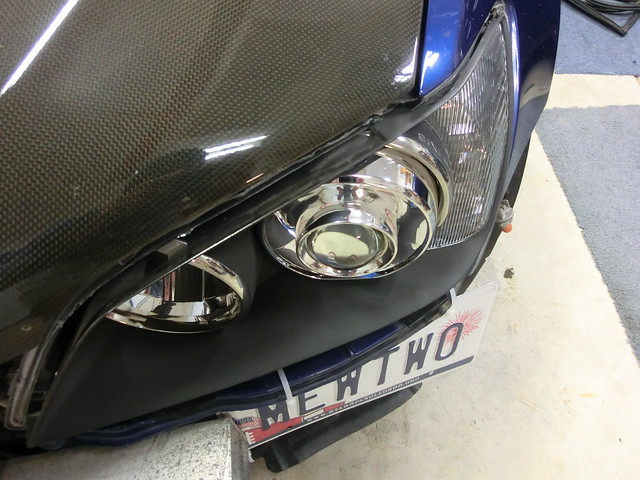 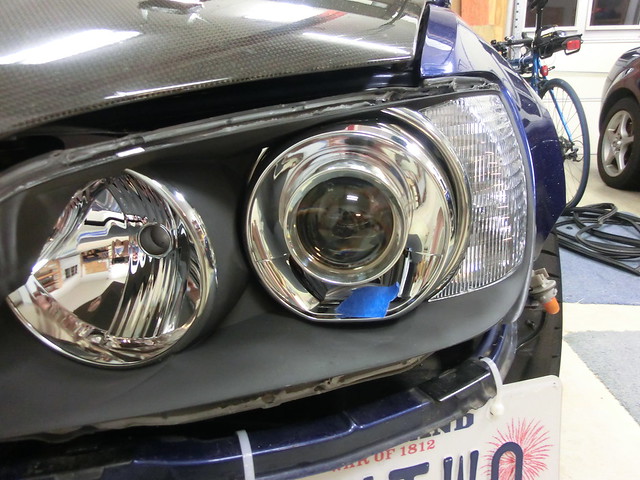 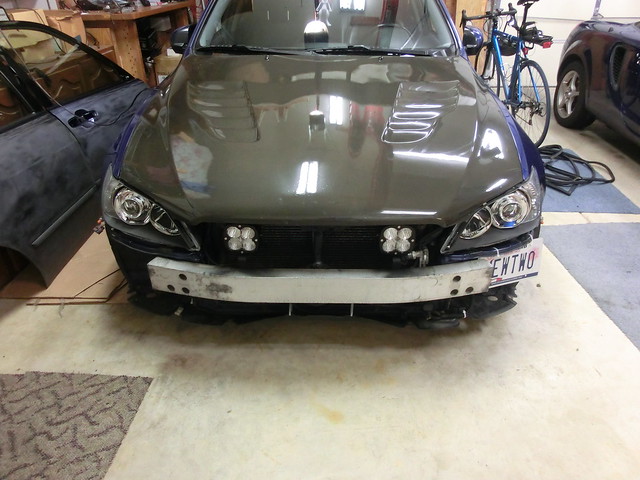 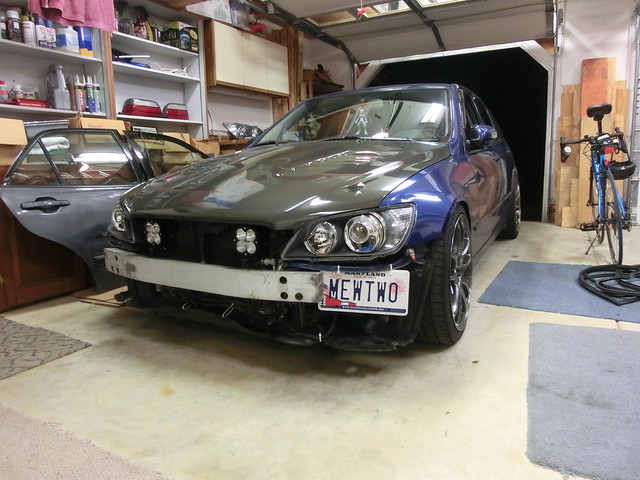 Glued the shrouds in place 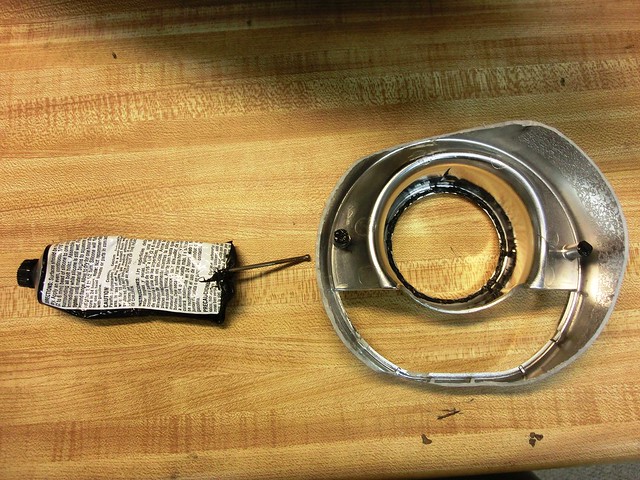 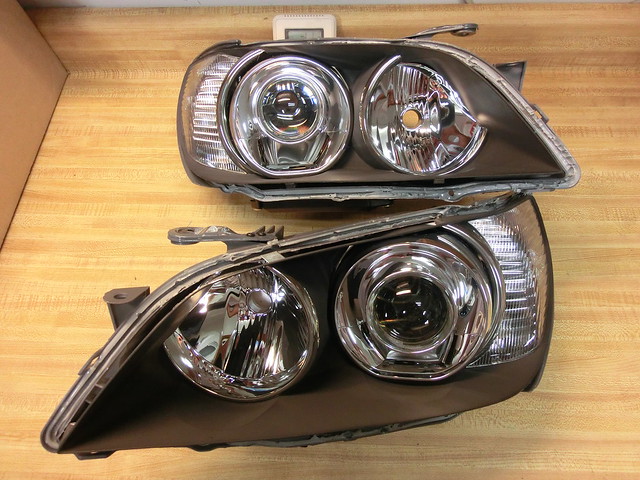 And sealed the lenses back on 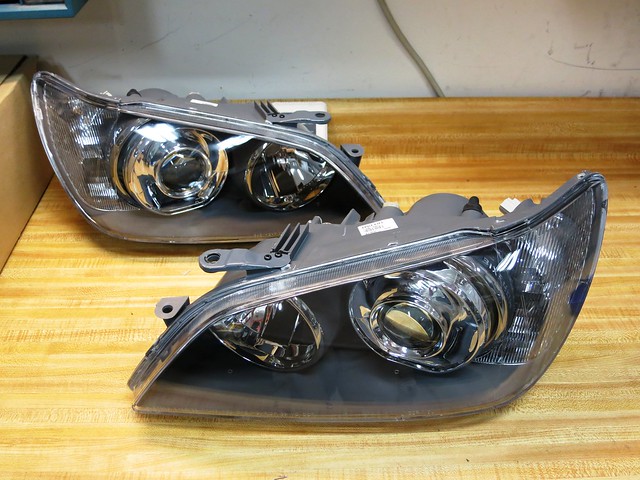 On the car completed! 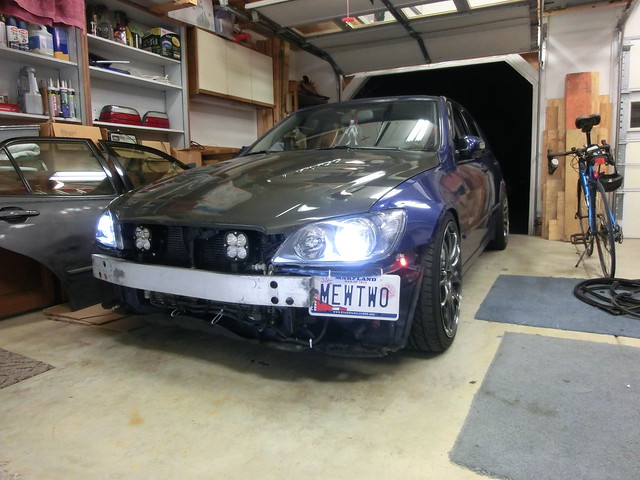 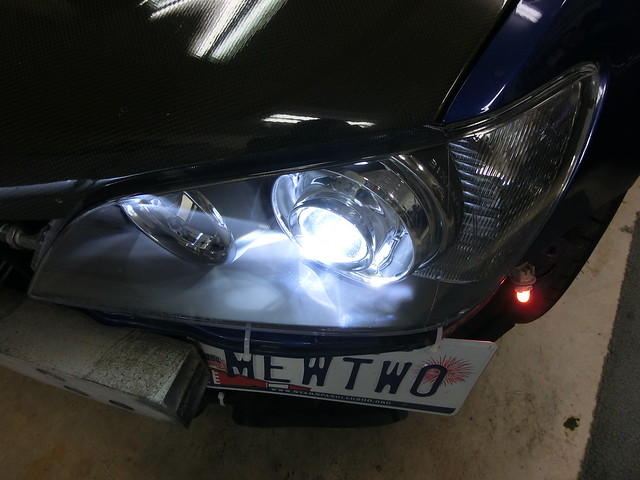 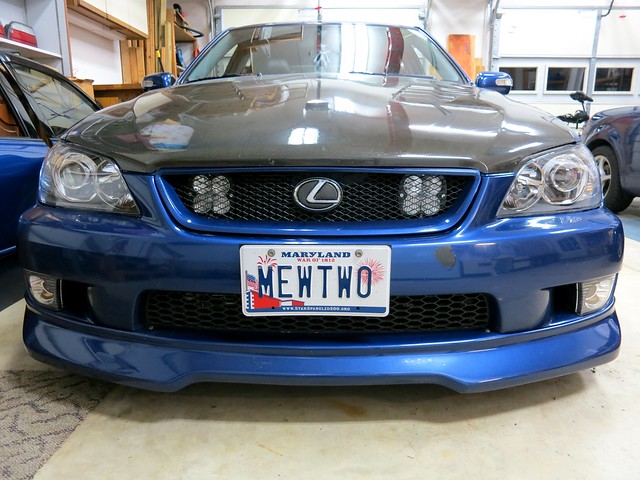 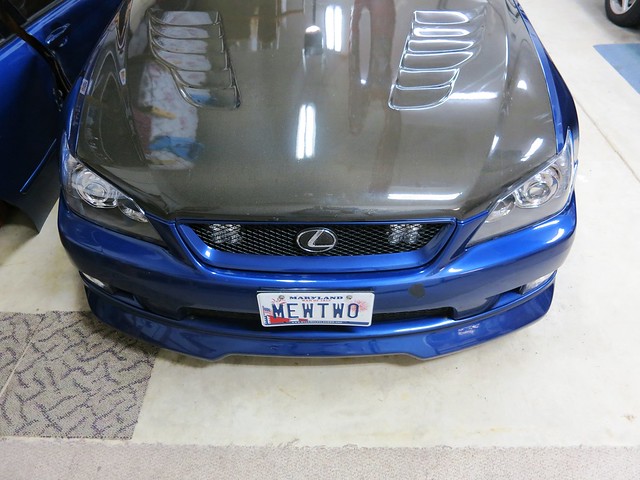 I decided to clean up the high beam HID wiring by trimming out the extra connectors (between the green lines) and soldering the bulbs directly to the ballast. This helped warm-up time and reliability CONSIDERABLY 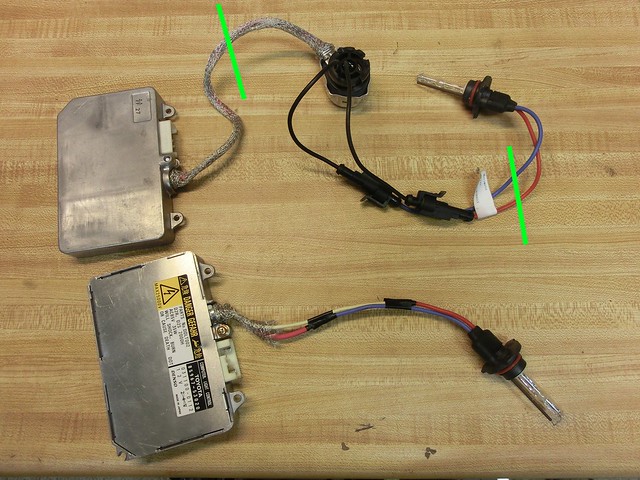 And it eliminated a lot of messy wires behind the head lights. Green dots represent high beam wires, blue arrows are the low beam projector ignitors, red arrows are the high beam projector solenoids, and red dots are the turnsignal/switchback DRL harnesses. 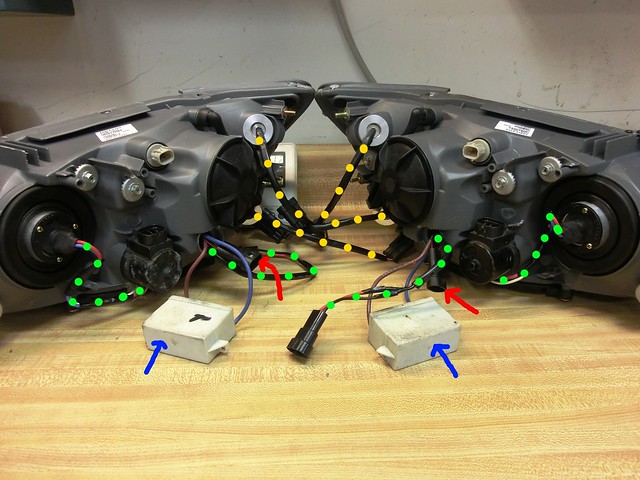 Since the car was having trouble running all 6 high beams at once on the stock wires, I ordered this relay harness from theretrofitsource. It powers the high beam HIDs and one of the solenoids directly from the battery, so that only one of the solenoids and the 2 LED pods are on the stock high beam wires. Much more reliable now, and no more flickering.  High Beam HID Wire Harness by gold94corolla, on Flickr Wiring behind the head lights is crazy lol.   And that's it for that update, it feels so good to have this second retrofit completed. I love driving with the projectors at night, and the LED spot lights are SO bright, the amount of light overall is impressive. And I just love how it looks. | |
|   | | gold94corolla
Site Administrator


Posts : 5234
Reputation : 181
Join date : 2011-04-29
Age : 37
 |  Subject: Re: Lexus IS300 Subject: Re: Lexus IS300  Fri Oct 24, 2014 4:29 pm Fri Oct 24, 2014 4:29 pm | |
| Found that my radiator cracked a week ago, managed to catch it before it lost too much fluid though. Apparently, this is how they all fail, right in this upper section: 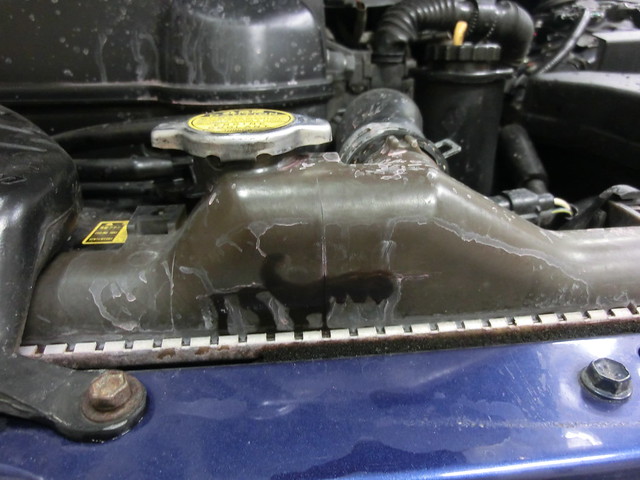 Radiator Is Leaking by gold94corolla, on Flickr Note all of the stress cracks formed: 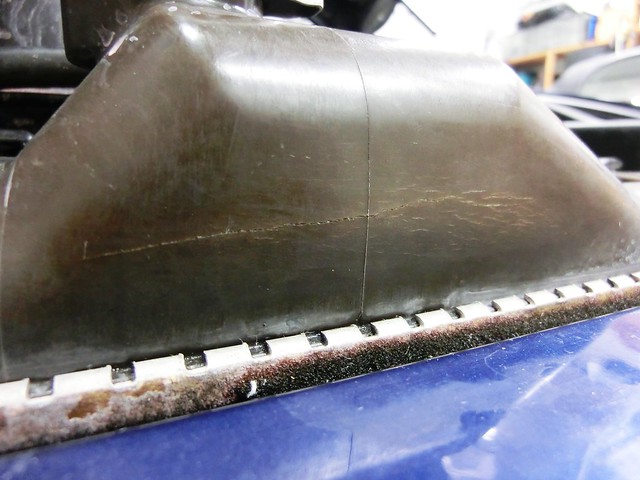 Radiator Crack by gold94corolla, on Flickr Immediately bought a new Denso radiator on Amazon, which arrived in a few days:  New Denso Radiator by gold94corolla, on Flickr As well as Toyota Red Coolant and distilled water to create a new 50/50 mixture to refill the system:  Distilled Water + Antifreeze by gold94corolla, on Flickr Having never messed with a radiator before, this project was yet another new experience for me. However, it was easy. Drained the coolant and trans fluid out the bottom:  Old Coolant & Trans Fluid by gold94corolla, on Flickr Radiator removed:  Radiator Removed by gold94corolla, on Flickr Old vs new:  New vs Old Radiator by gold94corolla, on Flickr Swapped the fans and a sensor over:  Fan Assembly Swapped by gold94corolla, on Flickr New fluids mixed (extra fluid went back in the Toyota bottle at the end of the project)  Coolant Mixed by gold94corolla, on Flickr Done! Went perfectly. Made sure to monitor and add fluid as needed.  Completed Radiator Swap by gold94corolla, on Flickr So that was an unexpected but relatively fun project, and now the radiator should be worry-free for a very long time  | |
|   | | miib14
Site Administrator


Posts : 7382
Reputation : 175
Join date : 2011-04-27
Age : 33
Location : Manchester
 |  Subject: Re: Lexus IS300 Subject: Re: Lexus IS300  Wed Oct 29, 2014 11:32 pm Wed Oct 29, 2014 11:32 pm | |
| love all the work you do with your lights chris... so jealous that i cant bring myself to do it  | |
|   | | gold94corolla
Site Administrator


Posts : 5234
Reputation : 181
Join date : 2011-04-29
Age : 37
 |  Subject: Re: Lexus IS300 Subject: Re: Lexus IS300  Thu Oct 30, 2014 10:04 am Thu Oct 30, 2014 10:04 am | |
| Thanks bro, but you've done engine swaps and stuff that I would never dream of doing either! haha | |
|   | | miib14
Site Administrator


Posts : 7382
Reputation : 175
Join date : 2011-04-27
Age : 33
Location : Manchester
 |  Subject: Re: Lexus IS300 Subject: Re: Lexus IS300  Fri Nov 07, 2014 2:04 am Fri Nov 07, 2014 2:04 am | |
| | |
|   | | gold94corolla
Site Administrator


Posts : 5234
Reputation : 181
Join date : 2011-04-29
Age : 37
 |  Subject: Re: Lexus IS300 Subject: Re: Lexus IS300  Sun Dec 07, 2014 5:18 pm Sun Dec 07, 2014 5:18 pm | |
| OK so this thread is way behind again, so I'm gonna post a ton of pictures. I don't remember where I left of regarding the body work and painting I was doing, so if I missed some pics or posted them twice, oh well. You know that I painted my front lip and mirrors a while ago, complete with clear coat  I also bought a brand new JDM Altezza mesh grille and painted that  New one is on top, old on the bottom  Notice how my old grille is all broken around the edges, it never sat properly on the bumper. I ended up not liking the Altezza badge on the mesh, so I used my old mesh and emblem on the new grille. My old emblem was looking terrible, after the black VHT spray tint had mostly come off. The carbon fiber background was yellowing as well. So, I bought a brand new black pearl colored emblem on Ebay for like $70 lol, and I polished up the carbon fiber.  Came out looking nice and fresh, and the finish won't just come off. 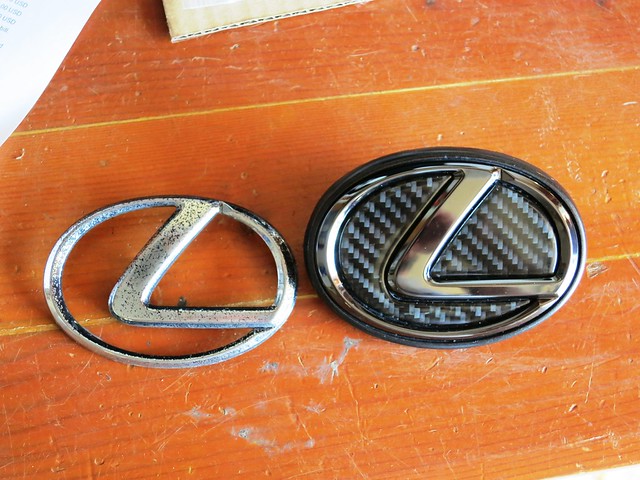 Installed  I'm actually not a fan of the new grille. Because it actually mounts properly, it sits kinda recessed and the transition between the grille and bumper looks too obvious. My previous grille blended better, so I'll paint that and reinstall it next year. Oh well, this isn't the first time I wasted money on something lol. Here's an older pic for reference to show how the old grille blended in better.  Next, I redid the rear quarter panels around the tail lights, because my previous body work didn't end up perfect after my accident in 2012.     The body work came out perfect, but I did have to repaint and reclear this side because you can see that I didn't blend the paint well enough. Other side.     This side came out much better. The body work came out perfect. I still need to blend in the clear coat though. And now that I've painted partial panels, I can tell the the spray paint doesn't match the old stock paint perfectly. Oh well.     At least it's shiny now lol. As you could see up there ^^^ I also redid the rear bumper where I removed the side markers. I used superglue in with the bondo this time to prevent cracking, and it actually worked lol     Final wetsand and clear coat  Repainted the rear lip as well, and clear coated it  Final wetsand and clear coat  And again, you could see earlier that I redid the side skirts as well.     Final wetsand and clear coat  But I left it outside too long after it got dark, and the humidity got to it and ruined the finish.  So I had to wetsand and buff the surface to remove that mess, top is wetsanded, bottom is buffed. Not exactly perfect, but much nicer looking than ever before.  I ended up finding some nice right-angle pieces that I could glue to the back of the skirts and give them rigidity, worked perfectly. 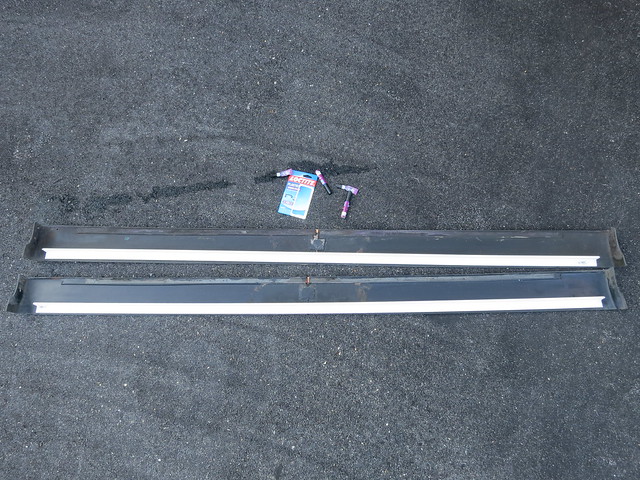 gonna continue this in a new post | |
|   | | gold94corolla
Site Administrator


Posts : 5234
Reputation : 181
Join date : 2011-04-29
Age : 37
 |  Subject: Re: Lexus IS300 Subject: Re: Lexus IS300  Sun Dec 07, 2014 5:50 pm Sun Dec 07, 2014 5:50 pm | |
| Next You know that I got some brand new painted fenders  And doors. Finally gonna fix that huge damage on the side. Doors prepped, dents filled, sanded, primed, ready for paint  Prepped for paint (took me a while to develop a way to paint them lol, ended up suspending them from the garage door tracks with bungy cords and vice grips)   Painted    Clear coated, then wetsanded, then clear coated again (ended up with orange peel, but I can buff that out later)        Transferred some parts to the rear door, like the hinges and handle and locking mechanism  Rear door removed (that was really easy)  Just gotta pull off the panel on the B pillar and you can get to the bolts and wire harness, super easy.  Rear door installed! Again, really easy, though it is kind of a pain to line up. Luckily, my blue LED strips came off the old door perfectly, and the glue was still 100%, so the strips just stuck right onto the new door.  Next, I had to remove the front fender in order to access the bolts for the front door, which meant taking off the front bumper and head light lol. Good thing I was replacing the fender anyway, and I already had the front bumper off from redoing the head light retrofit (yes I drove around with no bumpers for a couple of weeks)  Front door removed (again, super easy)  I bought a new pre-painted door handle on Ebay, because I thought the old one was broken. I also had to transfer the entire lock mechanism to the new door, which wasn't too hard, just required some figuring out. Turns out, the old handle was in perfect shape, but the actual crush in the door was preventing the connecting rods from operating. Oh well. You can see that the lock mechanism itself got crushed in the smashed door, but luckily, it still worked perfectly.  Installed the front door, stuck the LEDs on, and everything worked! Luckily, the windows and motors were included in the new doors, so I didn't even have to mess with those. I'm just going to get the windows retinted, rather than deal with swapping in the old windows.  Completed door swap. I had to redo the wiring in the front door for the power folding LED mirrors, but that wasn't too much work. Everything is back to normal!  Then I put the new fender on  Before rolling 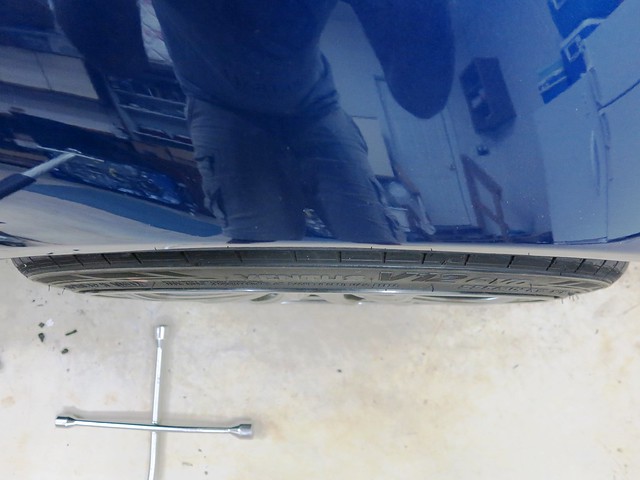 After. I ruined it instantly though, because I pulled it WAY too much, causing the lip to get messed up, and the fender itself warping and ruining everything. This picture is after I pushed the edge back in. So I ruined my brand new fender, but I'll get another one next year and paint it myself so that it matches 100%. 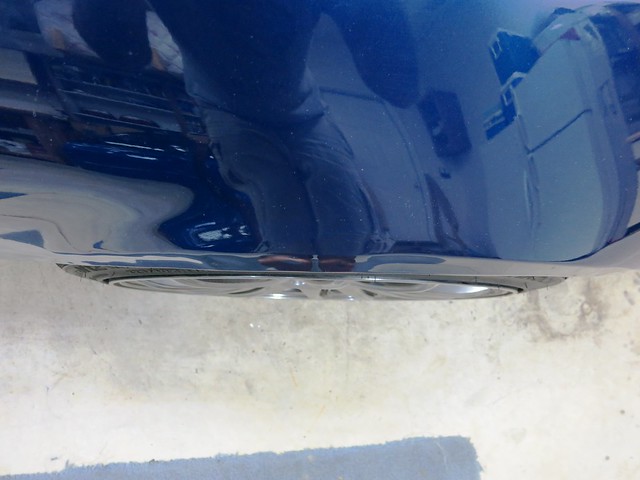 Done!  I then replaced the other fender, since I had messed it up long ago when I rolled it and when I put the suspension in.  Having learned from my mistake, I rolled this side perfectly. Came out beautiful, I'm 100% happy with this side.  Finally was able to put the front bumper back on  Then I put the rear bumper and lip back on. You can see that the new fenders didn't end up being a 100% color match from certain angles. Oh well.       Then I put the side skirts on. Car is looking better now than it has for years, thanks to the fresh body work, paint, and real clear coat!  Eventually, my brand new pre-painted fender moldings came in. I got new ones because I didn't need the old ones with LEDs drilled in.  Washed the car    [     And that ends the body work for 2014! Learned a lot, accomplished a lot, and things are looking better than ever. It's hard to imagine how much I've done to this car in the past couple of months since my trip around the country, especially since most of the work doesn't even show really, just redoing a lot of stuff. Body work plans for 2015: Buffing/wetsanding the clear coat on the doors and fenders to blend everything in, new fender (again), new (old) grille, new front lip (going with a different/custom lip this time), and new driver's side rear door. | |
|   | | trufauru
Member


Posts : 96
Reputation : 6
Join date : 2013-07-02
Age : 37
Location : Uruguay
 |  Subject: Re: Lexus IS300 Subject: Re: Lexus IS300  Wed Dec 10, 2014 7:01 am Wed Dec 10, 2014 7:01 am | |
| when your car couldnt look any better, there you go and improve it a little and it's gorgeous as usual. | |
|   | | iLL GT
Member


Posts : 146
Reputation : 4
Join date : 2014-08-14
Age : 43
Location : Christchurch
 |  Subject: Re: Lexus IS300 Subject: Re: Lexus IS300  Wed Dec 10, 2014 3:50 pm Wed Dec 10, 2014 3:50 pm | |
| Man, such a sweet ride, and a clean and tidy garage! | |
|   | | gold94corolla
Site Administrator


Posts : 5234
Reputation : 181
Join date : 2011-04-29
Age : 37
 |  Subject: Re: Lexus IS300 Subject: Re: Lexus IS300  Wed Dec 10, 2014 4:40 pm Wed Dec 10, 2014 4:40 pm | |
| Thanks! It was not easy putting 2 cars in a garage previously filled to the top with junk lol | |
|   | | gold94corolla
Site Administrator


Posts : 5234
Reputation : 181
Join date : 2011-04-29
Age : 37
 |  Subject: Re: Lexus IS300 Subject: Re: Lexus IS300  Thu Dec 11, 2014 12:44 pm Thu Dec 11, 2014 12:44 pm | |
| I thought I was done modding for the year, but nope. Moved onto the interior! Got my steering wheel wrapped in new grippy leather with blue stitching 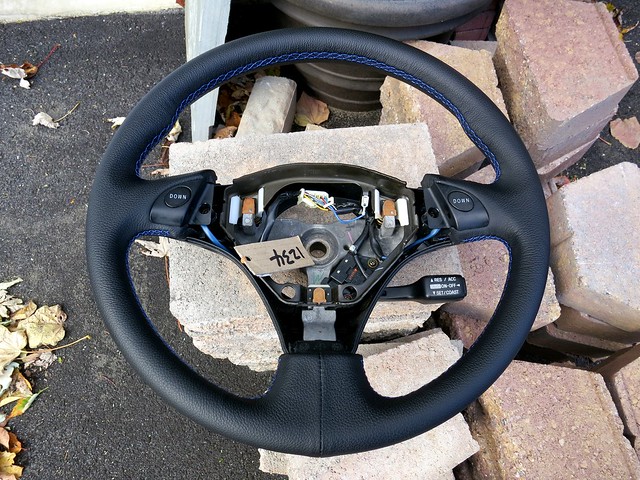 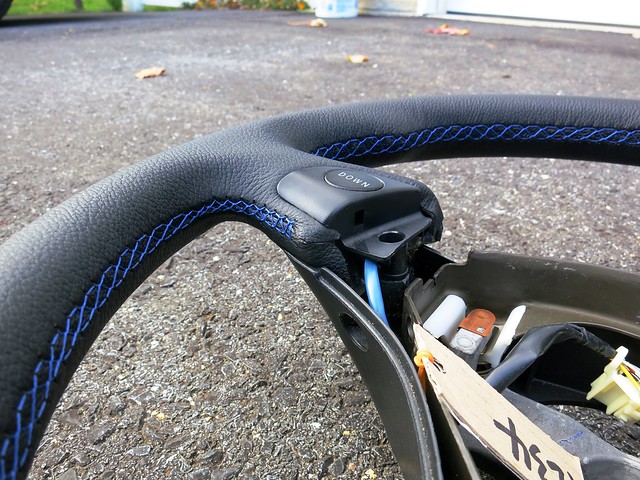 Removed old steering wheel 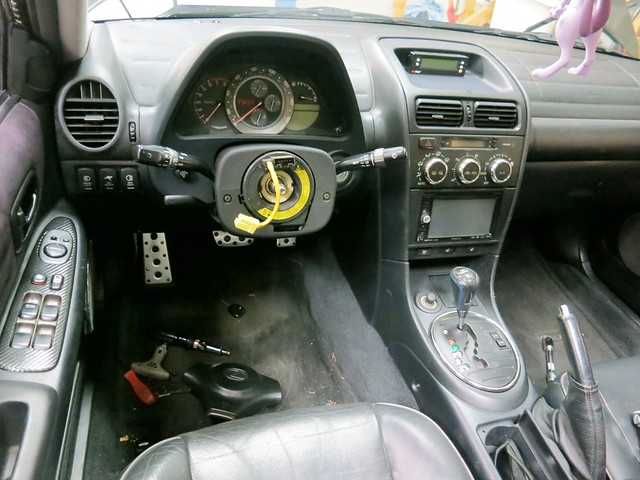 New VS Old (you can see the steering wheel removal tool still attached to the old one) 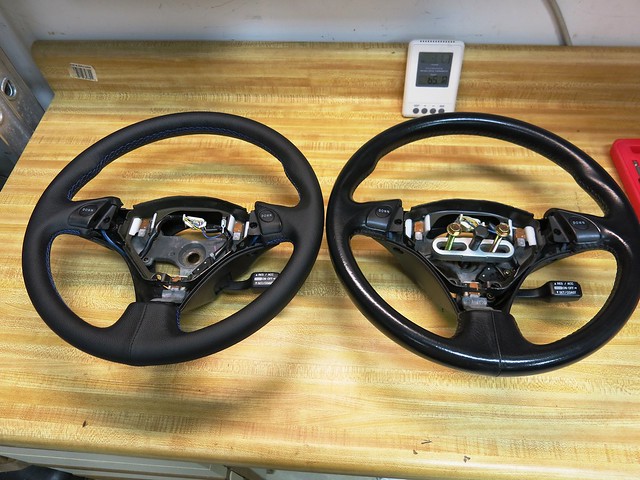 I ended up swapping the buttons and wiring because I thought that mine was in better shape 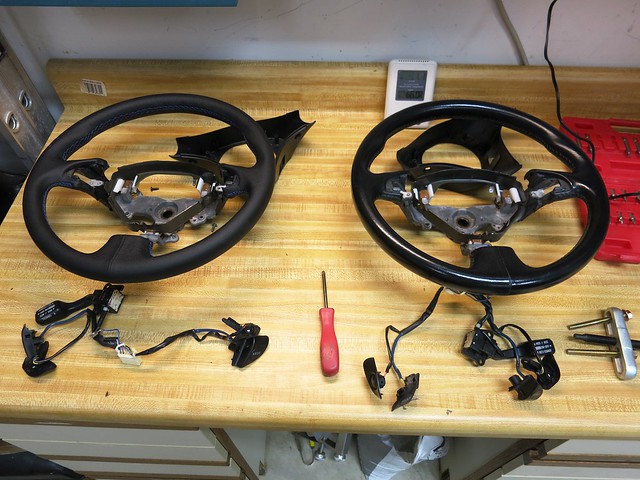 Installed [url=https://flic.kr/p/pxuyyS]  Looks and FEELs great! Then I got a new e-brake boot to match (same leather and stitching) 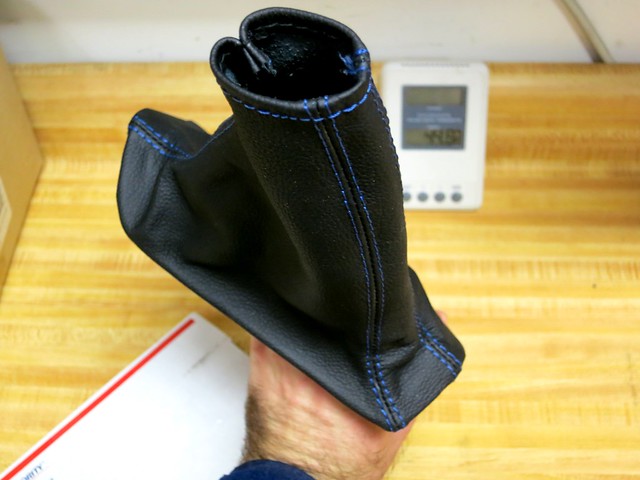 Really easy to install. 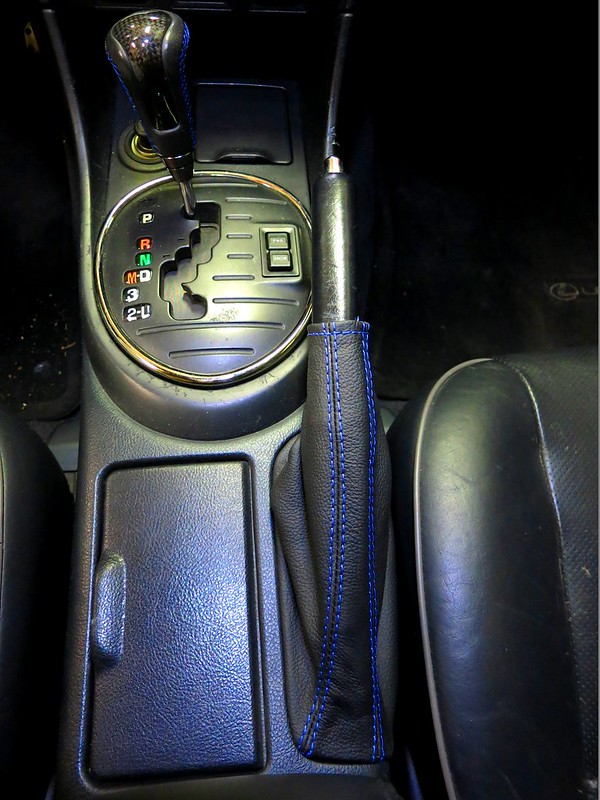 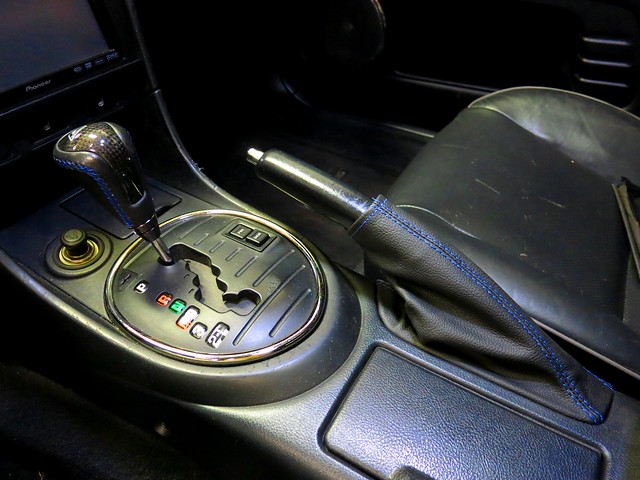 Now everything matches! 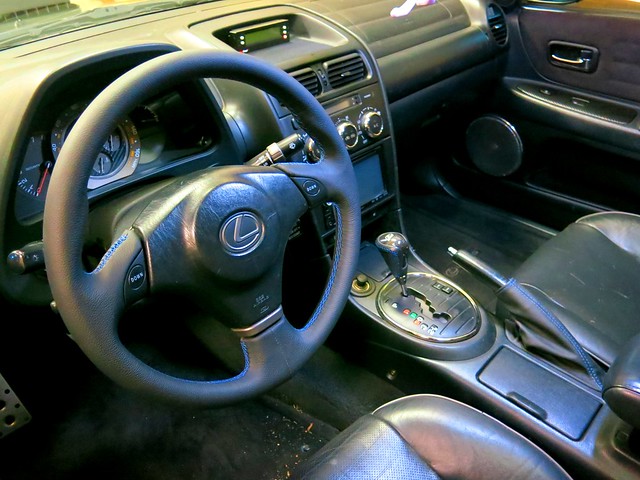 Blue Stitching Complete by gold94corolla, on Flickr Next, I changed the LEDs in the dome and map lights to some cheap ones from Ebay, I got these so that they would look better than tiny boards I had floating in there before. 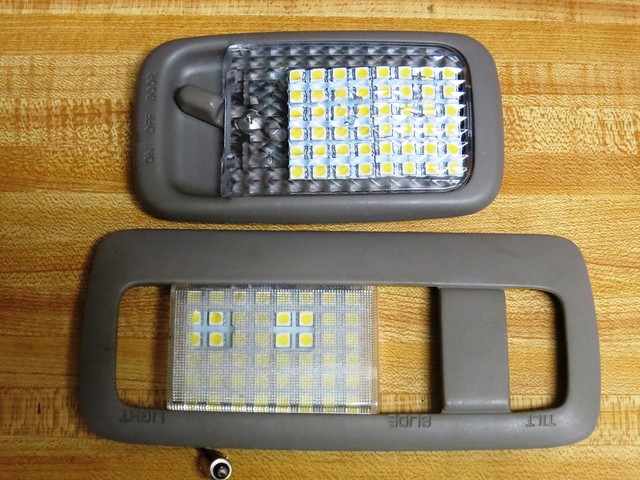 Map light is fully illuminated now 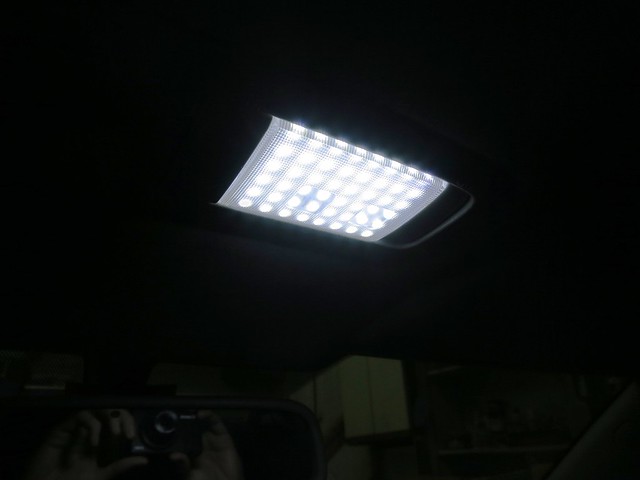 [/url Ended up not being able to fit 2 of them in the dome light, oh well. [url=https://flic.kr/p/pS3Vci] 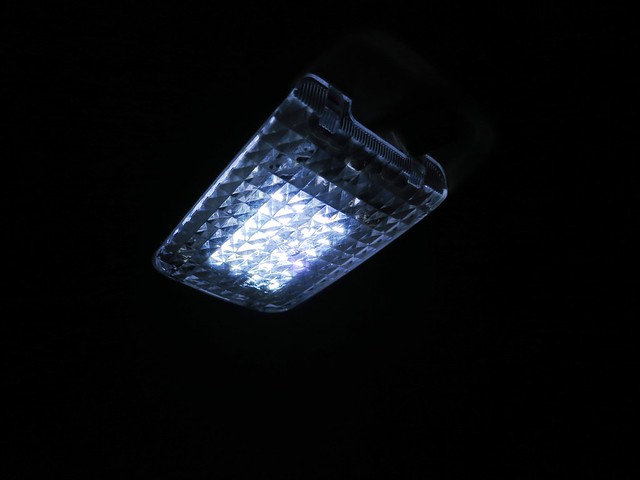 Got me a complete dashboard from a 2001 for super cheap. This one has the two tone with the dark gray accents, and this dash doesn't have a soft sticky material all over it (my current dash looks like garbage now). Gonna clean this up and install it next year with a custom zebra wood dash kit to match.  Something random..... similar to how I rewired the high beam HIDs, I simplified the fog light HID wiring by eliminating the socket adapter. Fogs definitely warm up faster now.  Washed the car some time ago, looking good 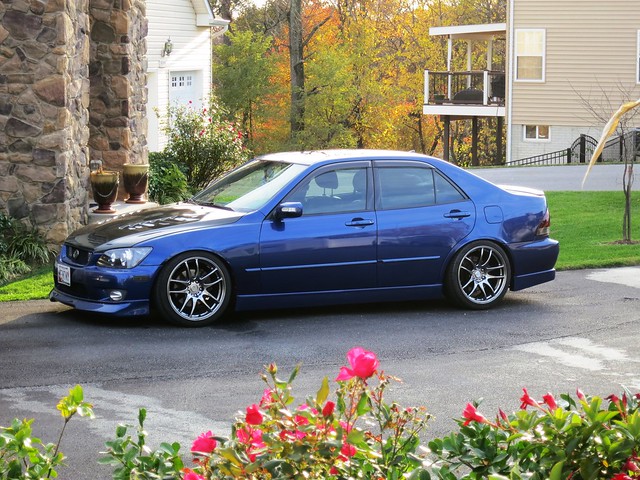 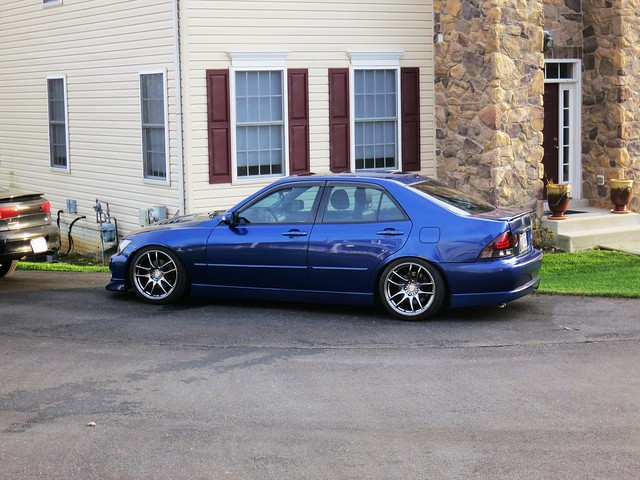 Next, got some expensive reverse lights from V-LEDs (the 1000 lumen kind in 5000k) and put them in. Hella bright, and I can finally see when reversing lol  Then I replaced my license plate lights.... removed the built-in LEDs and put the stock housings back with some small Philips #194 bulbs, because the other ones were just embarrassingly bright lol. Before: 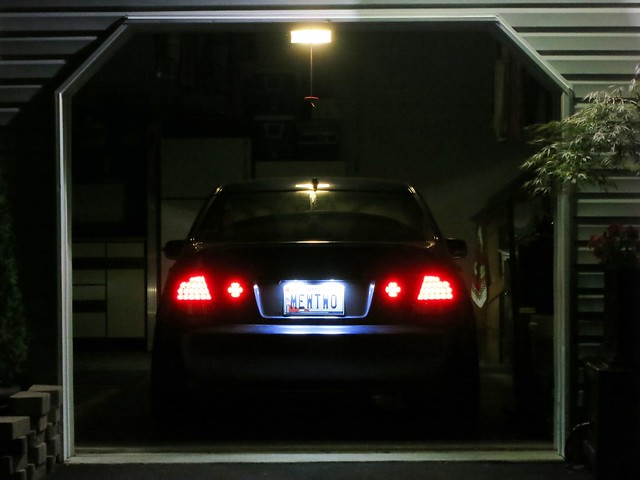 Now (dimmer, and slightly less blue)  Then I immediately put the built-in LED housings back and made them green for Christmas lol 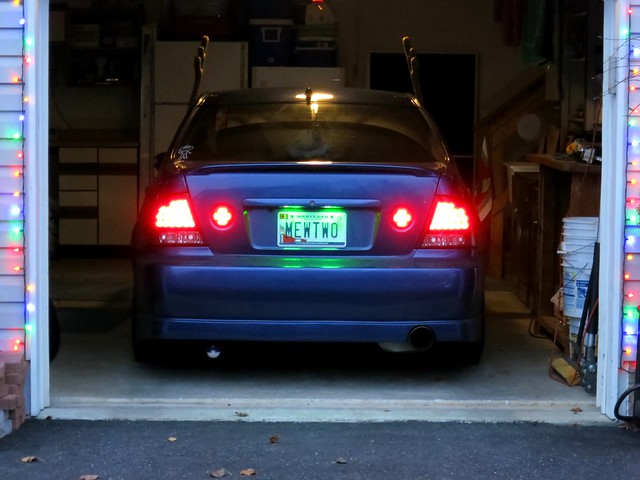 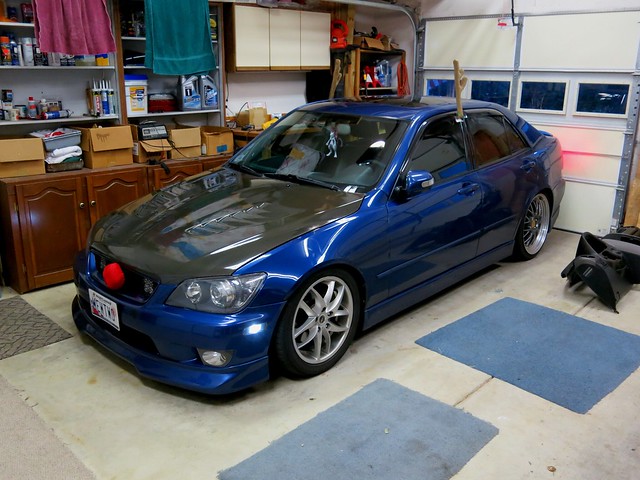 Whew, all caught up!! | |
|   | | miib14
Site Administrator


Posts : 7382
Reputation : 175
Join date : 2011-04-27
Age : 33
Location : Manchester
 |  Subject: Re: Lexus IS300 Subject: Re: Lexus IS300  Thu Dec 11, 2014 9:47 pm Thu Dec 11, 2014 9:47 pm | |
| wow nice chris,
nice to see it back to its former glory | |
|   | | gold94corolla
Site Administrator


Posts : 5234
Reputation : 181
Join date : 2011-04-29
Age : 37
 |  Subject: Re: Lexus IS300 Subject: Re: Lexus IS300  Fri Dec 12, 2014 11:20 am Fri Dec 12, 2014 11:20 am | |
| Thanks bro  | |
|   | | miib14
Site Administrator


Posts : 7382
Reputation : 175
Join date : 2011-04-27
Age : 33
Location : Manchester
 |  Subject: Re: Lexus IS300 Subject: Re: Lexus IS300  Sat Dec 13, 2014 10:06 am Sat Dec 13, 2014 10:06 am | |
| are you now officially on facebook?
Tobias sing? | |
|   | | gold94corolla
Site Administrator


Posts : 5234
Reputation : 181
Join date : 2011-04-29
Age : 37
 |  Subject: Re: Lexus IS300 Subject: Re: Lexus IS300  Sat Dec 13, 2014 11:17 am Sat Dec 13, 2014 11:17 am | |
| Yessir Ishaq, I joined yesterday finally lol!
Tobias Sing is the name I use in the Lexus world, since "gold94corolla" was too long for the ClubLexus forum lol. That, and I don't want to put anything personal on there. | |
|   | | SHEHROZE ARAIN
Pakistan Rep

Posts : 1783
Reputation : 57
Join date : 2011-12-08
Age : 30
Location : HYDERABAD
 |  Subject: Re: Lexus IS300 Subject: Re: Lexus IS300  Sat Dec 13, 2014 8:26 pm Sat Dec 13, 2014 8:26 pm | |
| wow chris so much i missed out well i dont know from where to start ill just say amazing diy work and im glad to see your ride coming back to its former glory.. try polishing ur ride with a very oily paint darkening polish or glaze maybe the fenders would match with ur body. also welcome to facebook mr sing  | |
|   | | miib14
Site Administrator


Posts : 7382
Reputation : 175
Join date : 2011-04-27
Age : 33
Location : Manchester
 |  Subject: Re: Lexus IS300 Subject: Re: Lexus IS300  Sun Dec 14, 2014 8:48 am Sun Dec 14, 2014 8:48 am | |
| - gold94corolla wrote:
- Yessir Ishaq, I joined yesterday finally lol!
Tobias Sing is the name I use in the Lexus world, since "gold94corolla" was too long for the ClubLexus forum lol. That, and I don't want to put anything personal on there. about time my friend  | |
|   | | gold94corolla
Site Administrator


Posts : 5234
Reputation : 181
Join date : 2011-04-29
Age : 37
 |  Subject: Re: Lexus IS300 Subject: Re: Lexus IS300  Sun Dec 14, 2014 3:51 pm Sun Dec 14, 2014 3:51 pm | |
| Thanks guys! I'm going to keep updating this thread, but hopefully I'll see you guys more on Facebook lol
I already have plenty of work lined up for 2015, including polishing! | |
|   | | trife96
Elite Member


Posts : 307
Reputation : 13
Join date : 2014-02-22
Age : 46
Location : Louisiana
 |  Subject: Re: Lexus IS300 Subject: Re: Lexus IS300  Mon Dec 15, 2014 1:04 am Mon Dec 15, 2014 1:04 am | |
| Nice work man, came out great! That dash also will look way better once installed. You know secretly, I've been wanting one of these cars for a long time now. To me, the IS300 is similar to the Corolla in that it's old enough that it's still very simple to work on, but has a lot more advantages of being a branded Lexus model. And not to forget that it's RWD. And the possibility of swapping in the 2JZ motor. Have you ever considered doing this swap? | |
|   | | gold94corolla
Site Administrator


Posts : 5234
Reputation : 181
Join date : 2011-04-29
Age : 37
 |  Subject: Re: Lexus IS300 Subject: Re: Lexus IS300  Mon Dec 15, 2014 11:16 am Mon Dec 15, 2014 11:16 am | |
| - trife96 wrote:
- You know secretly, I've been wanting one of these cars for a long time now. To me, the IS300 is similar to the Corolla in that it's old enough that it's still very simple to work on, but has a lot more advantages of being a branded Lexus model. And not to forget that it's RWD. And the possibility of swapping in the 2JZ motor. Have you ever considered doing this swap?
LOL it's no secret, doesn't everyone want one? lol. It really is the "perfect" car IMO, well maybe a little on the heavy side, but that has its benefits. But you're right, this car is just a more "grown" up version of the Corolla. Same size, built similarly, but with such a higher quality and workmanship. It is a pleasure to work on. It's already got the 2JZ though stock, just not boosted. | |
|   | | miib14
Site Administrator


Posts : 7382
Reputation : 175
Join date : 2011-04-27
Age : 33
Location : Manchester
 |  Subject: Re: Lexus IS300 Subject: Re: Lexus IS300  Tue Dec 16, 2014 8:53 am Tue Dec 16, 2014 8:53 am | |
| | |
|   | | trife96
Elite Member


Posts : 307
Reputation : 13
Join date : 2014-02-22
Age : 46
Location : Louisiana
 |  Subject: Re: Lexus IS300 Subject: Re: Lexus IS300  Tue Dec 16, 2014 9:29 am Tue Dec 16, 2014 9:29 am | |
| | |
|   | | gold94corolla
Site Administrator


Posts : 5234
Reputation : 181
Join date : 2011-04-29
Age : 37
 |  Subject: Re: Lexus IS300 Subject: Re: Lexus IS300  Tue Dec 16, 2014 11:44 am Tue Dec 16, 2014 11:44 am | |
| lol, everyone highly agrees but me | |
|   | | miib14
Site Administrator


Posts : 7382
Reputation : 175
Join date : 2011-04-27
Age : 33
Location : Manchester
 |  Subject: Re: Lexus IS300 Subject: Re: Lexus IS300  Wed Dec 17, 2014 12:00 am Wed Dec 17, 2014 12:00 am | |
| | |
|   | | Sponsored content
 |  Subject: Re: Lexus IS300 Subject: Re: Lexus IS300  | |
| |
|   | | | | Lexus IS300 |  |
|
| | Permissions in this forum: | You cannot reply to topics in this forum
| |
| |
| |
