| Latest topics | » AE101 4AGZE Muffler and exhaust pipe Mon Oct 21, 2024 5:52 pm by ramon » fog lights for a ae 101 Wed Mar 27, 2024 12:39 am by jorpakko » WTB: AE101 Levin Body Parts - front and rear Mon Aug 21, 2023 2:26 am by motorsportbd » My 96 wagon Mon May 15, 2023 6:13 am by emmet.harten3 » E10 corolla wagon / estate wind deflectors wanted Mon May 15, 2023 5:32 am by emmet.harten3 » wind deflectors for e10 estate / bz touring top spoiler Mon May 15, 2023 5:30 am by emmet.harten3 » genuine oem moulded Mud flaps  Mon May 15, 2023 5:29 am by emmet.harten3 » Wanted gxi/20v front bumper for e10 corolla  Sat Feb 11, 2023 2:08 am by emmet.harten3 » AE101 arm rest  Sat Feb 11, 2023 1:30 am by emmet.harten3 » Marvin the ZZE122 Wagon Sun Feb 05, 2023 1:53 pm by gold94corolla» 7AGE Blacktop Fri Jan 20, 2023 1:49 pm by gold94corolla» RARE JDM OEM PARTS  Thu Dec 29, 2022 7:47 am by prnguy » Te1 jumper to E1 wont flash codes  Sun Sep 04, 2022 1:44 pm by kaitaiya » AE101 Crotch Vent Install Sat Sep 03, 2022 12:36 pm by gold94corolla» Ae 100 1993 Windscreen issue  Fri Jul 22, 2022 3:15 pm by Yunmiliautoparts |
| Who is online? | In total there are 8 users online :: 0 Registered, 0 Hidden and 8 Guests
None
Most users ever online was 316 on Thu Nov 25, 2021 1:28 am
|
| Top posting users this month | |
| Statistics | We have 4026 registered users
The newest registered user is ramon
Our users have posted a total of 42624 messages in 3012 subjects
|
| Please Donate to the Site | |
|
| November 2024 | | Mon | Tue | Wed | Thu | Fri | Sat | Sun |
|---|
| | | | | 1 | 2 | 3 | | 4 | 5 | 6 | 7 | 8 | 9 | 10 | | 11 | 12 | 13 | 14 | 15 | 16 | 17 | | 18 | 19 | 20 | 21 | 22 | 23 | 24 | | 25 | 26 | 27 | 28 | 29 | 30 | |  Calendar Calendar |
|
|
| | Charlene the AE102 |  |
|
+19101 Pilot Wes16v trife96 Scott Sillitoe XsV kickfli12 noodlekid JesuelBoricua SHEHROZE ARAIN knite BRIDGY gelovash Sgt_Lyna kennydang91 humidade Corolla Sound gold94corolla magweal MirrorEyes 23 posters | |
| Author | Message |
|---|
elements616
New Member

Posts : 27
Reputation : 0
Join date : 2016-03-01
Location : Melbourne, Australia
 |  Subject: Re: Charlene the AE102 Subject: Re: Charlene the AE102  Tue Feb 07, 2017 11:36 pm Tue Feb 07, 2017 11:36 pm | |
| Looks great! I know what I'm getting next for my Corolla next  | |
|   | | gold94corolla
Site Administrator


Posts : 5234
Reputation : 181
Join date : 2011-04-29
 |  Subject: Re: Charlene the AE102 Subject: Re: Charlene the AE102  Wed Feb 08, 2017 8:14 am Wed Feb 08, 2017 8:14 am | |
| one of my favorite upgrades | |
|   | | miib14
Site Administrator

Posts : 7382
Reputation : 175
Join date : 2011-04-27
Age : 34
Location : Manchester
 |  Subject: Re: Charlene the AE102 Subject: Re: Charlene the AE102  Fri Feb 10, 2017 11:55 am Fri Feb 10, 2017 11:55 am | |
| | |
|   | | Hiro
Super Member


Posts : 544
Reputation : 16
Join date : 2012-04-27
Age : 40
Location : Newcastle, Australia
 | |   | | Hiro
Super Member


Posts : 544
Reputation : 16
Join date : 2012-04-27
Age : 40
Location : Newcastle, Australia
 |  Subject: Re: Charlene the AE102 Subject: Re: Charlene the AE102  Tue Apr 25, 2017 12:43 pm Tue Apr 25, 2017 12:43 pm | |
| After 18 months of pottering around with a stock exhaust, I finally got fed up of being bored to sleep and decided to pull the pin and install my old exhaust. In theory what should be a ~2 hour job by a mechanic with a hoist turned out to be a 2.5 day marathon in my driveway on chassis stands - first I had to drive around the world to find a shop that was open on a Saturday that actually had 2" 2-bolt exhaust flange gaskets (everyone had 2.5" and 1.75"), then the factory bolts were a pain to get undone (not surprising since they're ~18 years old, but at least they haven't been copping salt or snow), then the hangers didn't want to slide off the pins (copious amounts of WD40 required), then the engine pipe didn't want to slide out over the subframe (had to take the front hanger off the subframe), then I had to loosen the alternator to get the last manifold nut out which THEN highlighted the fact that my alternator belt had discovered meiosis. So that was the first day. The second day involved wrestling the extractors in to place (at which point I realised I had to fully remove the alternator to have a chance of getting the extractors around the oil filter and air-con lines), which added a few dings to the back of the radiator (I'll probably get a new alloy one at some stage anyway), then slowly piece-by-piece bolting the new exhaust up (with the new gaskets and bolts/nuts/antisieze), then wrestling with the muffler to get it on to the hangers. Job done, fire it up and take it for a spin around the block to savour the sound.....................of a bloody rattle. Bugger. So that was the second day done and dusted. Yesterday then consisted of jacking the car up on to stands AGAIN, then going about the task of finding the rattle - turns out it was the pipe between the hotdog and the muffler hitting the tunnel heat shield (initially thought it might have been the engine pipe over the subframe) as well as the left rear muffler hanger hitting the muffler heat shield. Figuring that the only thing that could be affecting it was the engine-pipe hanger (as the bolt holes are slotted) I loosened them and wriggled things around for next-to-no improvement.... Bugger. Next step was a niggling thought that I'd put the cat in the wrong way (as the flanges aren't parallel/aligned), so I went through the 3 other permutations of spinning and flipping the cat to see if things would line up better. On the fourth permutation (ie upside-down and back-to-front to how I had initially installed it) it seemed to make everything clear the heatshields, until I noticed that the rear cat flange was hard up against one of the studs holding the cat tunnel heat shield on..... Bugger. So out came the hacksaw to shorten that stud down (I don't have an angle-grinder). After an hour or so of sweating, grunting and swearing (not to mention sore arms) I had knocked off about 10mm from the stud, which then allowed the cat flange to sit high enough for the bloody rear pipe to start hitting the heat shield again.... Bugger. So THEN I decided that maybe I had been right all along when I put the cat in first time, and things just needed to be wriggled around a bit. So for the 5th time in as many hours I removed the cat and flipped it back around to the initial guess I had made as to its orientation. Except this time I also loosened off the bolts on both the front hanger AND the subframe mount nut, then as I installed the cat I slowly did up each bolt/nut evenly all the while making sure to keep the mid- and rear-pipes centred in the tunnel. And when that was all said and done, I finally had an exhaust that was fully tight and not rubbing on anything. It would still kiss the heat shield if I kicked the tip of the muffler to each side, but a quick drive down to the post office to pick up a package showed that in day-to-day driving it wouldn't come close (if it crops up in the future I'll probably just rip that heat shield out, or at least bash it a bit more open). 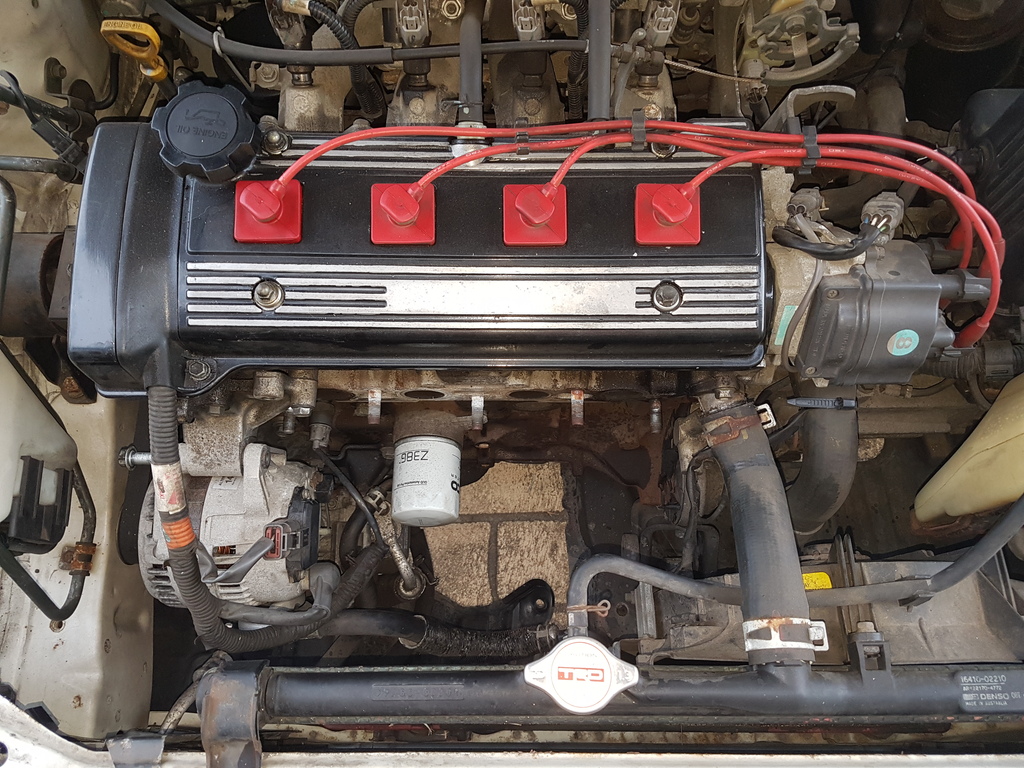 Something missing? 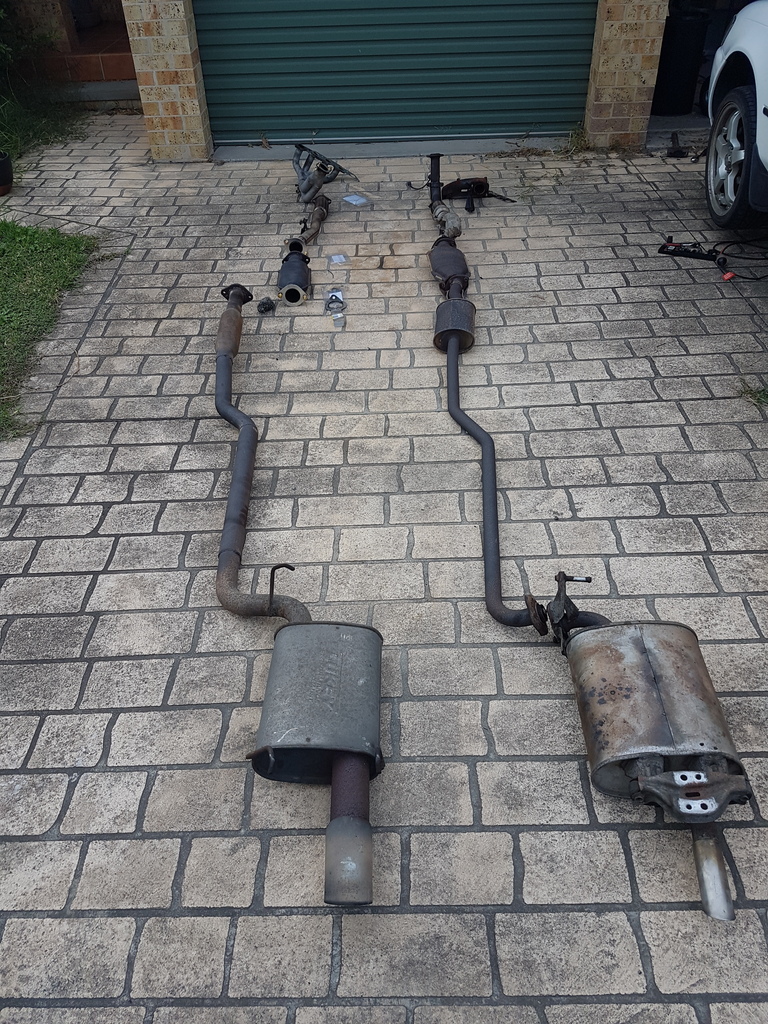 Ahh there it is 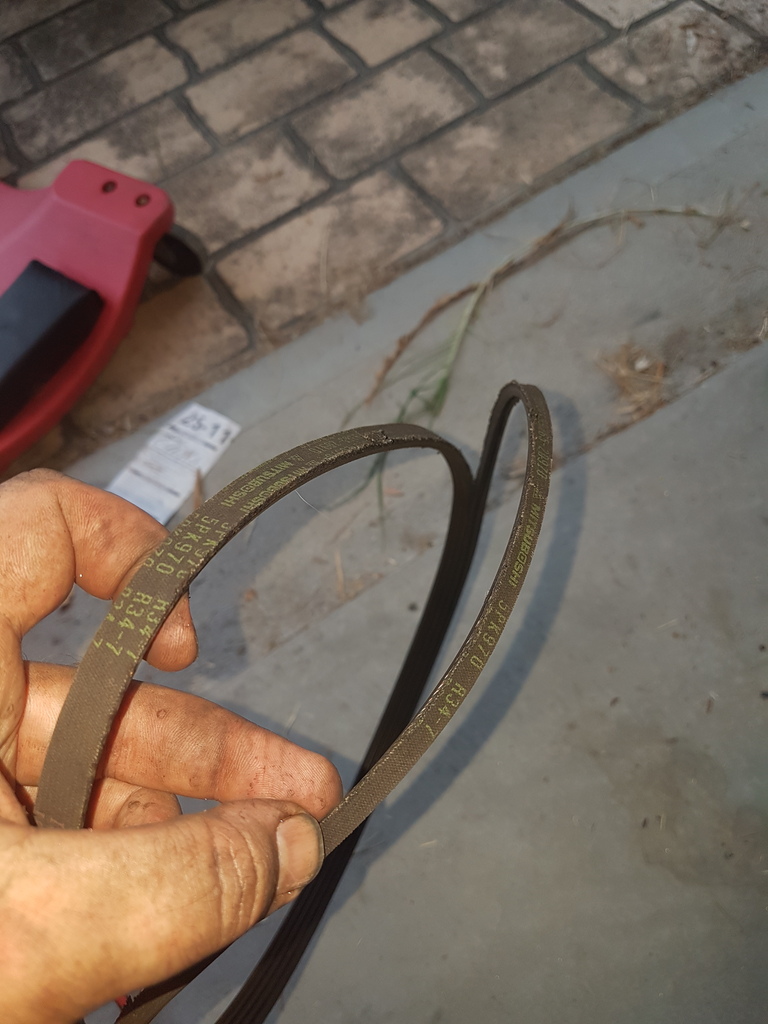 Alternator belt discovering cell meiosis | |
|   | | miib14
Site Administrator


Posts : 7382
Reputation : 175
Join date : 2011-04-27
Age : 34
Location : Manchester
 |  Subject: Re: Charlene the AE102 Subject: Re: Charlene the AE102  Sat May 06, 2017 9:19 am Sat May 06, 2017 9:19 am | |
| | |
|   | | Hiro
Super Member


Posts : 544
Reputation : 16
Join date : 2012-04-27
Age : 40
Location : Newcastle, Australia
 |  Subject: Re: Charlene the AE102 Subject: Re: Charlene the AE102  Mon May 29, 2017 4:01 pm Mon May 29, 2017 4:01 pm | |
| Spent all of Saturday afternoon and half of Saturday night on my back under the rear end installing my Ultra Racing rear swaybar, and what a pain in the arse that turned out to be. Fortunately didn't have to drop the tank, but both straps, filler pipe, breather pipe and the exhaust from the cat back had to come out, and even then it needed some wiggling to get it out past the jack stands on the cross-member and holding up the tank.  Stock 14mm vs UR 19mm (both solid)  Fortunately managed to work out how to get my sensor light to stay on permanently, otherwise I would have had to call it quits as soon as it got dark and pick it up in the morning. Garage is too full of crap to get a car in these days, and chances are the light wouldn't have been much better in there since all underneath would have been in shadow. As it was I still didn't get everything back in and buttoned up until after 9pm. | |
|   | | Hiro
Super Member


Posts : 544
Reputation : 16
Join date : 2012-04-27
Age : 40
Location : Newcastle, Australia
 |  Subject: Re: Charlene the AE102 Subject: Re: Charlene the AE102  Sat Jun 17, 2017 5:51 pm Sat Jun 17, 2017 5:51 pm | |
| Latest acquisition - AE102 Sprinter 3-dial dash cluster. Unlike the JDM BZ Touring and FXGT 3-dial clusters, this one has the correct tacho for the 7AFE (8000rpm vs 9000rpm) AND retains the Aus-spec 200km/h speedo (vs 180 for JDM). Also doesn't have the superfluous dash lights for cat temperature, rear light failure module etc (although since the ADM Sprinters were all pre-facelift, there is no seatbelt warning light fitted). Still requires a bit of wiring magic but I'll most likely palm that off to someone who likes electrons more than I do in exchange for some beer or something.  | |
|   | | elements616
New Member

Posts : 27
Reputation : 0
Join date : 2016-03-01
Location : Melbourne, Australia
 |  Subject: Re: Charlene the AE102 Subject: Re: Charlene the AE102  Sat Jun 17, 2017 11:32 pm Sat Jun 17, 2017 11:32 pm | |
| Looks great. I'll see if I can do my homework on that cluster to figure out the amazing magic that is rewiring. P.S. Did it come with half a tank of fuel too?  | |
|   | | Hiro
Super Member


Posts : 544
Reputation : 16
Join date : 2012-04-27
Age : 40
Location : Newcastle, Australia
 |  Subject: Re: Charlene the AE102 Subject: Re: Charlene the AE102  Sun Aug 06, 2017 12:22 am Sun Aug 06, 2017 12:22 am | |
| Had a go at trial-fitting the ST204 pad carrier brackets today in conjunction with the twinpot calipers, unfortunately I've got the 54mm SS AE101 discs rather than the 55mm SS AE111 discs so I couldn't quite get everything to sit snug, looks like I'll either need to machine the pad carrier a couple of mm on the mounting face or get a spacer for the rotor (which I'd prefer not to do as aftermarket rotors are all 55mm). 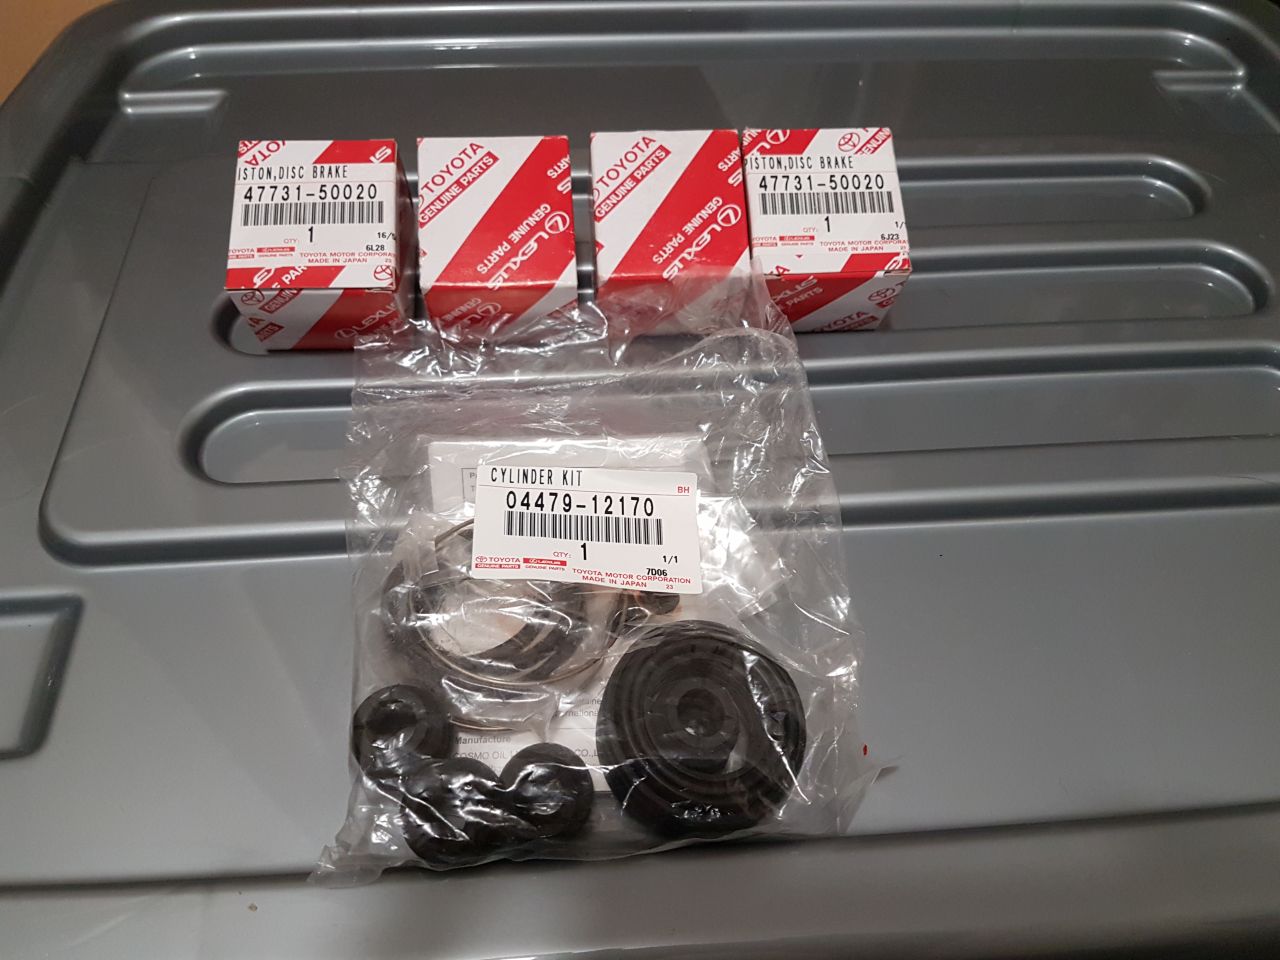 Brand new seal kit and 4x cylinder pistons from Toyota, grand total of $130 +p/h through Amayama 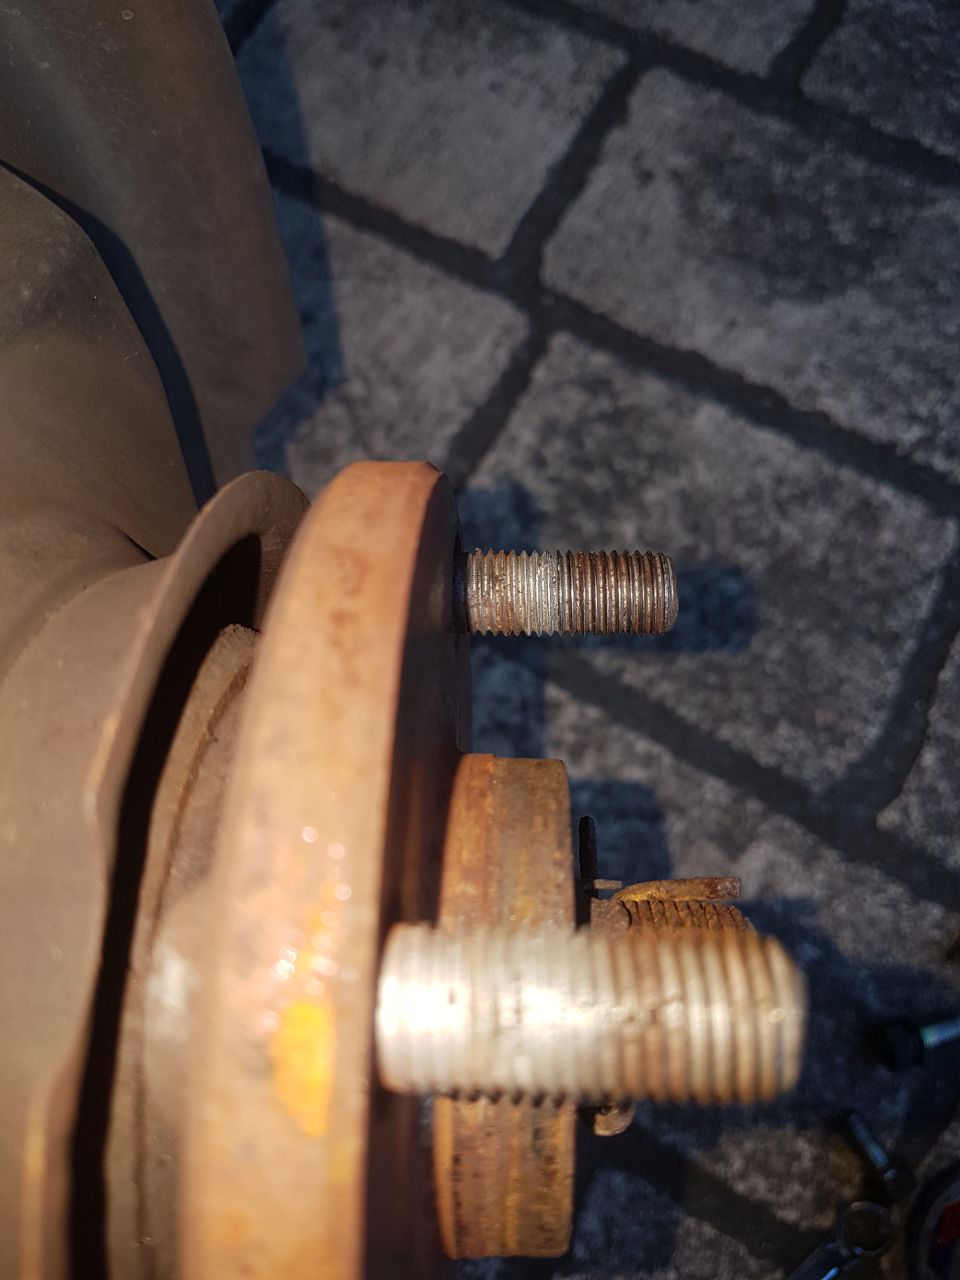 Showing the 54-to-55mm step on the AE102 hub - disc needs to be 55mm, wheels need to be 54mm. 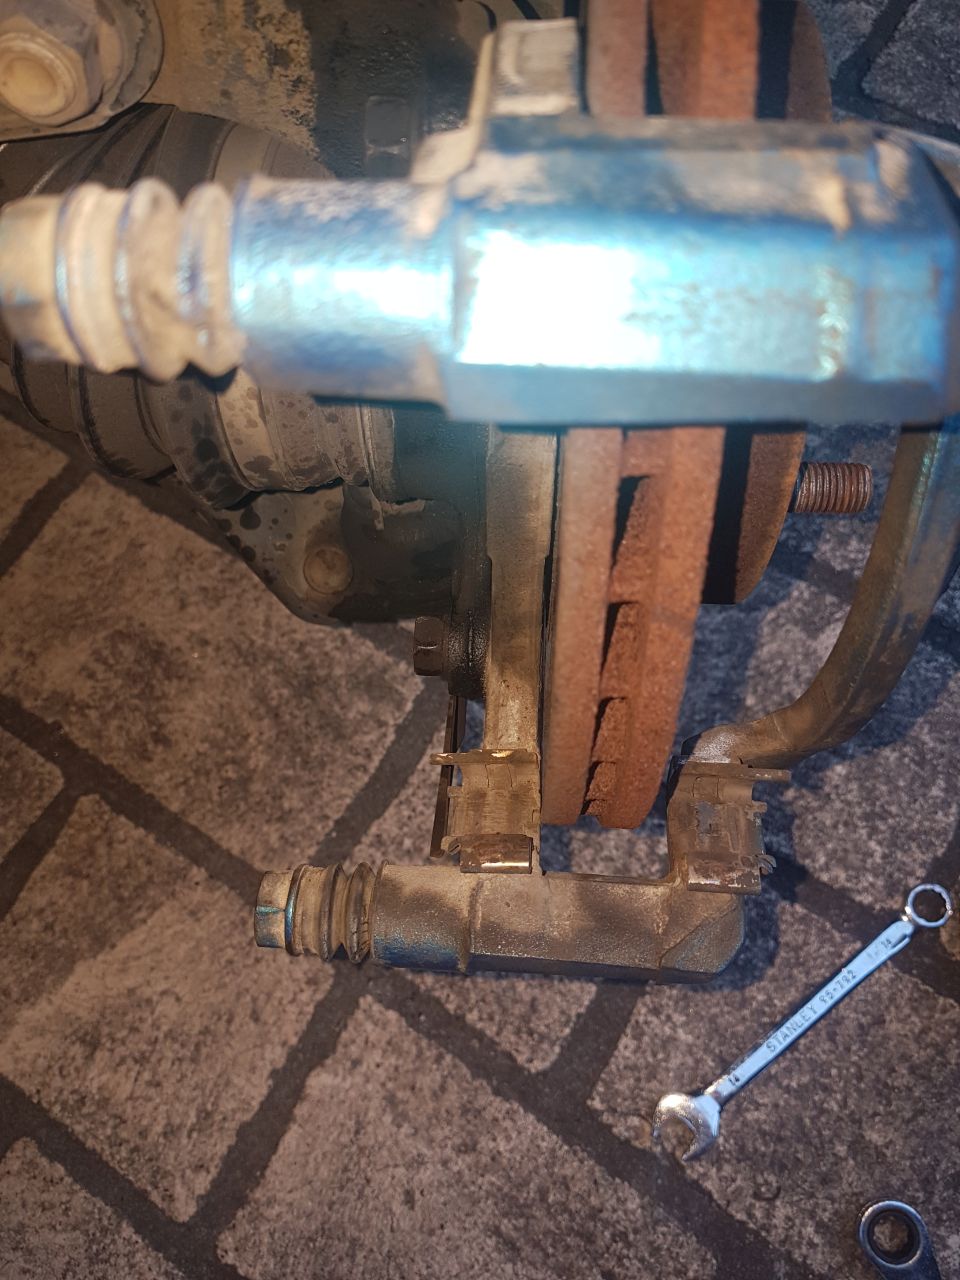 ST204 caliper bracket on the stock 255mm disc, the rotor just skims the inner face but there's too much room on the other side, wouldn't want a pad falling out... 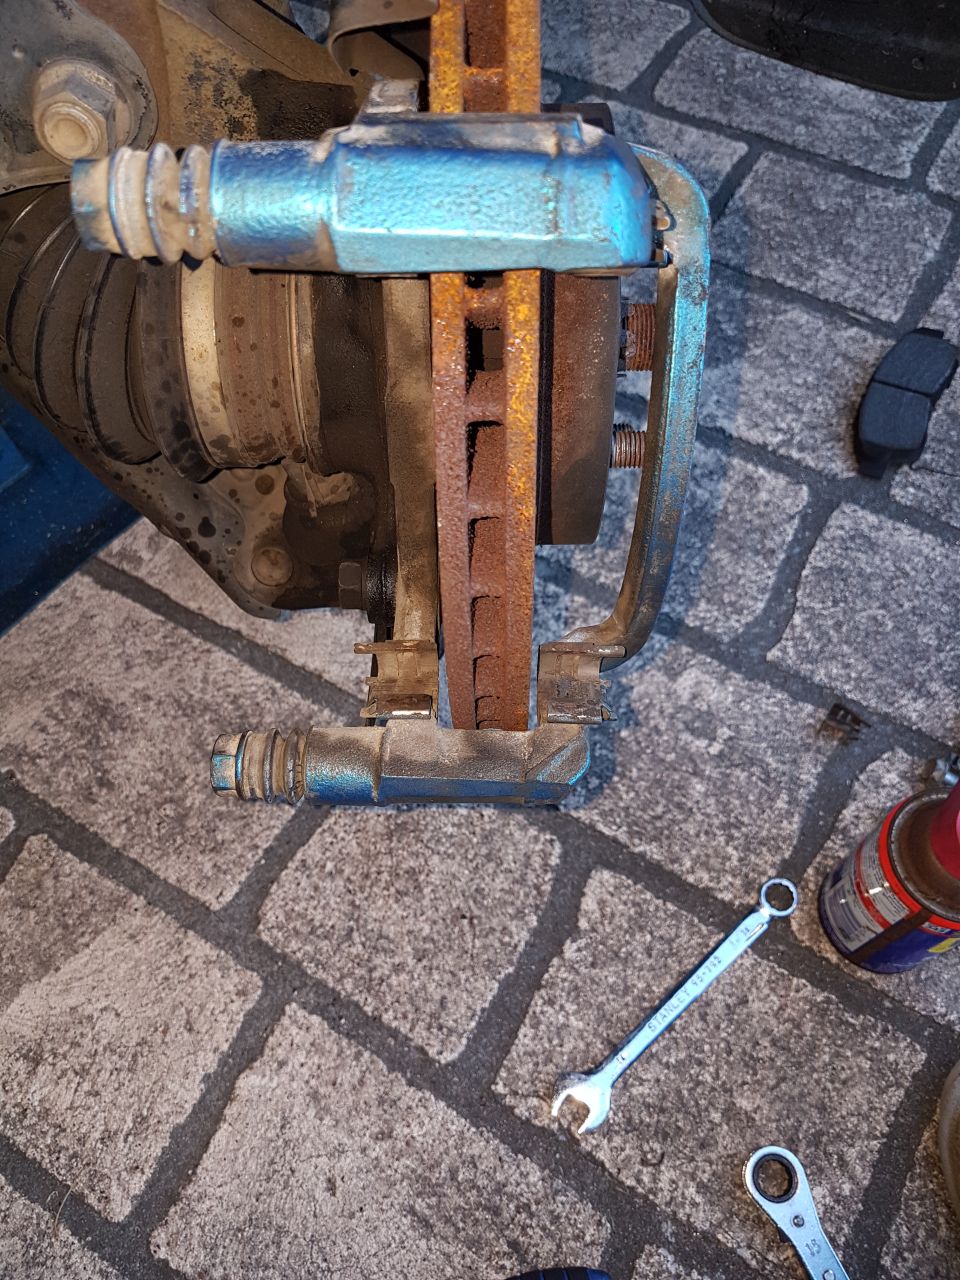 How the 275mm disc sits inside the carrier - since the rotor doesn't want to sit all the way in on the hub (due to the step) it actually lines up almost perfectly in the carrier, however the rotor can rock around a bit and would be dangerous to attach a wheel in this configuration 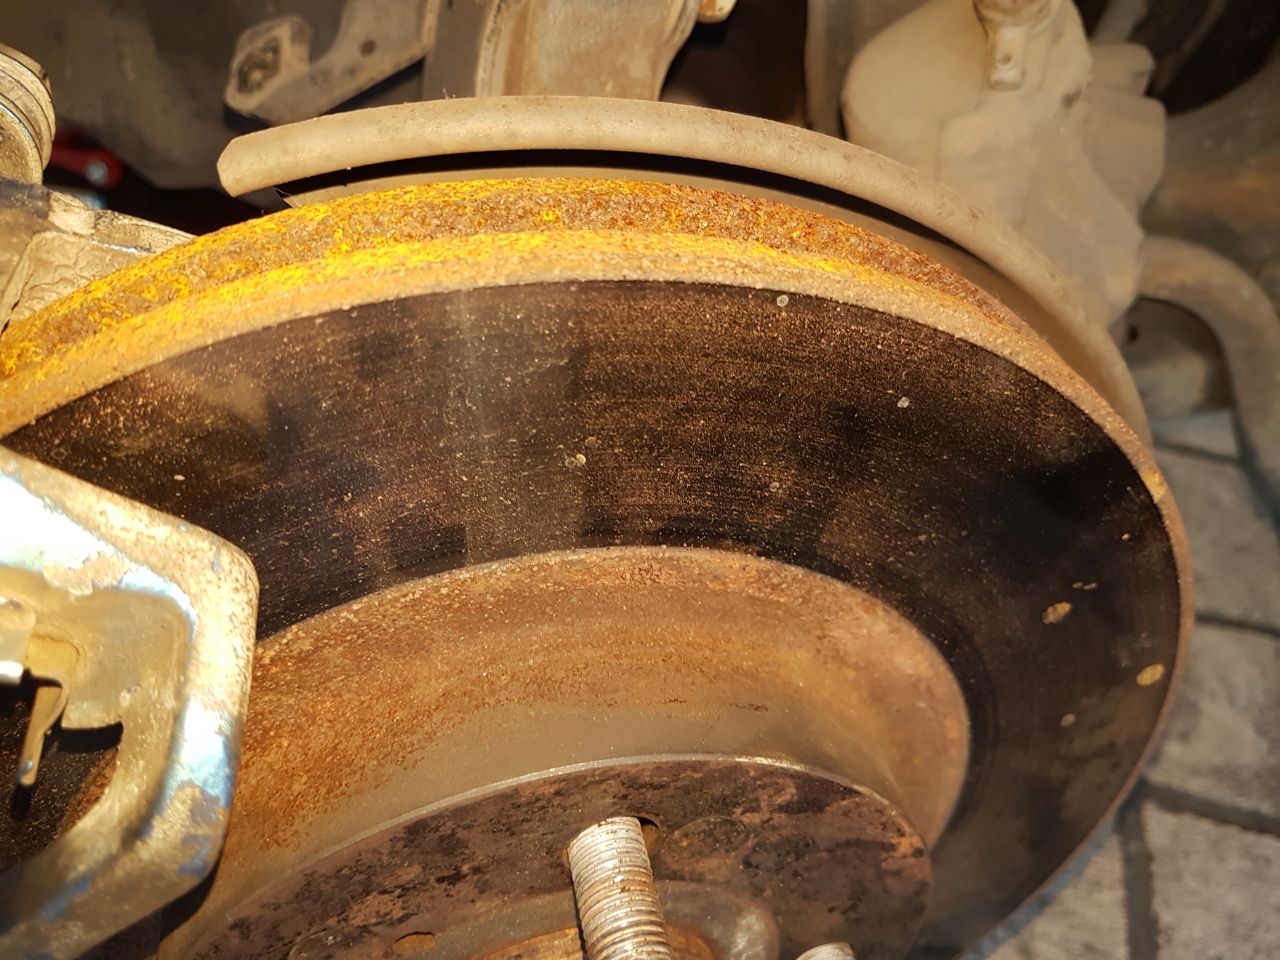 No need to trim the factory heat shield, fits perfect 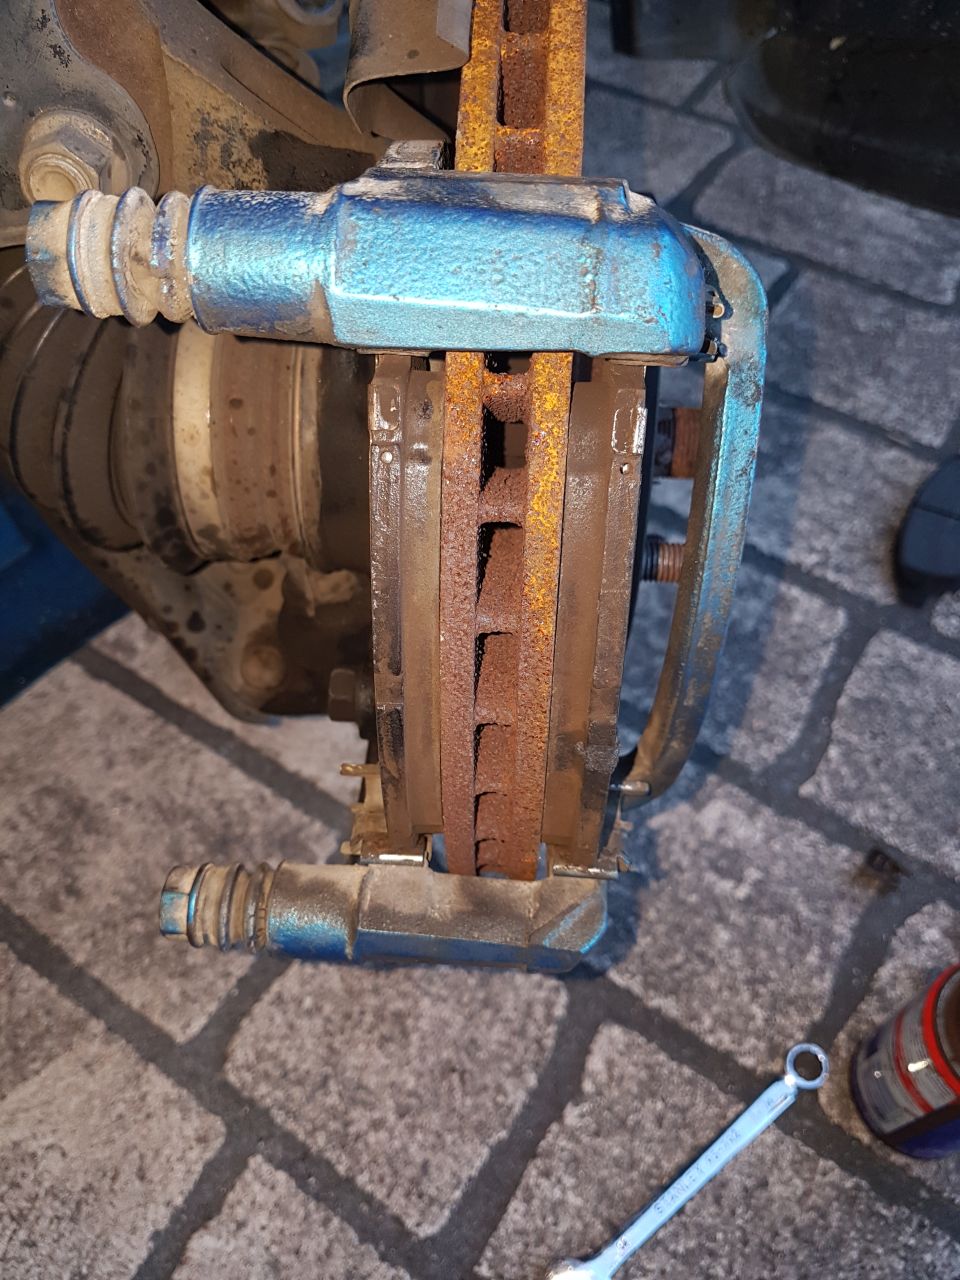 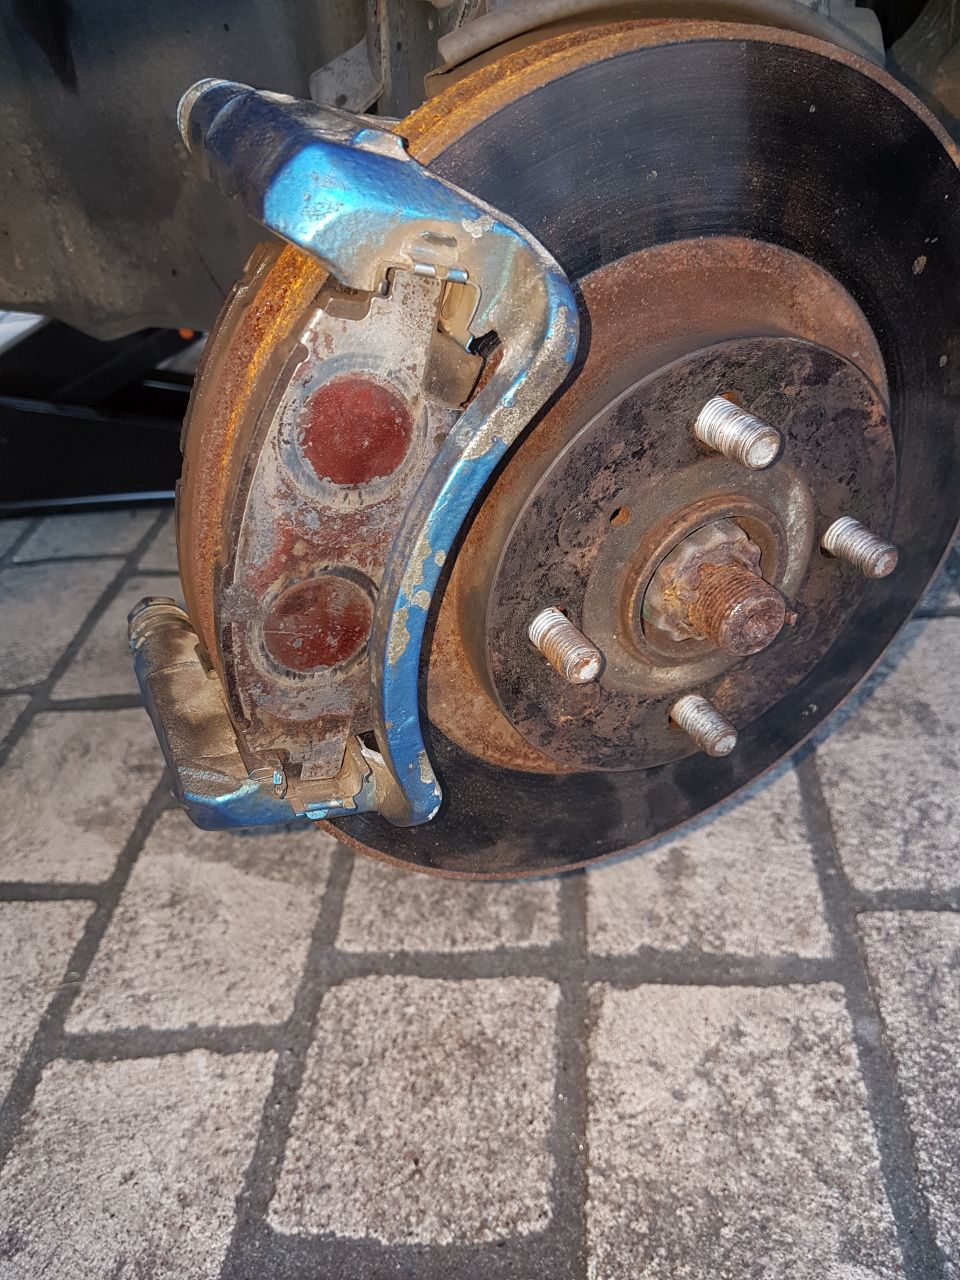 SS pads fit snug in the ST204 carrier and line up millimetre-perfect with the edge of the disc 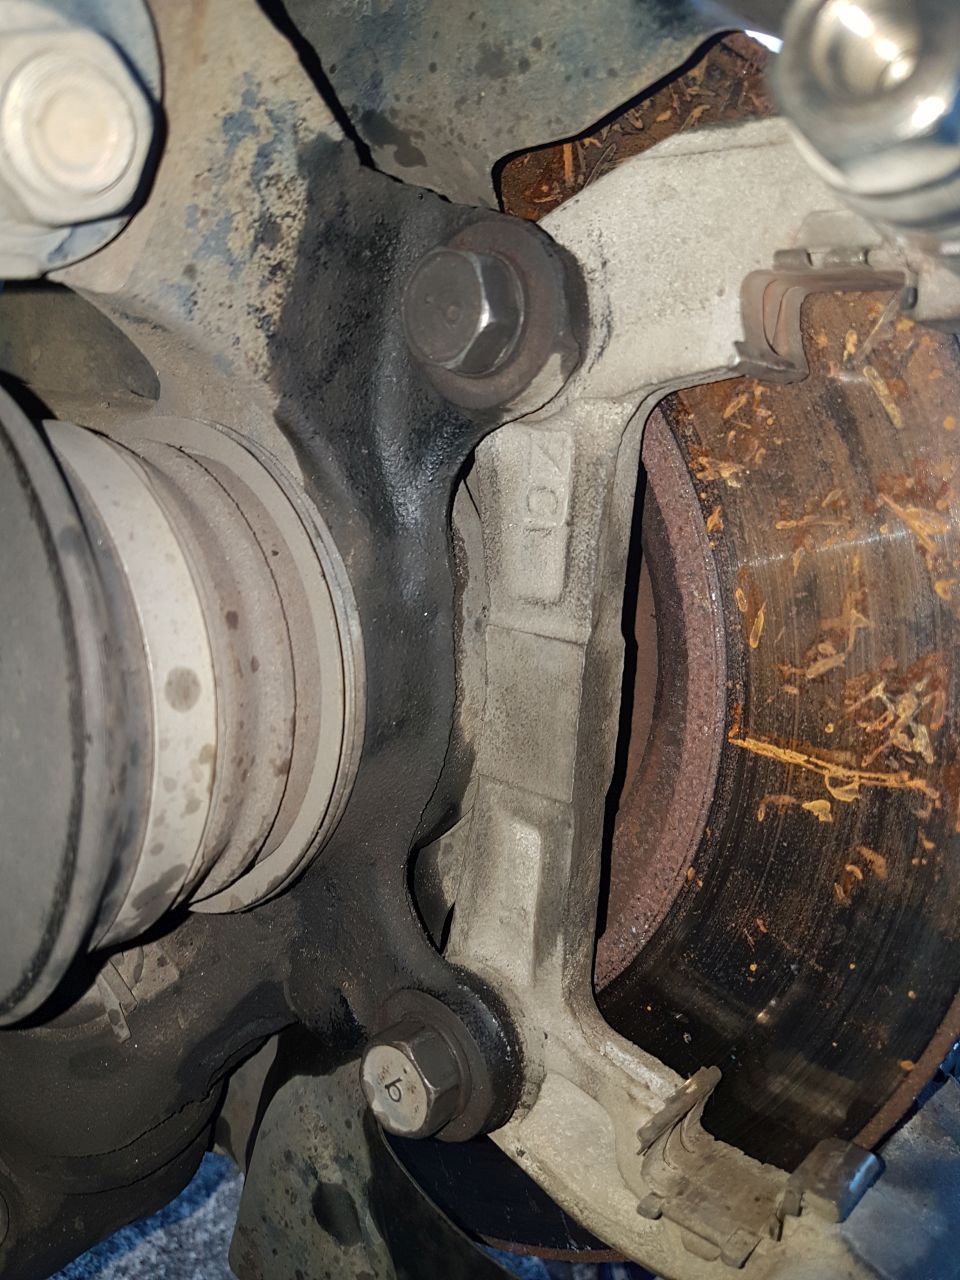 No machining of the pad carrer where it bolts to the hub either (unlike the SS carrier) - perfect fit 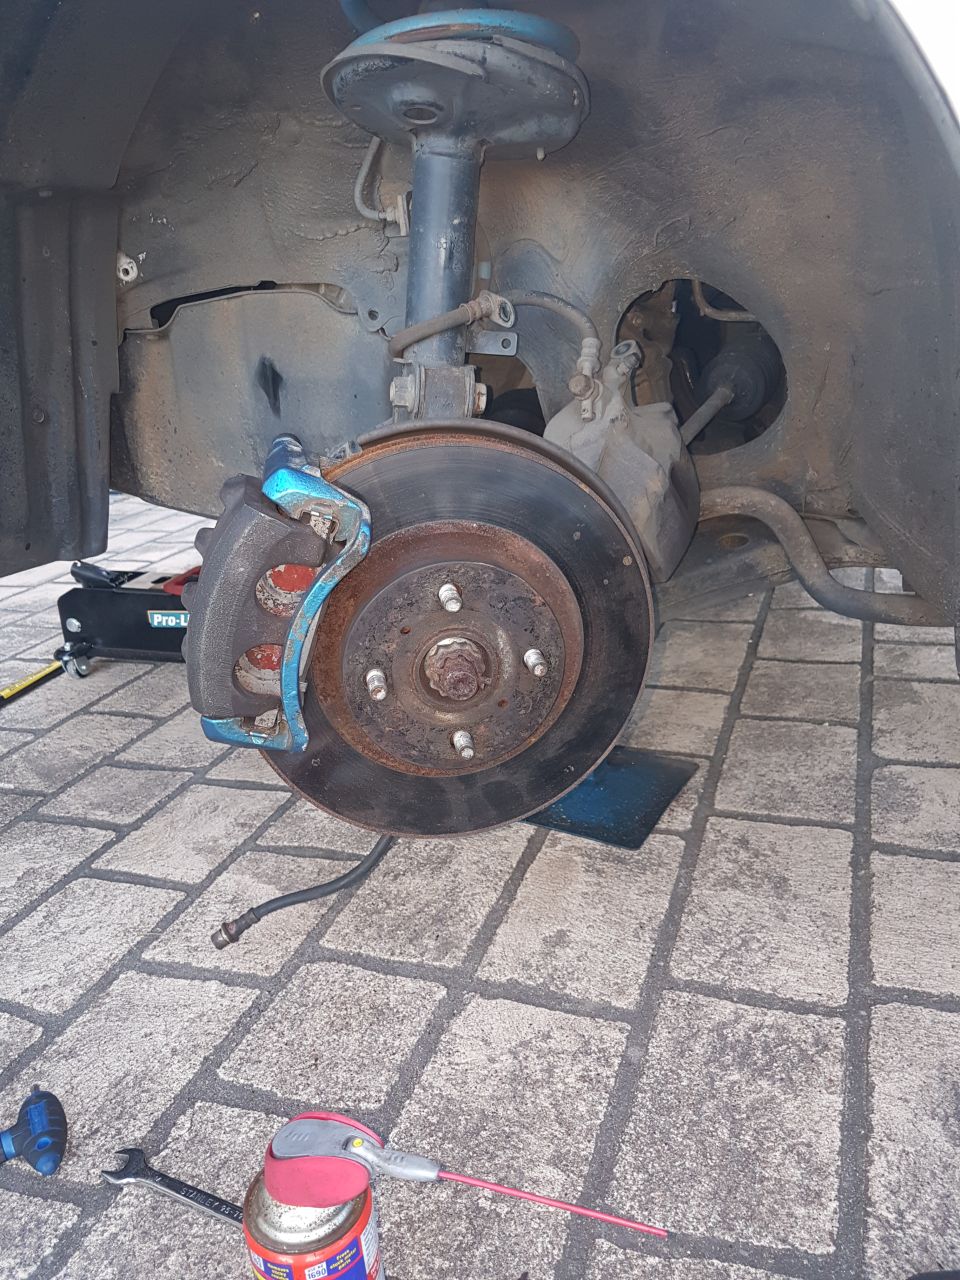 How it looks all assembled - if it wasn't for the mis-matched paint you'd swear it was a factory fitment 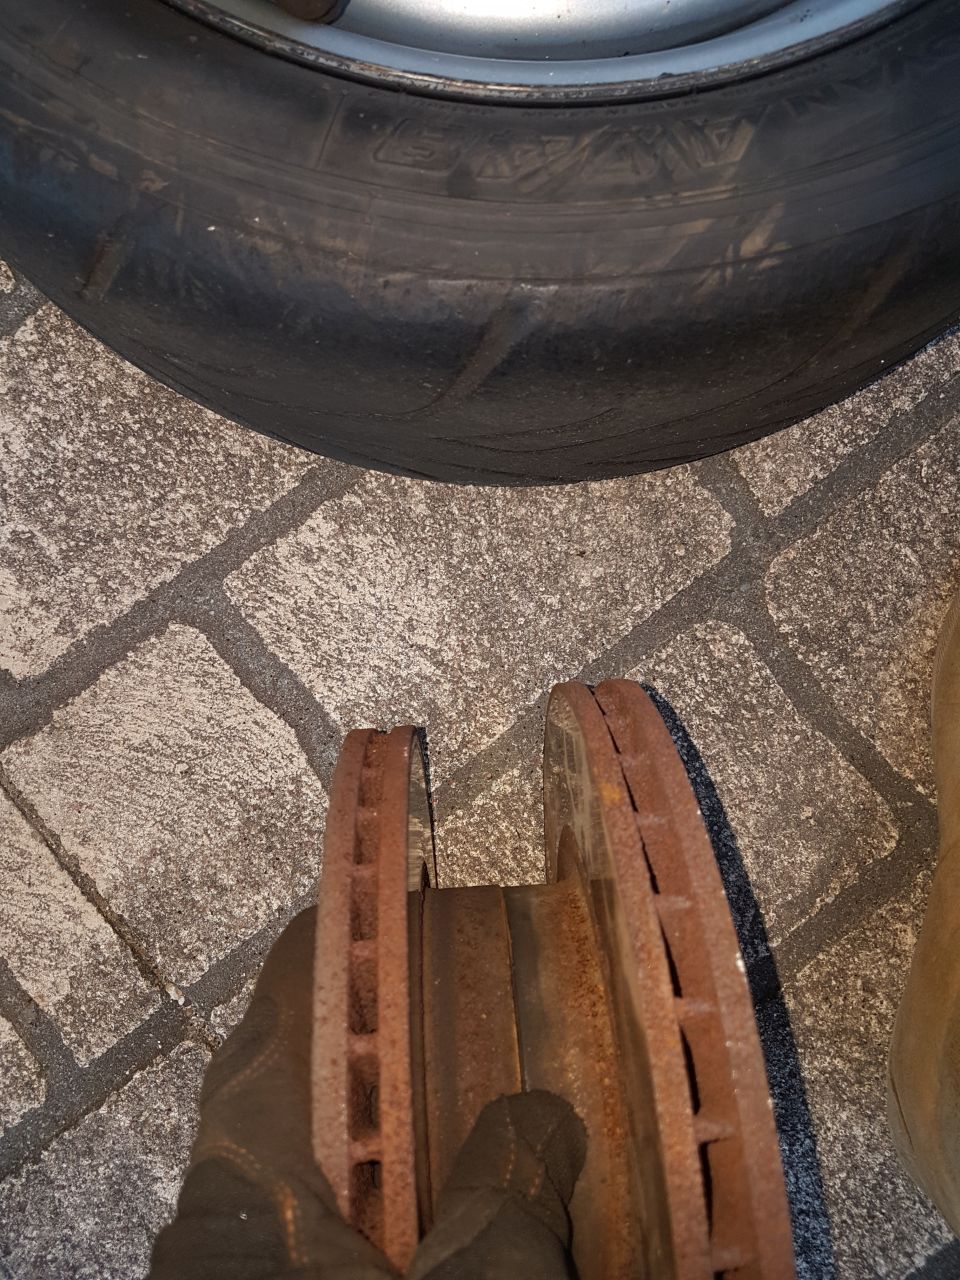 Diameter comparison of the AE102 to SS AE101 discs Since the 14" spare wheel will no longer fit over the SS caliper (Superstrut models came with 15" wheels as standard) I decided to get a set of what I believe are facelift ZZE122 15x6" steelies.......that also happened to come with Advan A048 R-comp semi-slicks  Might just keep those in the back pocket for Toyota Nationals next year... 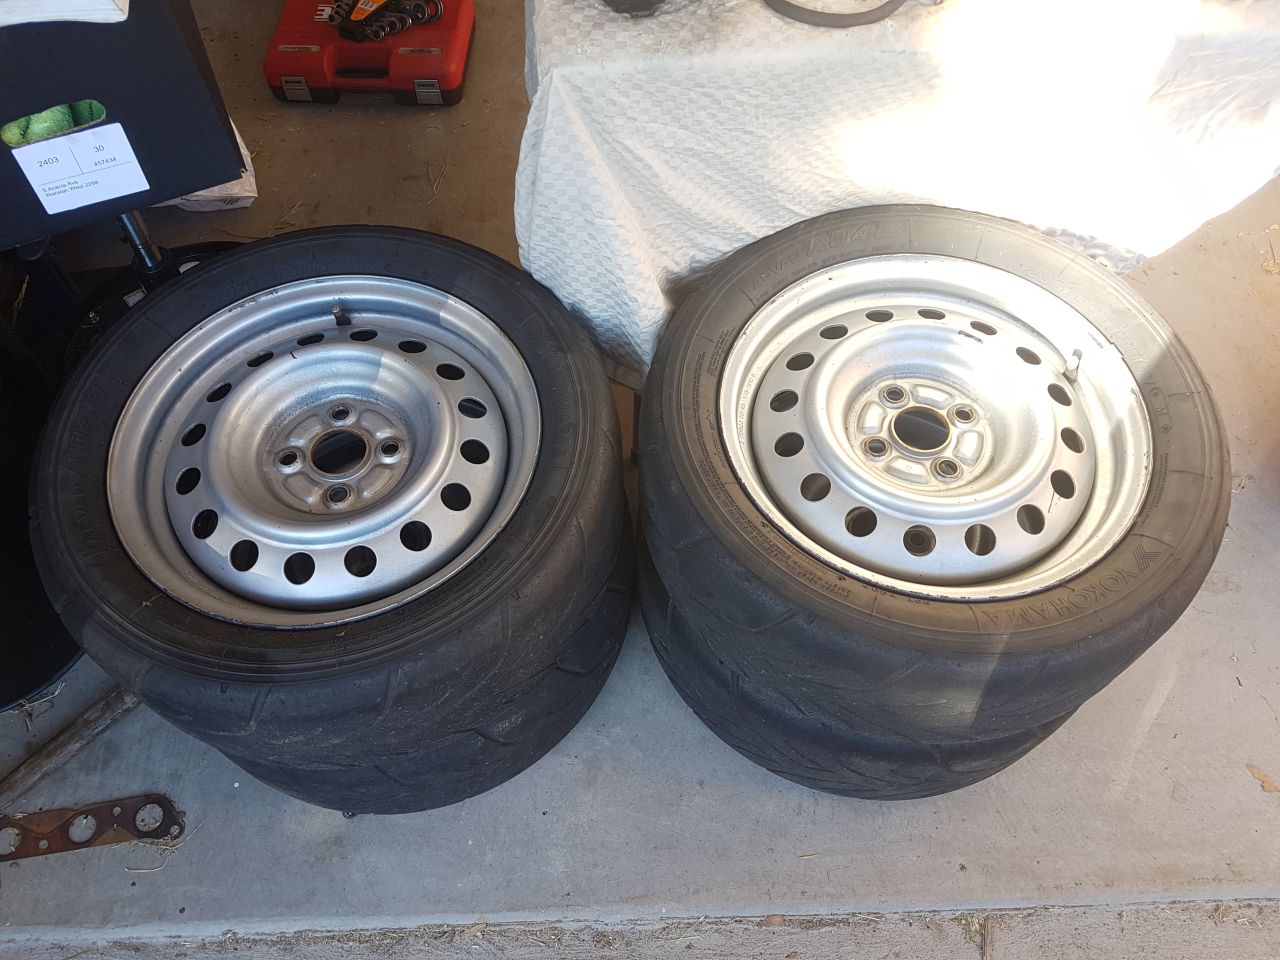 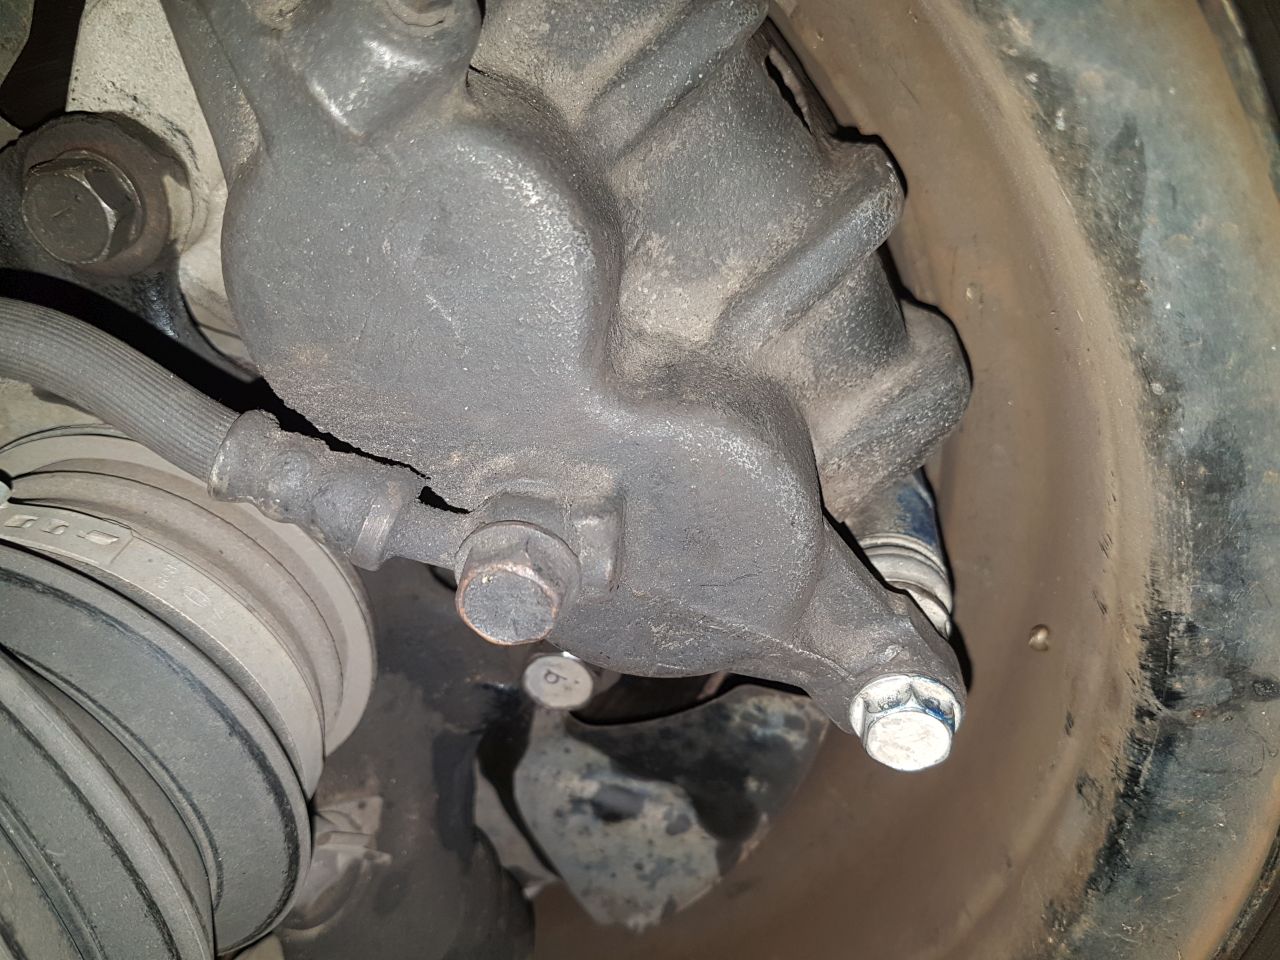 Even with the bigger wheels, clearance was pretty tight. Back side of the caliper was fine, but the clearance between the face of the rim and the front of the caliper is as about as tight as I'd be comfortable with 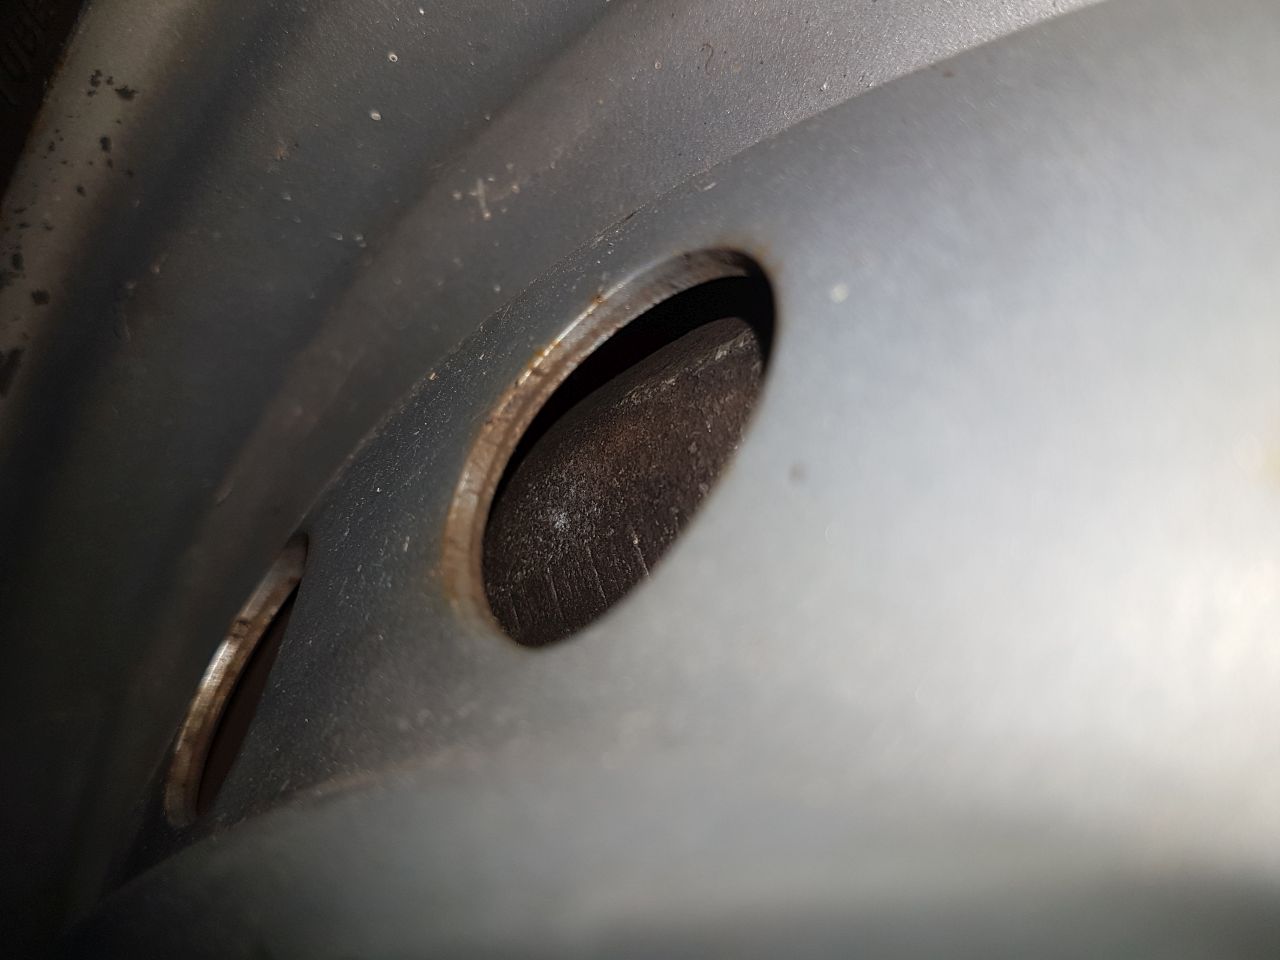 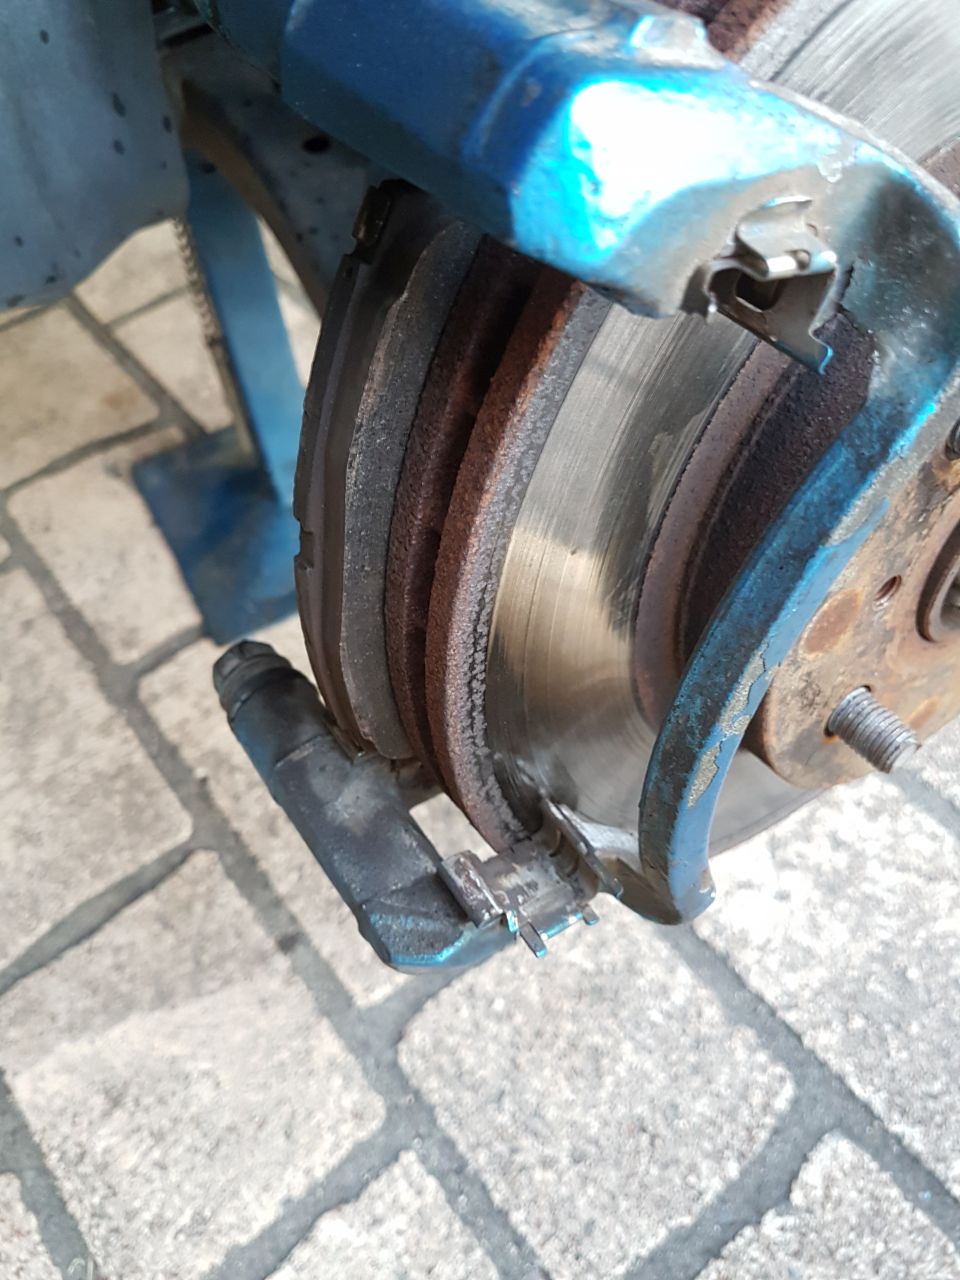 And just for laughs I fitted the ST204 pad carrier and an SS pad to the stock AE102 disc.....yeah, these brakes are going to be heaps better  | |
|   | | Hiro
Super Member


Posts : 544
Reputation : 16
Join date : 2012-04-27
Age : 40
Location : Newcastle, Australia
 |  Subject: Re: Charlene the AE102 Subject: Re: Charlene the AE102  Wed Jan 16, 2019 12:28 pm Wed Jan 16, 2019 12:28 pm | |
| So as most of you probably know, about 12 months ago I finally pulled my finger out and get started on an engine conversion that I've been umming and ahhing about for the last ~10 years. Over the course of that time my mind would sway every few months, from a supercharged 20V to a high-comp smallport 7AGE, to a redtop BEAMS 3SGE, and then off to more exotic pastures like a 1MZFE or 2GRFE. Eventually though I decided that most of the standard conversions out there (A- or S-based) are getting long in the tooth design-wise, and I should probably look at something more modern (but not too modern that would make the electronics a nightmare) - enter the 2ZZGE. Good power straight out of the box, aftermarket support, locally delivered so parts aren't hard to find, plus the added fun/awesomeness of Lift and a 6-speed manual. So with my annual bonus from work fresh in my pocket, I started trawling Gumtree/Carsales/Facebook for cheap ZZT231 Celicas to rip the drivetrain out of (my main reason going with the Celica rather than the Sportivo is the better final drive ratio for cruising, plus Celicas tended to be cheaper and more plentiful) Initially started to get slightly depressed when I realised I'd still have to burn half my budget buying a rego'd runner only to scrap 90% of it, until one day a wrecked but "complete" low-k 2000 SX fell in my lap for the ridiculously cheap price of $700 (the gearbox and engine combo alone can go for $2k). Cue a mad rush to clear space in my garage (because the wife wouldn't want a shell sitting in the driveway and I needed cover to rip stuff out) as well as organise a trailer/tow-car - borrowed my mate's diesel Ranger and found a local guy who rented out car trailers for $50 a day. 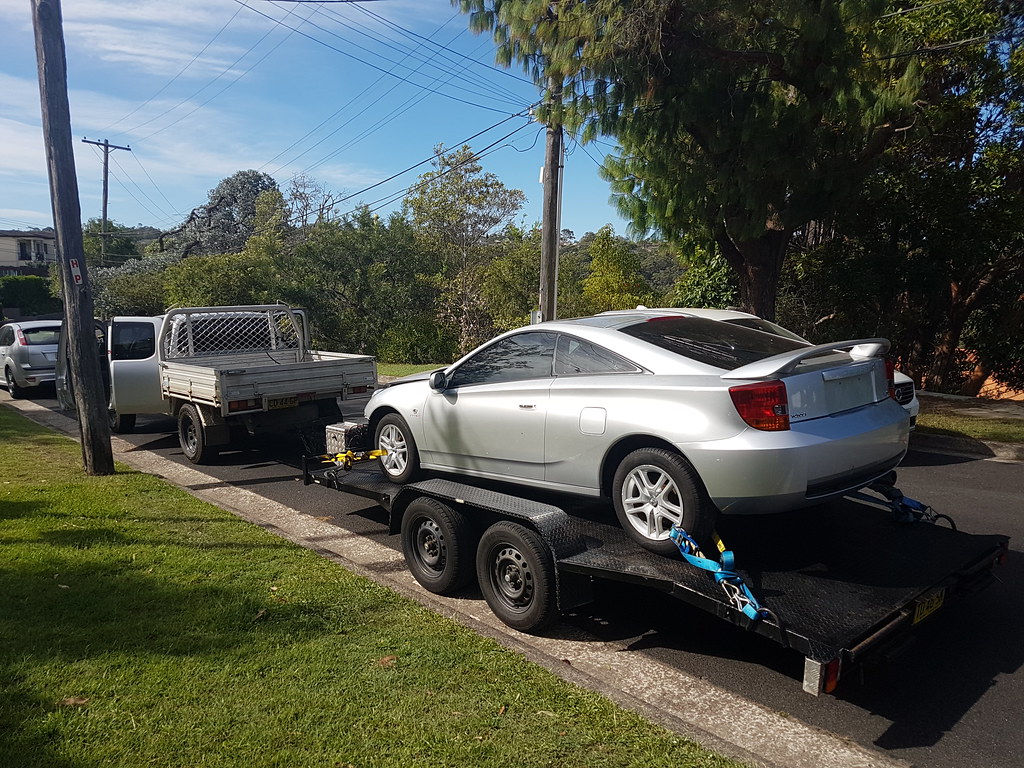 Just to make things more fun, picked up the trailer the afternoon before but none of the lights worked. Checked with my BiL's Jeep and everything worked fine (couldn't take the Jeep though as the brakes needed to be replaced), so figured it would have to be in the wiring on the Ranger....turns out whomever did the wiring harness for the trailer plug used Scotchloks instead of braincells, and had basically disintegrated. A morning-of patch job by [MENTION=143396]the[/MENTION]guitarhero4 saved the day, however no trailer brakes (ute didn't have them fitted at all) left me a bit nervous negotiating the steep hills of the F3 on the way home with 2 tonnes of car trailer behind (turned out to be completely unwarranted though, the Ranger towed like an absolute champ). 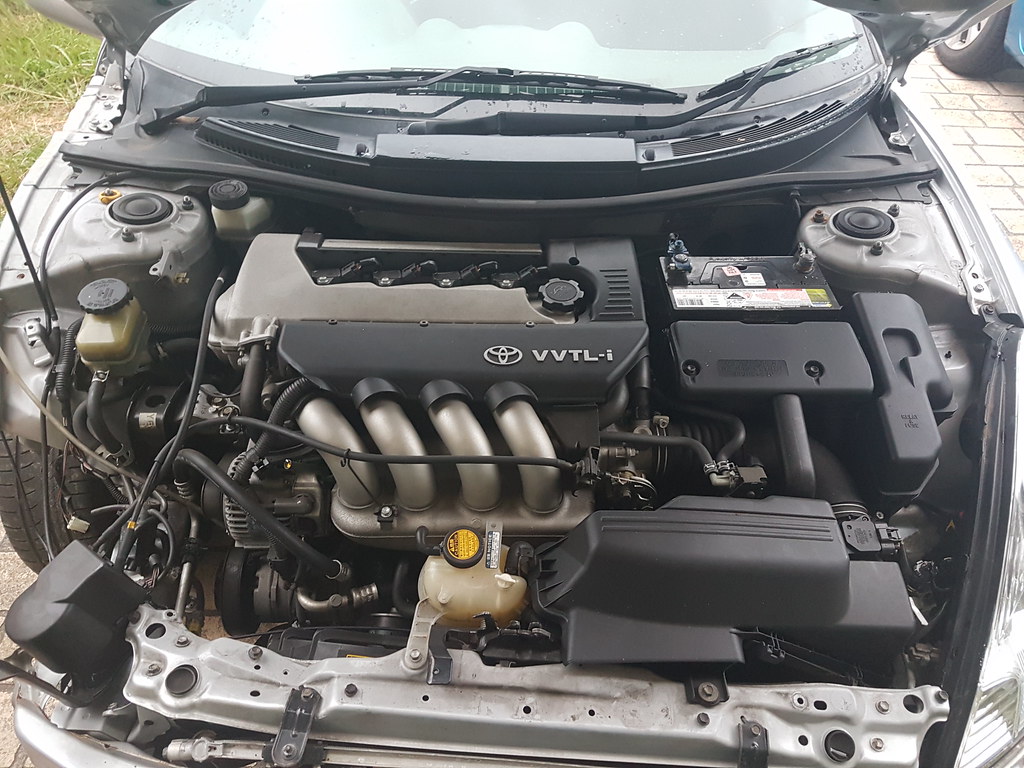 What will hopefully await me whenever I open the bonnet in the future 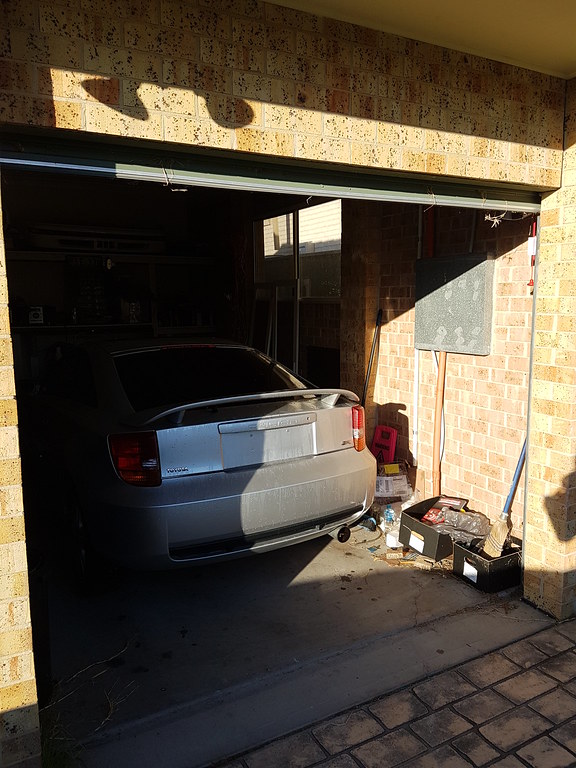 Back home and tucked away First purchase was an MWR order to get the ball rolling - JDM ECU w/ no immobiliser, short-shifter (the Celica 6-speed housing bolts directly in to the Corolla), new dipstick (ring had broken off), solid shifter bushes, and the obligatory lift bolts. 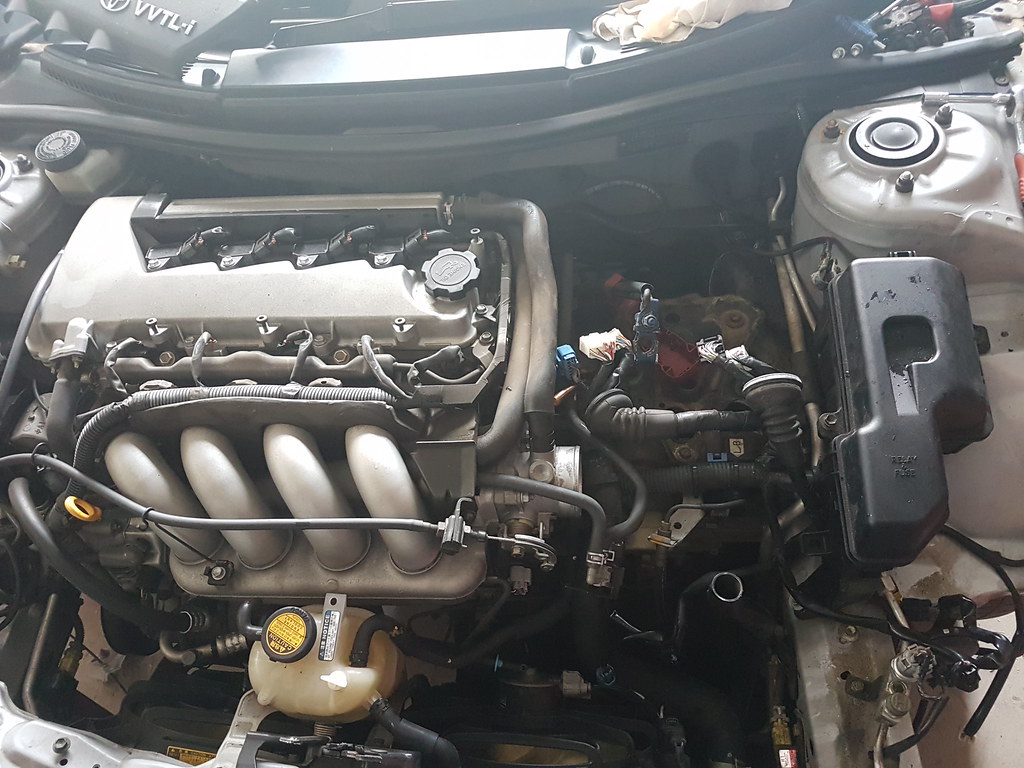 The beginning of the strip - battery, ECU and air intake removed. Over the next few months I would slowly chip away at the engine bay, focusing on making room and getting rid of anything that I didn't need and would just get in the way - radiator, air-con condenser, overflow bottle, by the end of it I had basically stripped the entire front of the car (one of the good things about the Celica is that you can unbolt practically _everything_ from the front end). Then moved my attention to the gearbox and the driveshafts 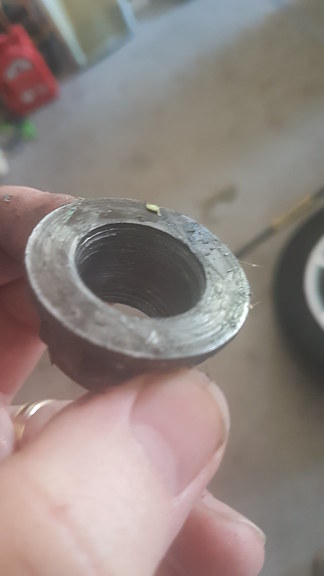 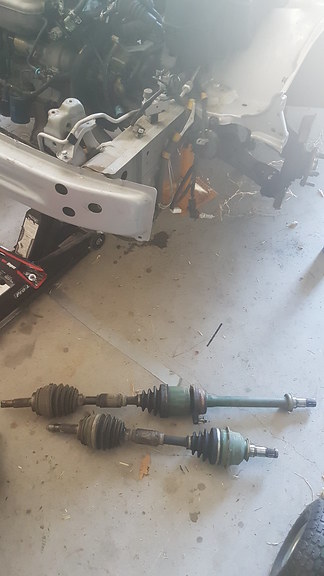 Turns out that you really do need to un-stake the axle nuts before you whale on them with a 300Nm rattlegun.....ended up with 2 stripped axles (wasn't planning on re-using them anyway) and 1 nut in particular that was stuck on because it had stripped but there was still thread either side of it on the axle (part-drilled it out and then pried off with the biggest bar I had). Gearbox oil was green too, which was a bit concerning as I hope it isn't the dreaded Redline Shockproof (which would indicate that the synchros could be on the way out, despite being only 130k). Equal-length driveshafts will be a bonus though. Then made a start on the plethora of pipes and hoses in the engine bay - heater hoses, power steering lines, fuel line (got to love factory-fitted quick-connects) vacuum lines, air-con (at which point I "accidentally" released the entire load of R134a in to the atmosphere as I assumed it had already leaked out from the accident....turns out noooooooooooope), and fitted the engine lifting hooks (figured it best to lift the engine the way Toyota intended, rather than via seat-belts/random bolts etc) - the rear one was a real prick as there is basically no room between the back of the head and the cowl 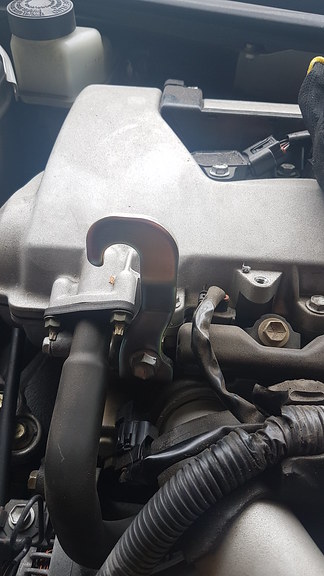 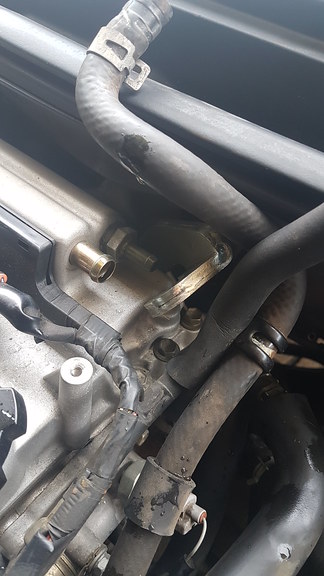 At this point I realised that the only thing holding the engine in to the car were the 4 engine mounts...........so I thought "bugger it, this thing is coming out today". Of course I chose to attempt this with the car parked in just about the worst position possible, had literally millimetres of clearance between the engine, gearbox, chassis and roller-door. 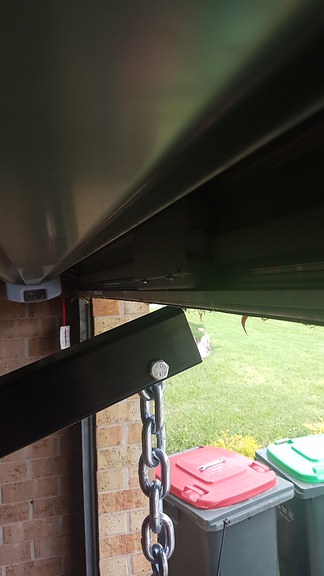 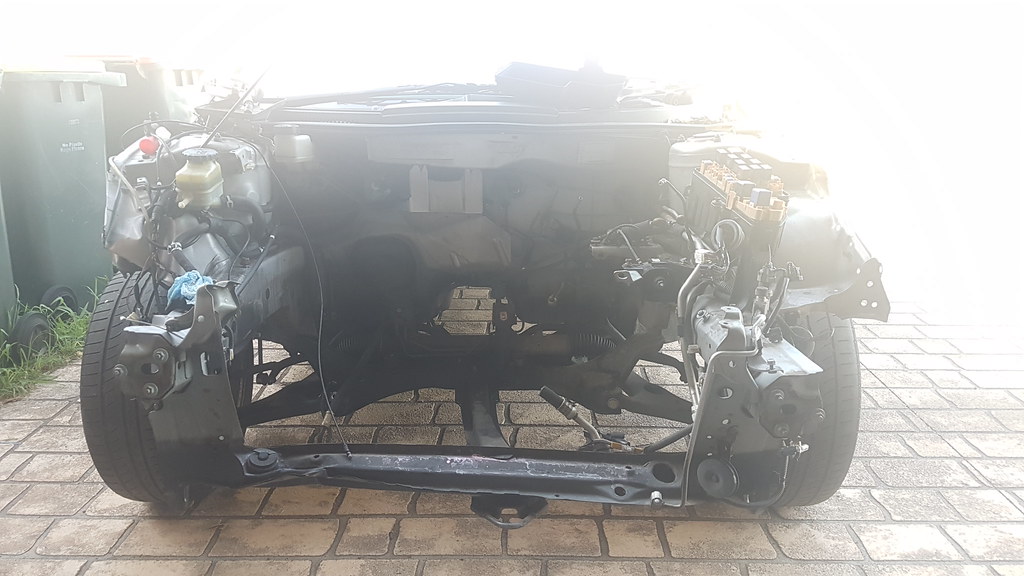 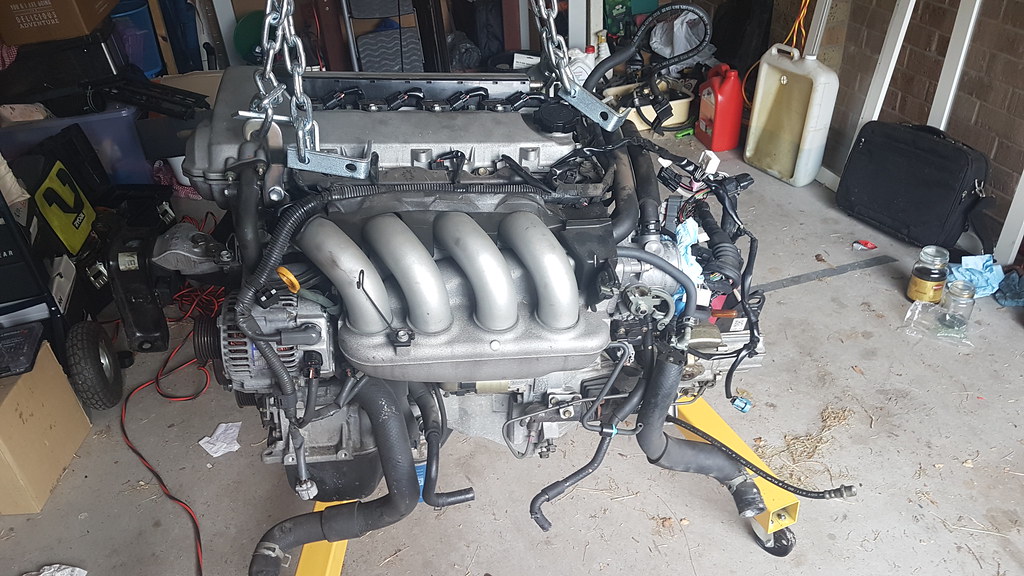 Success! Note for future conversions - load leveller is worth its weight in gold. And I only tested the tensile strength of a single ground wire strap.....guess who won. 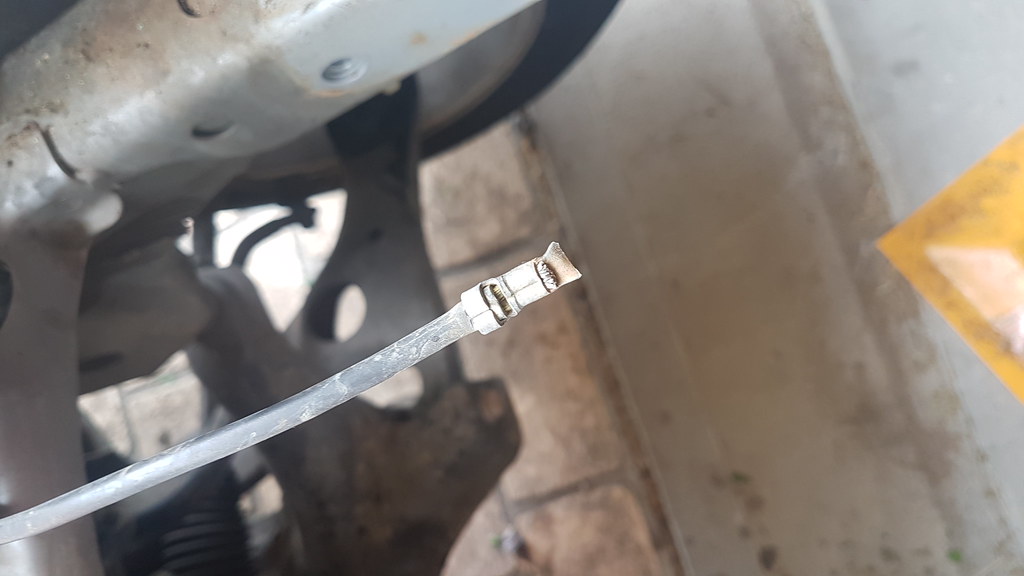 Next step was splitting the engine and gearbox so I could measure the bolt lengths required and get the block up on the engine stand (stupid fine-threads...). Block and gearbox were slightly harder to separate than I expected until I realised the wiring harness was still attached to both.....oops. 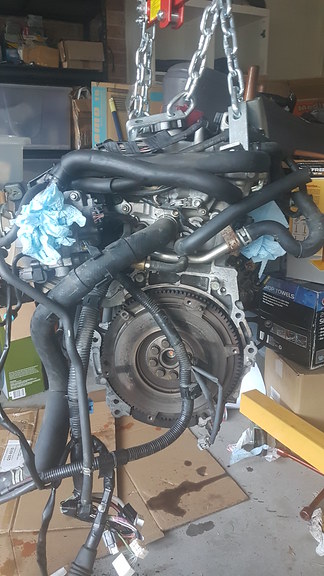 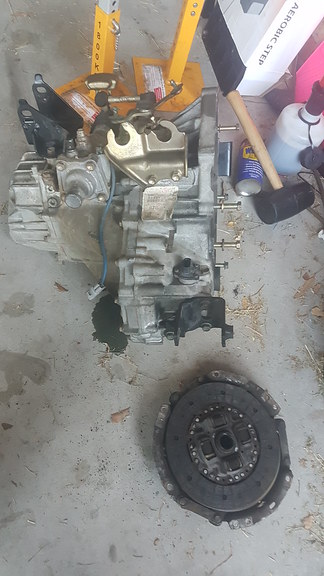 20190112_190806 by Ian Rigby, on Flickr So that's how things stand at the moment. At this stage I'm considering starting the 7A removal around Easter (depending on when my bonus comes in and when rego is due on the Corolla, so I can have it off the road for the maximum amount of time possible without rego cancelling). List Timing-end engine mount from a Euro-spec 4ZZ ZZE111 (the E11x has essentially the same chassis as the E10x) - the 3 other mounts should essentially bolt straight on (benefit of the C-series transmission) MWR adaptor mount (used to fit the 2ZZ in to the 1ZZ-powered MR2/S) Fuel pressure regulator (so I can keep the returnless fuel rail) Custom exhaust headers as the Celica ones will hit the firewall/steering rack New clutch and flywheel (Fidanza probably, not sure on the clutch yet) New intake (might need to relocate battery too) New CVs (mix-n-match from a couple of different cars to get the splines and lengths right) Obvious shits-n-bits for power steering, brake booster, clutch lines, air-con etc etc Oh, and something about wires....meh, I'll cross that bridge when I come to it | |
|   | | Hiro
Super Member


Posts : 544
Reputation : 16
Join date : 2012-04-27
Age : 40
Location : Newcastle, Australia
 |  Subject: Re: Charlene the AE102 Subject: Re: Charlene the AE102  Wed Jan 16, 2019 12:37 pm Wed Jan 16, 2019 12:37 pm | |
| Oh, and I'm now rolling on 15" TOM's AE111 wheels, came up at a bargain price and I couldn't resist a piece of JDM dealer-option gold. 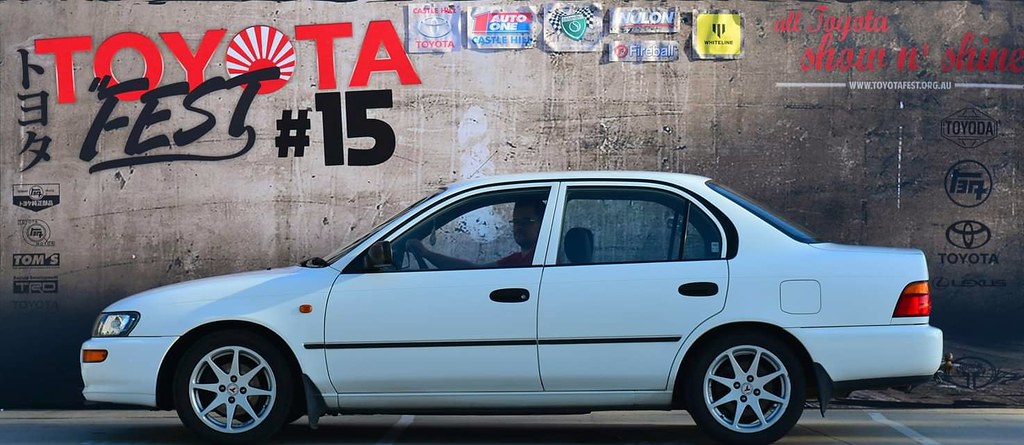 | |
|   | | Hiro
Super Member


Posts : 544
Reputation : 16
Join date : 2012-04-27
Age : 40
Location : Newcastle, Australia
 |  Subject: Re: Charlene the AE102 Subject: Re: Charlene the AE102  Thu Jan 24, 2019 5:55 pm Thu Jan 24, 2019 5:55 pm | |
| Day +next - engine is now on the stand. Had to take the flywheel off as the mounting arms were hitting the pressure plate dowels, and could probably use a washer or two on the top gearbox bolts as they just bottom out in the block. Currently pivoting around the crank which makes it super hard to turn (2ZZ is quite top-heavy too), need to try and lower it as much as I can so it doesn't turn in to the Leaning Tower of Pisa. Actually ended up re-fitting the exhaust manifold just to try and balance it in the short-term. 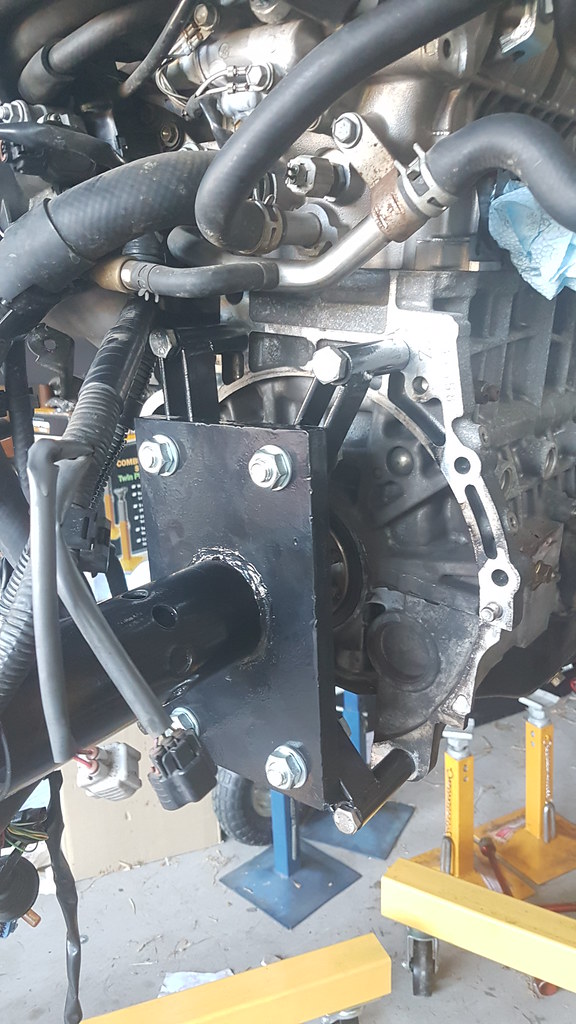 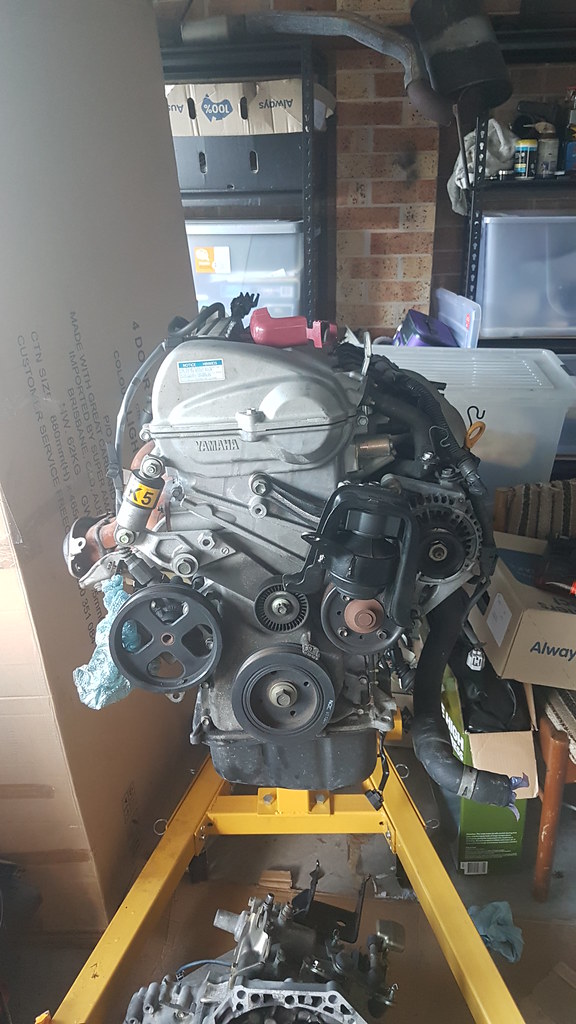 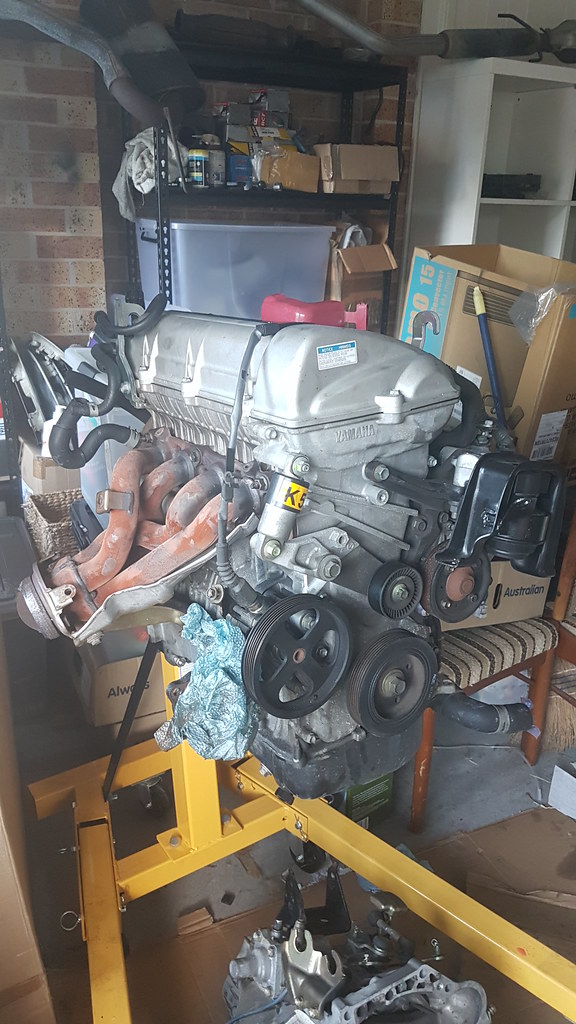 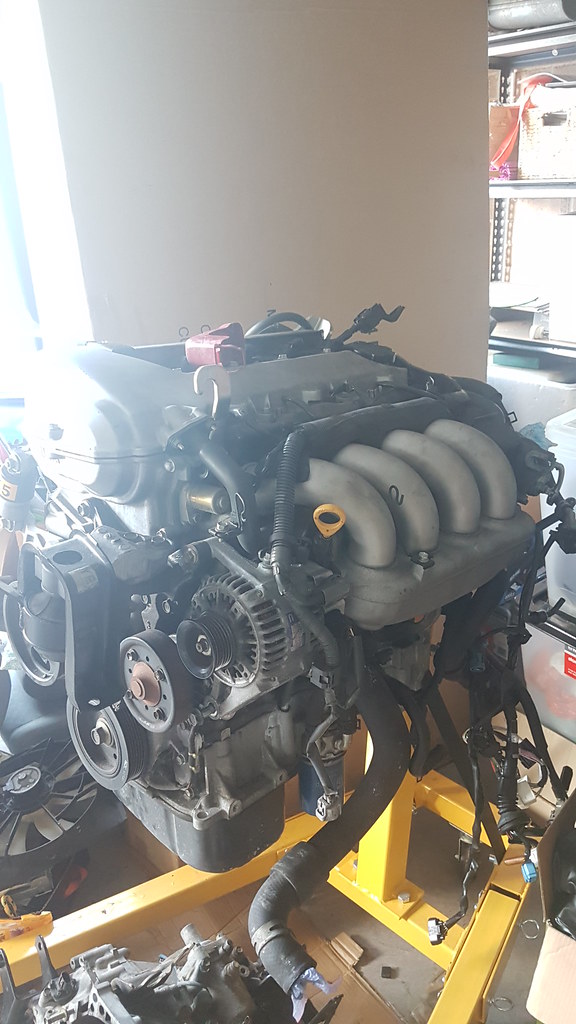 by Ian Rigby, on Flickr Next step (after balancing the stand) will be to label and strip off all the hoses etc, get the manifolds off and then pull the cam cover to do the lift bolts (and get an idea on the general condition of the engine). | |
|   | | Hiro
Super Member


Posts : 544
Reputation : 16
Join date : 2012-04-27
Age : 40
Location : Newcastle, Australia
 |  Subject: Re: Charlene the AE102 Subject: Re: Charlene the AE102  Sat Aug 24, 2019 6:17 pm Sat Aug 24, 2019 6:17 pm | |
| So that's how things stood at the start of this year.....basically nothing has happened since. Still got to pull the shifter cables out of the Celica shell (which requires disassembling most of the dash) along with some of the body harness (for the engine bay fuse box) but in the meantime I've started hoarding parts for the eventual conversion. First things first - some tools, and something to put them in. Been wanting a decent roll-cab for ages but never really had enough to fill it, but eventually got sick of all my stuff being scattered between two separate toolboxes, a builders-bag, and the floor, so I snagged one of the limited edition Mighty Car Mods roll-cab set when they went on special. Knew we bought a hatch for a reason... 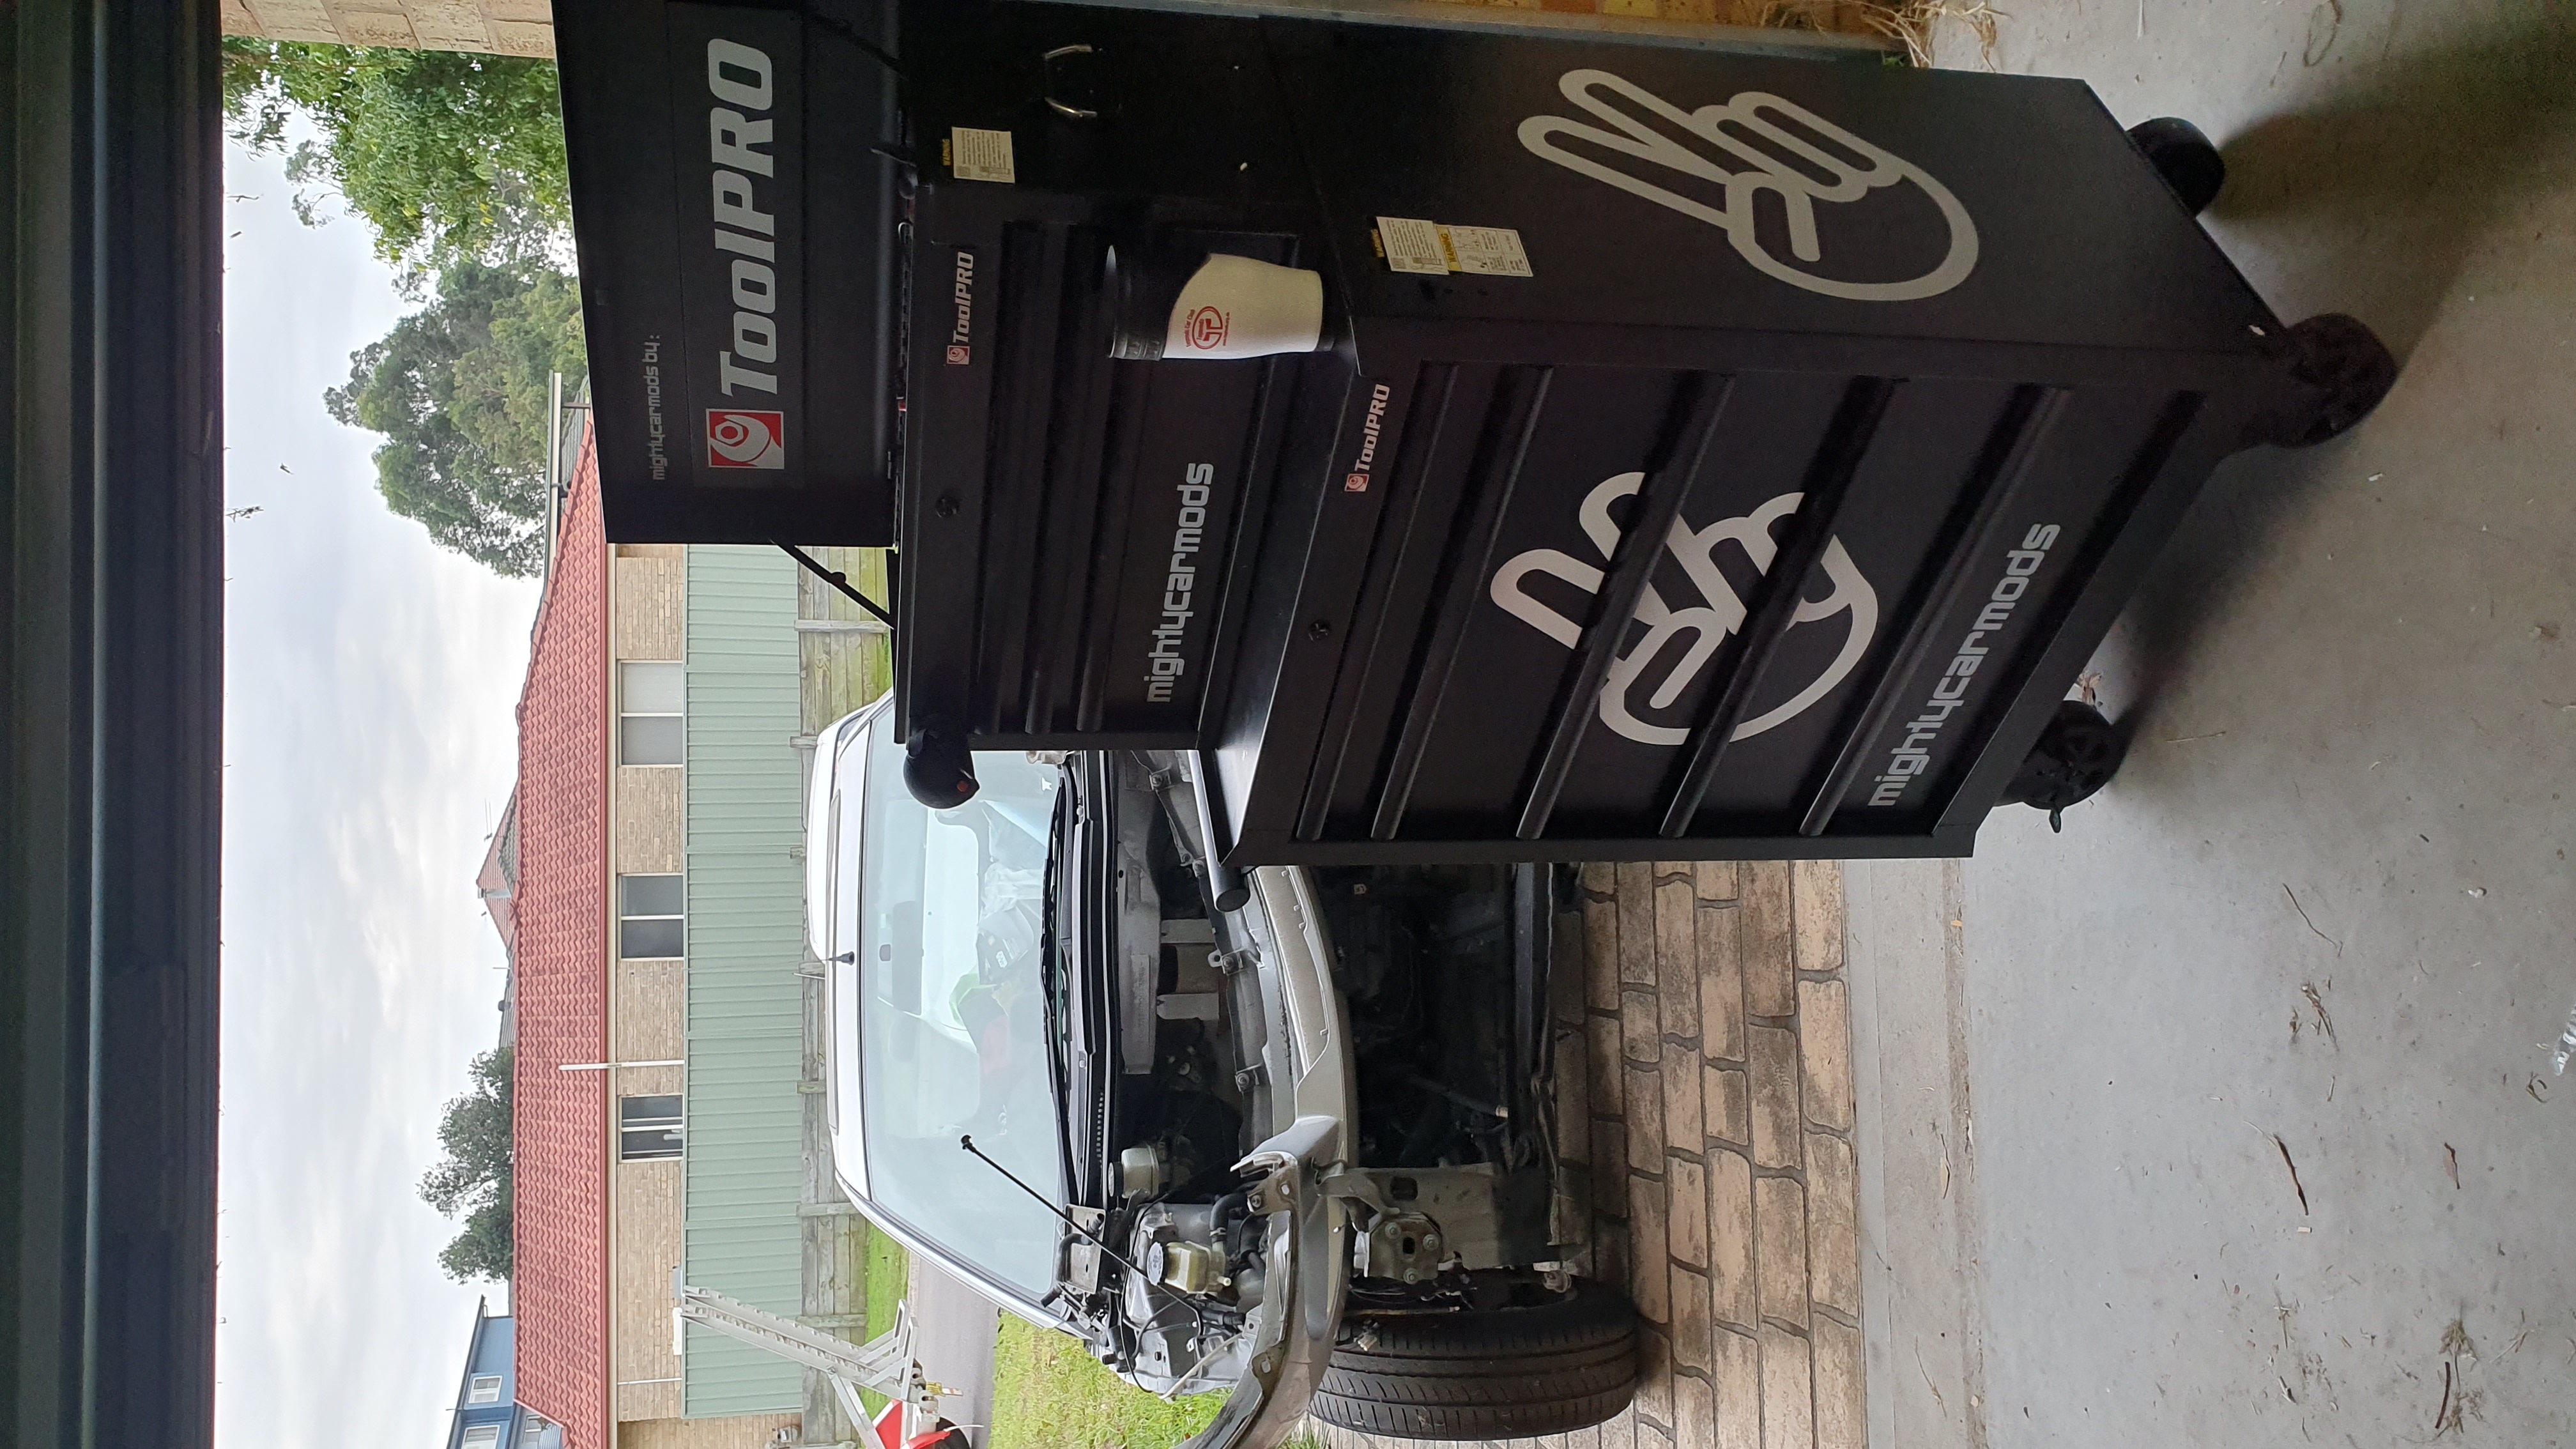  Then decided it was time to make the swap from Ryobi One+ to Milwaukee, much better tools as well as being smaller (with inline batteries too, much better for engine-bay/undercar work). Got a 1/2" power ratchet, 1/2" stumpy impact wrench and a 13mm hammer drill (for house stuff). Also just picked up a 1/4" hex-chuck impact driver for the small stuff (not pictured)  Then came the parts hoarding. First up was a plug-n-play Adaptronic E440d ECU modified by Kaizen Garage, which Jason Purcell had running in his AE82 2ZZ race car. This will allow be to do away with the factory immobiliser, run a bigger intake without the factory MAF (has onboard MAP sensor), as well as tweak lift and redline rpms to my liking (not to mention being able to support bigger cams).  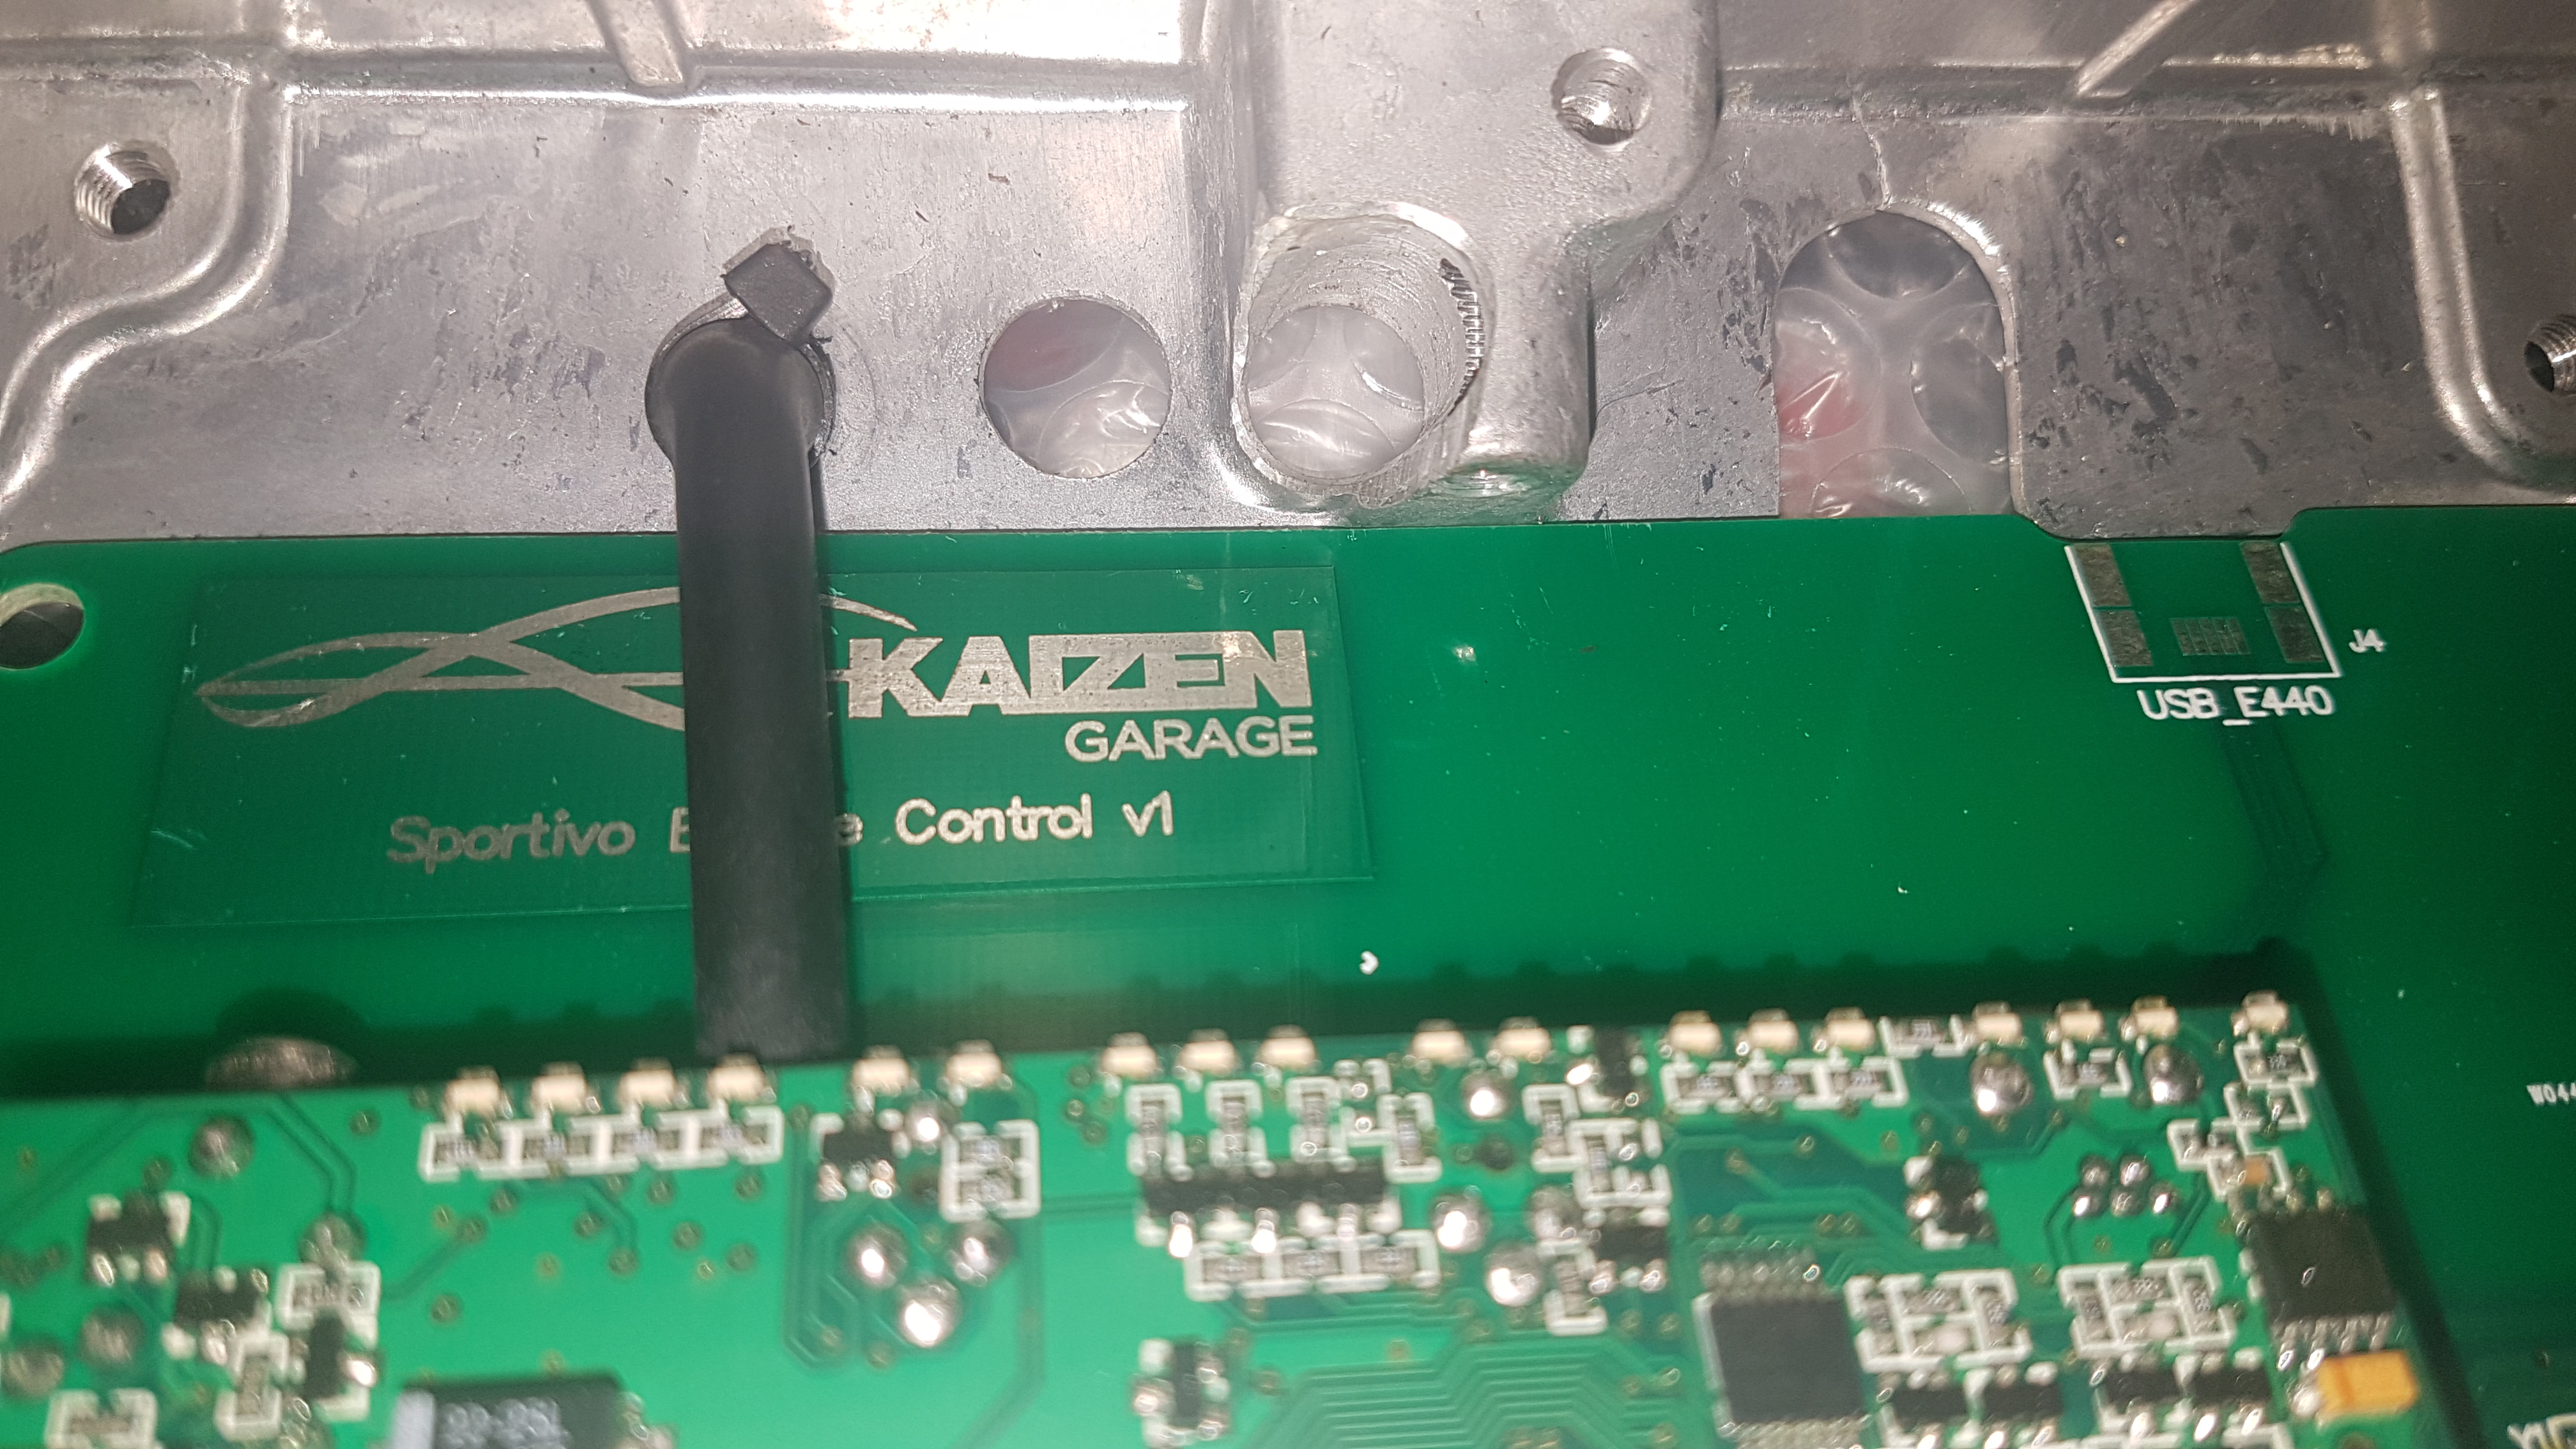 Next was a bunch of little bits and pieces to try and spark my motivation again - a 6-speed TRD ball shift knob (from the Tacoma/FJ Cruiser), height perfectly suits the MWR short shifter. Also got the MWR underside WP and ALT pulleys for some extra bling, a 77° TRD thermostat, Speed Source extended slave cylinder pushrod, and an MWR MR2 2ZZ engine mount adaptor. Along with that I also sourced the RH engine mount from a 4ZZ Euro ZZE111, so between that and the MR2 adaptor I should have something close to built-in. 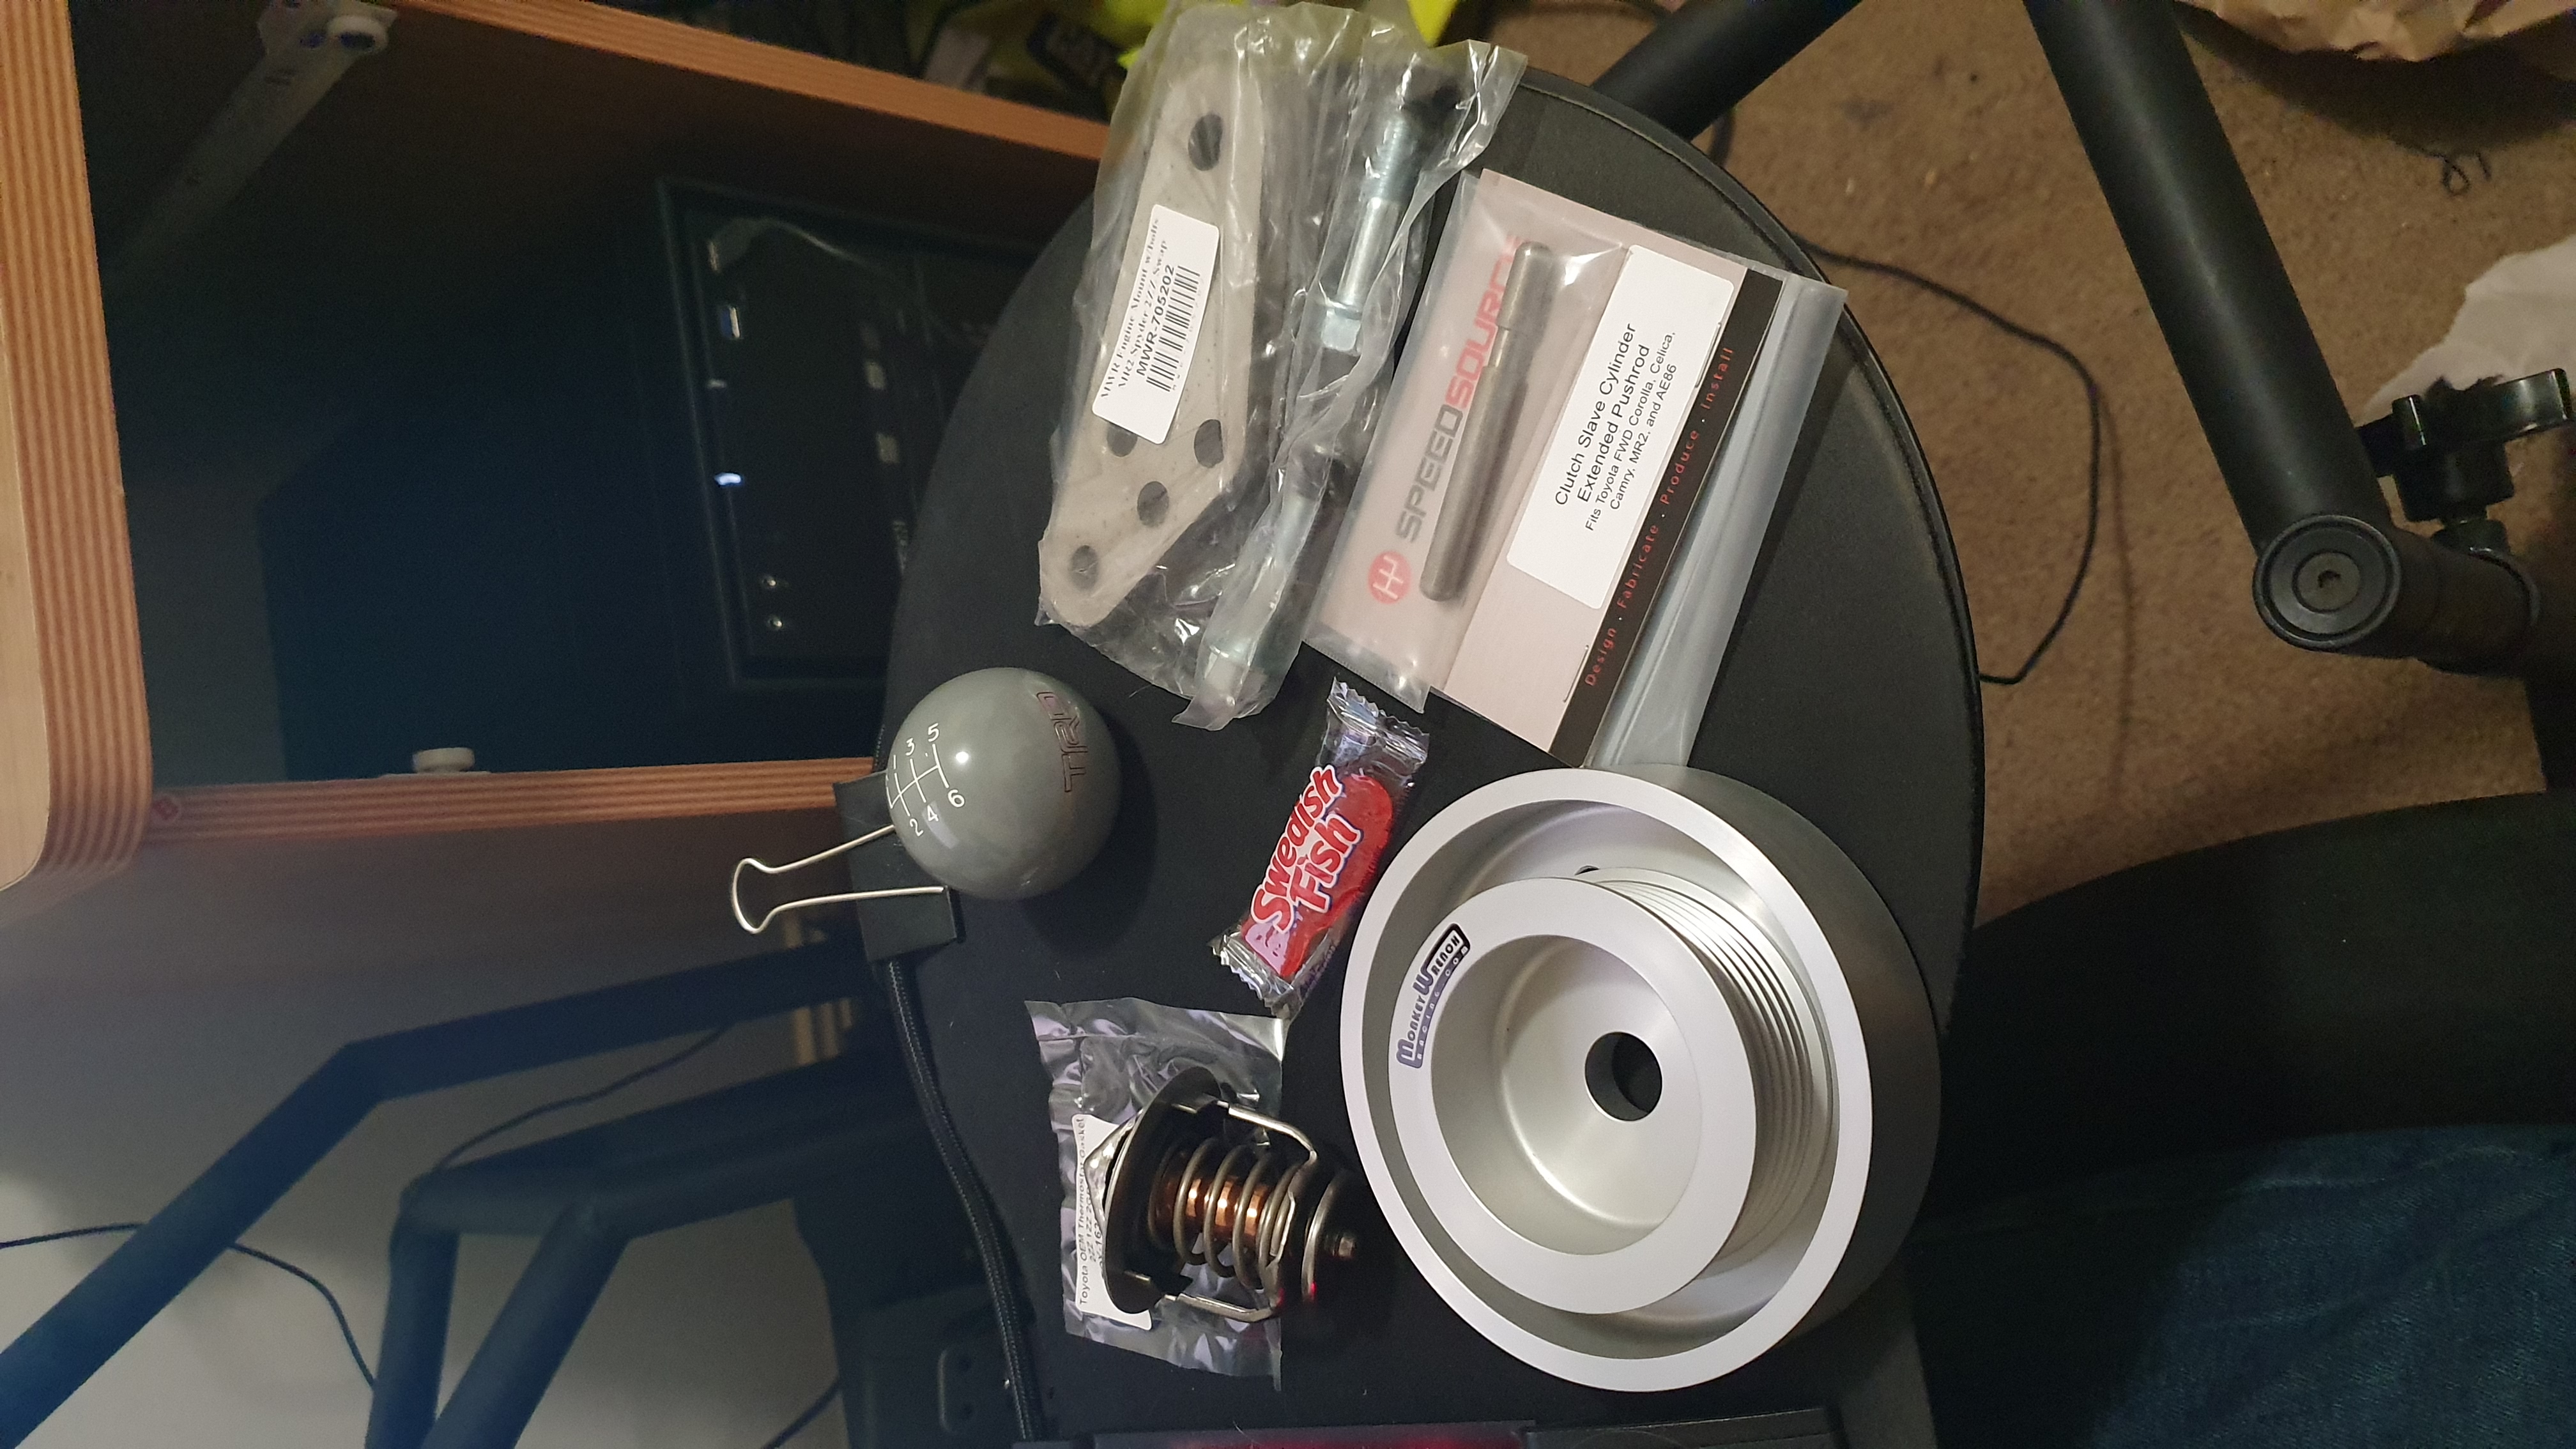   Next up will probably be clutch/flywheel, and maybe start looking at cams (but that opens Pandora's Box, because then I'll need valve springs, then might as well get new stem seals, then might as well get new valves, which means the head has to come off etc etc) On, and the Celica shell is a bit breezy now too...  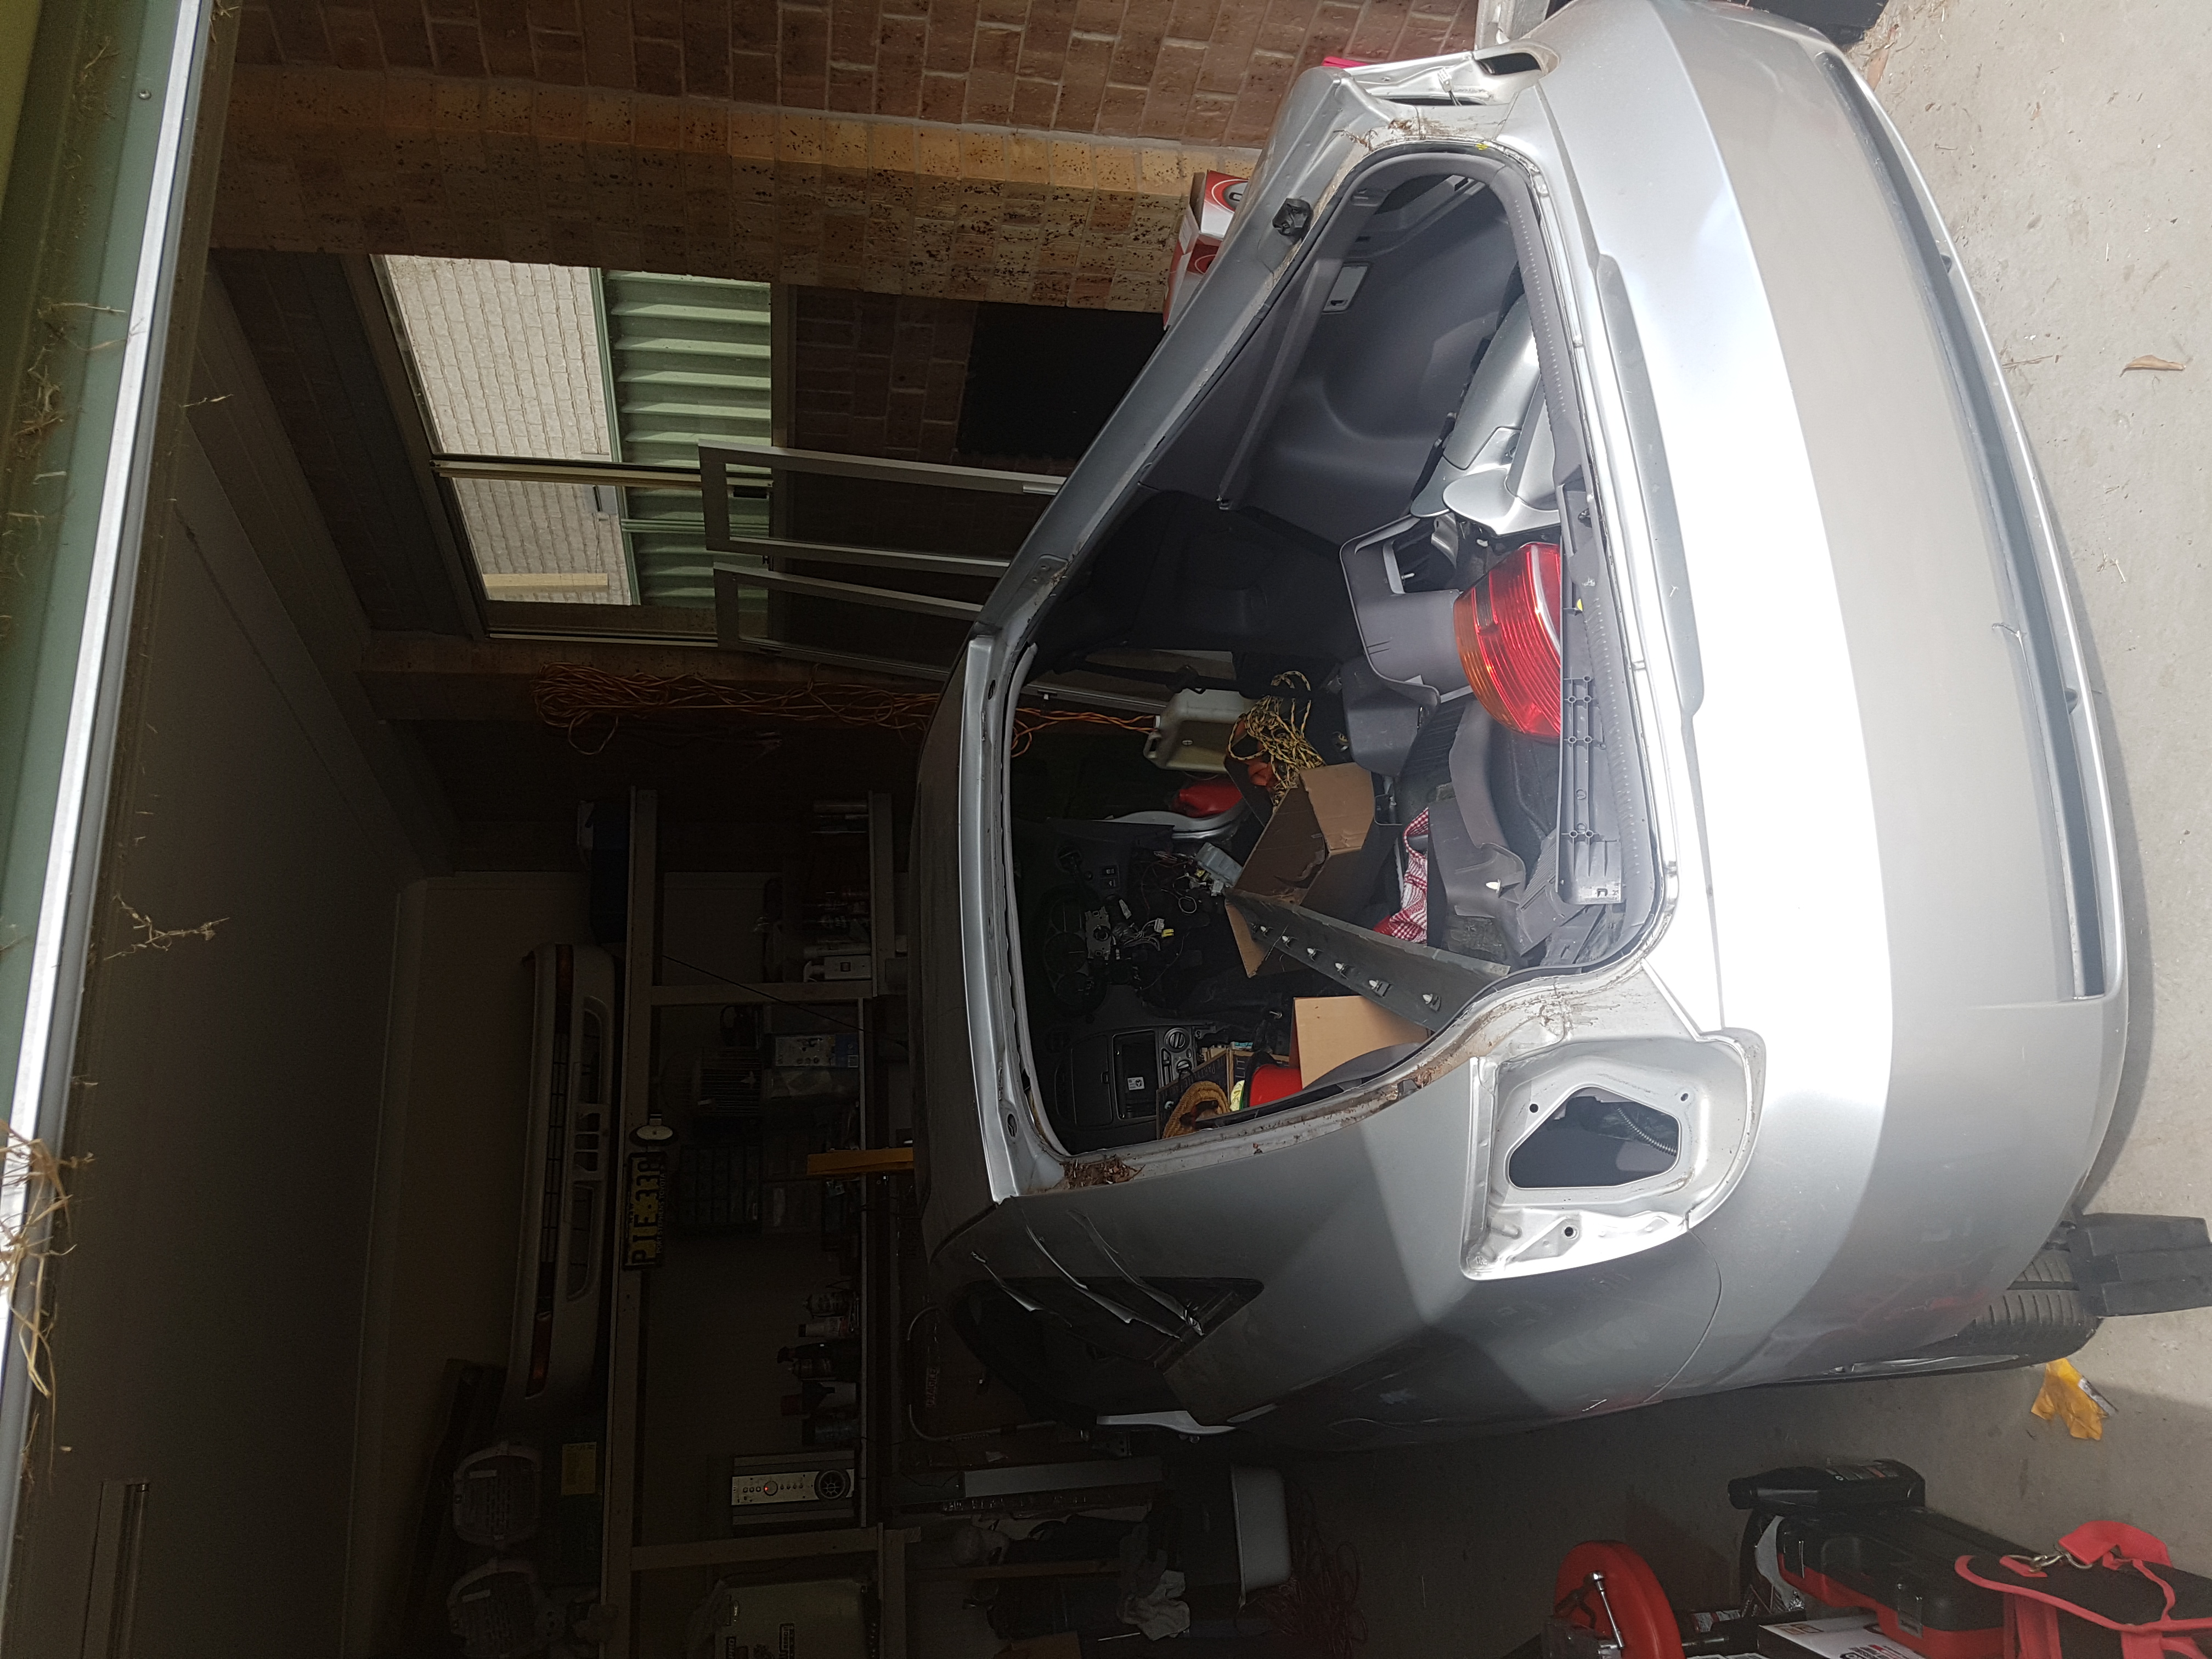 by Ian Rigby, on Flickr | |
|   | | Hiro
Super Member


Posts : 544
Reputation : 16
Join date : 2012-04-27
Age : 40
Location : Newcastle, Australia
 |  Subject: Re: Charlene the AE102 Subject: Re: Charlene the AE102  Tue Dec 24, 2019 4:25 pm Tue Dec 24, 2019 4:25 pm | |
| Been a little while since the last update - 12 weeks/60 days and 48 flights worth of travel for work on one hand, plus my old man passed away in September on the other has meant that this year has basically been a write-off as far as car updates is concerned, but that didn't hamper much the accrual of parts. Latest haul below: 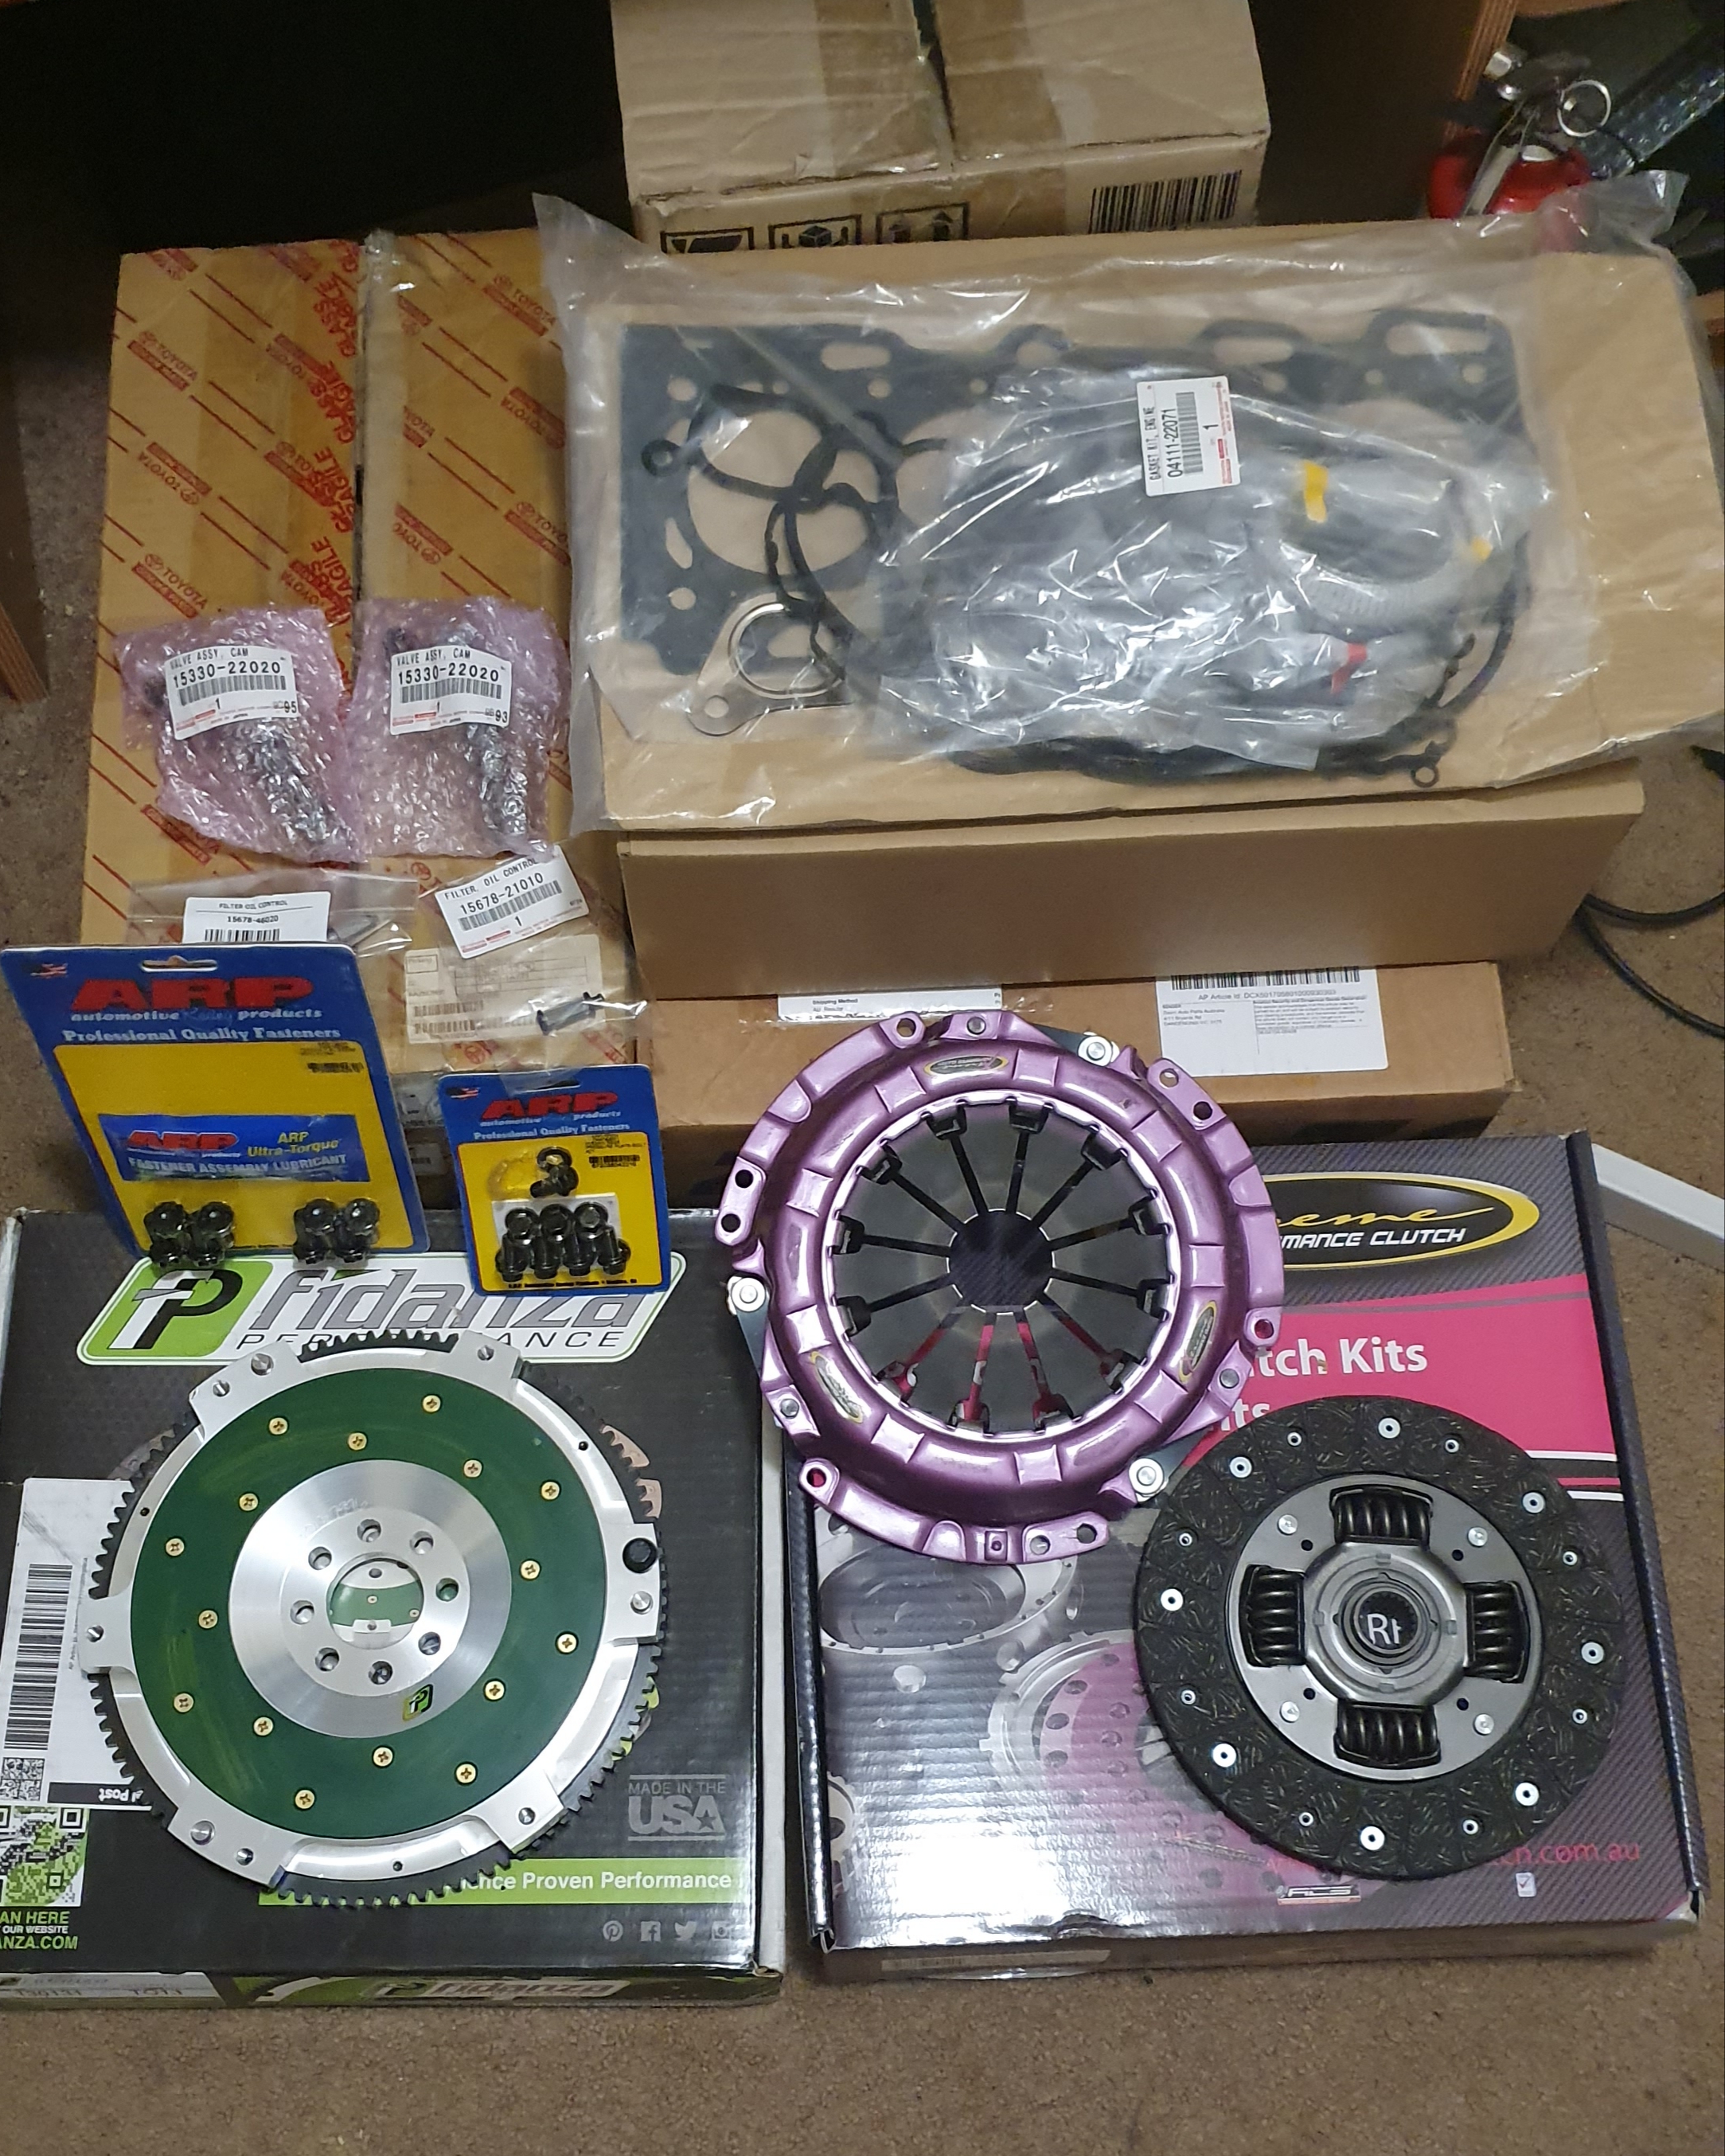 20191224_160022 by Ian Rigby, on Flickr Fidanza lightweight flywheel (3.4kg vs 5.9kg factory) Xtreme HD clutch ARP flywheel and pressure plate bolts (the only Toyota bolts that ARP list for the pressure plate are to suit a Hilux and cost a fortune for no reason, however Skyline ones are dirt-cheap by comparison and same thread, just a little longer) New VVT and VVL solenoids and OCV filters Full VRS kit | |
|   | | gold94corolla
Site Administrator


Posts : 5234
Reputation : 181
Join date : 2011-04-29
 |  Subject: Re: Charlene the AE102 Subject: Re: Charlene the AE102  Wed Dec 25, 2019 7:49 am Wed Dec 25, 2019 7:49 am | |
| Nice to see you're still hanging in there even with everything going on, and you can actually install and enjoy the parts lol | |
|   | | Hiro
Super Member


Posts : 544
Reputation : 16
Join date : 2012-04-27
Age : 40
Location : Newcastle, Australia
 |  Subject: Re: Charlene the AE102 Subject: Re: Charlene the AE102  Sat Dec 28, 2019 10:22 am Sat Dec 28, 2019 10:22 am | |
| - gold94corolla wrote:
- and you can actually install and enjoy the parts lol
Nothing is going to be "enjoyed" for a long time, probably a good 12 months away from this being close to completion (ZZT shell still needs to leave the garage and the 7A still needs to come out of the 102 before I could really even call this "started"). Plus summer is the worst time to work on cars here. | |
|   | | Hiro
Super Member


Posts : 544
Reputation : 16
Join date : 2012-04-27
Age : 40
Location : Newcastle, Australia
 |  Subject: Re: Charlene the AE102 Subject: Re: Charlene the AE102  Wed Feb 26, 2020 1:44 pm Wed Feb 26, 2020 1:44 pm | |
| | |
|   | | Hiro
Super Member


Posts : 544
Reputation : 16
Join date : 2012-04-27
Age : 40
Location : Newcastle, Australia
 |  Subject: Re: Charlene the AE102 Subject: Re: Charlene the AE102  Sun Mar 15, 2020 1:26 pm Sun Mar 15, 2020 1:26 pm | |
| Just bought a second-hand set of Yellowspeeds (no, not Godspeed or maXpeedingrods or any other eBay crap), was never really certain that I wanted to go to coilovers but they came up at an absolute bargain so couldn't resist. Interestingly they appear to be 7/4kg F/R which is a little different from the usual 6/4kg and 8/6kg sets out there Will pull them apart and give everything a clean and oil (the threads look like they could use it) and maybe a bit of paint if I can be arsed).  by Ian Rigby, on Flickr | |
|   | | Hiro
Super Member


Posts : 544
Reputation : 16
Join date : 2012-04-27
Age : 40
Location : Newcastle, Australia
 |  Subject: Re: Charlene the AE102 Subject: Re: Charlene the AE102  Sat May 09, 2020 9:22 pm Sat May 09, 2020 9:22 pm | |
| So, time for another little catch-up.  Finally got around to getting rid of the donor Celica shell, managed to sneak it in under 2 years by a single day, which is a pretty decent indication of how slowly I move with most projects Next was getting the SuperStrut brakes fitted  Calipers and carriers vapour-blasted ready for overhaul (second set for a mate's Sportivo)  Primed  Top-coated (I went matte-black, Andrew went silver)  New pistons, seals, dust boots and clip-rings 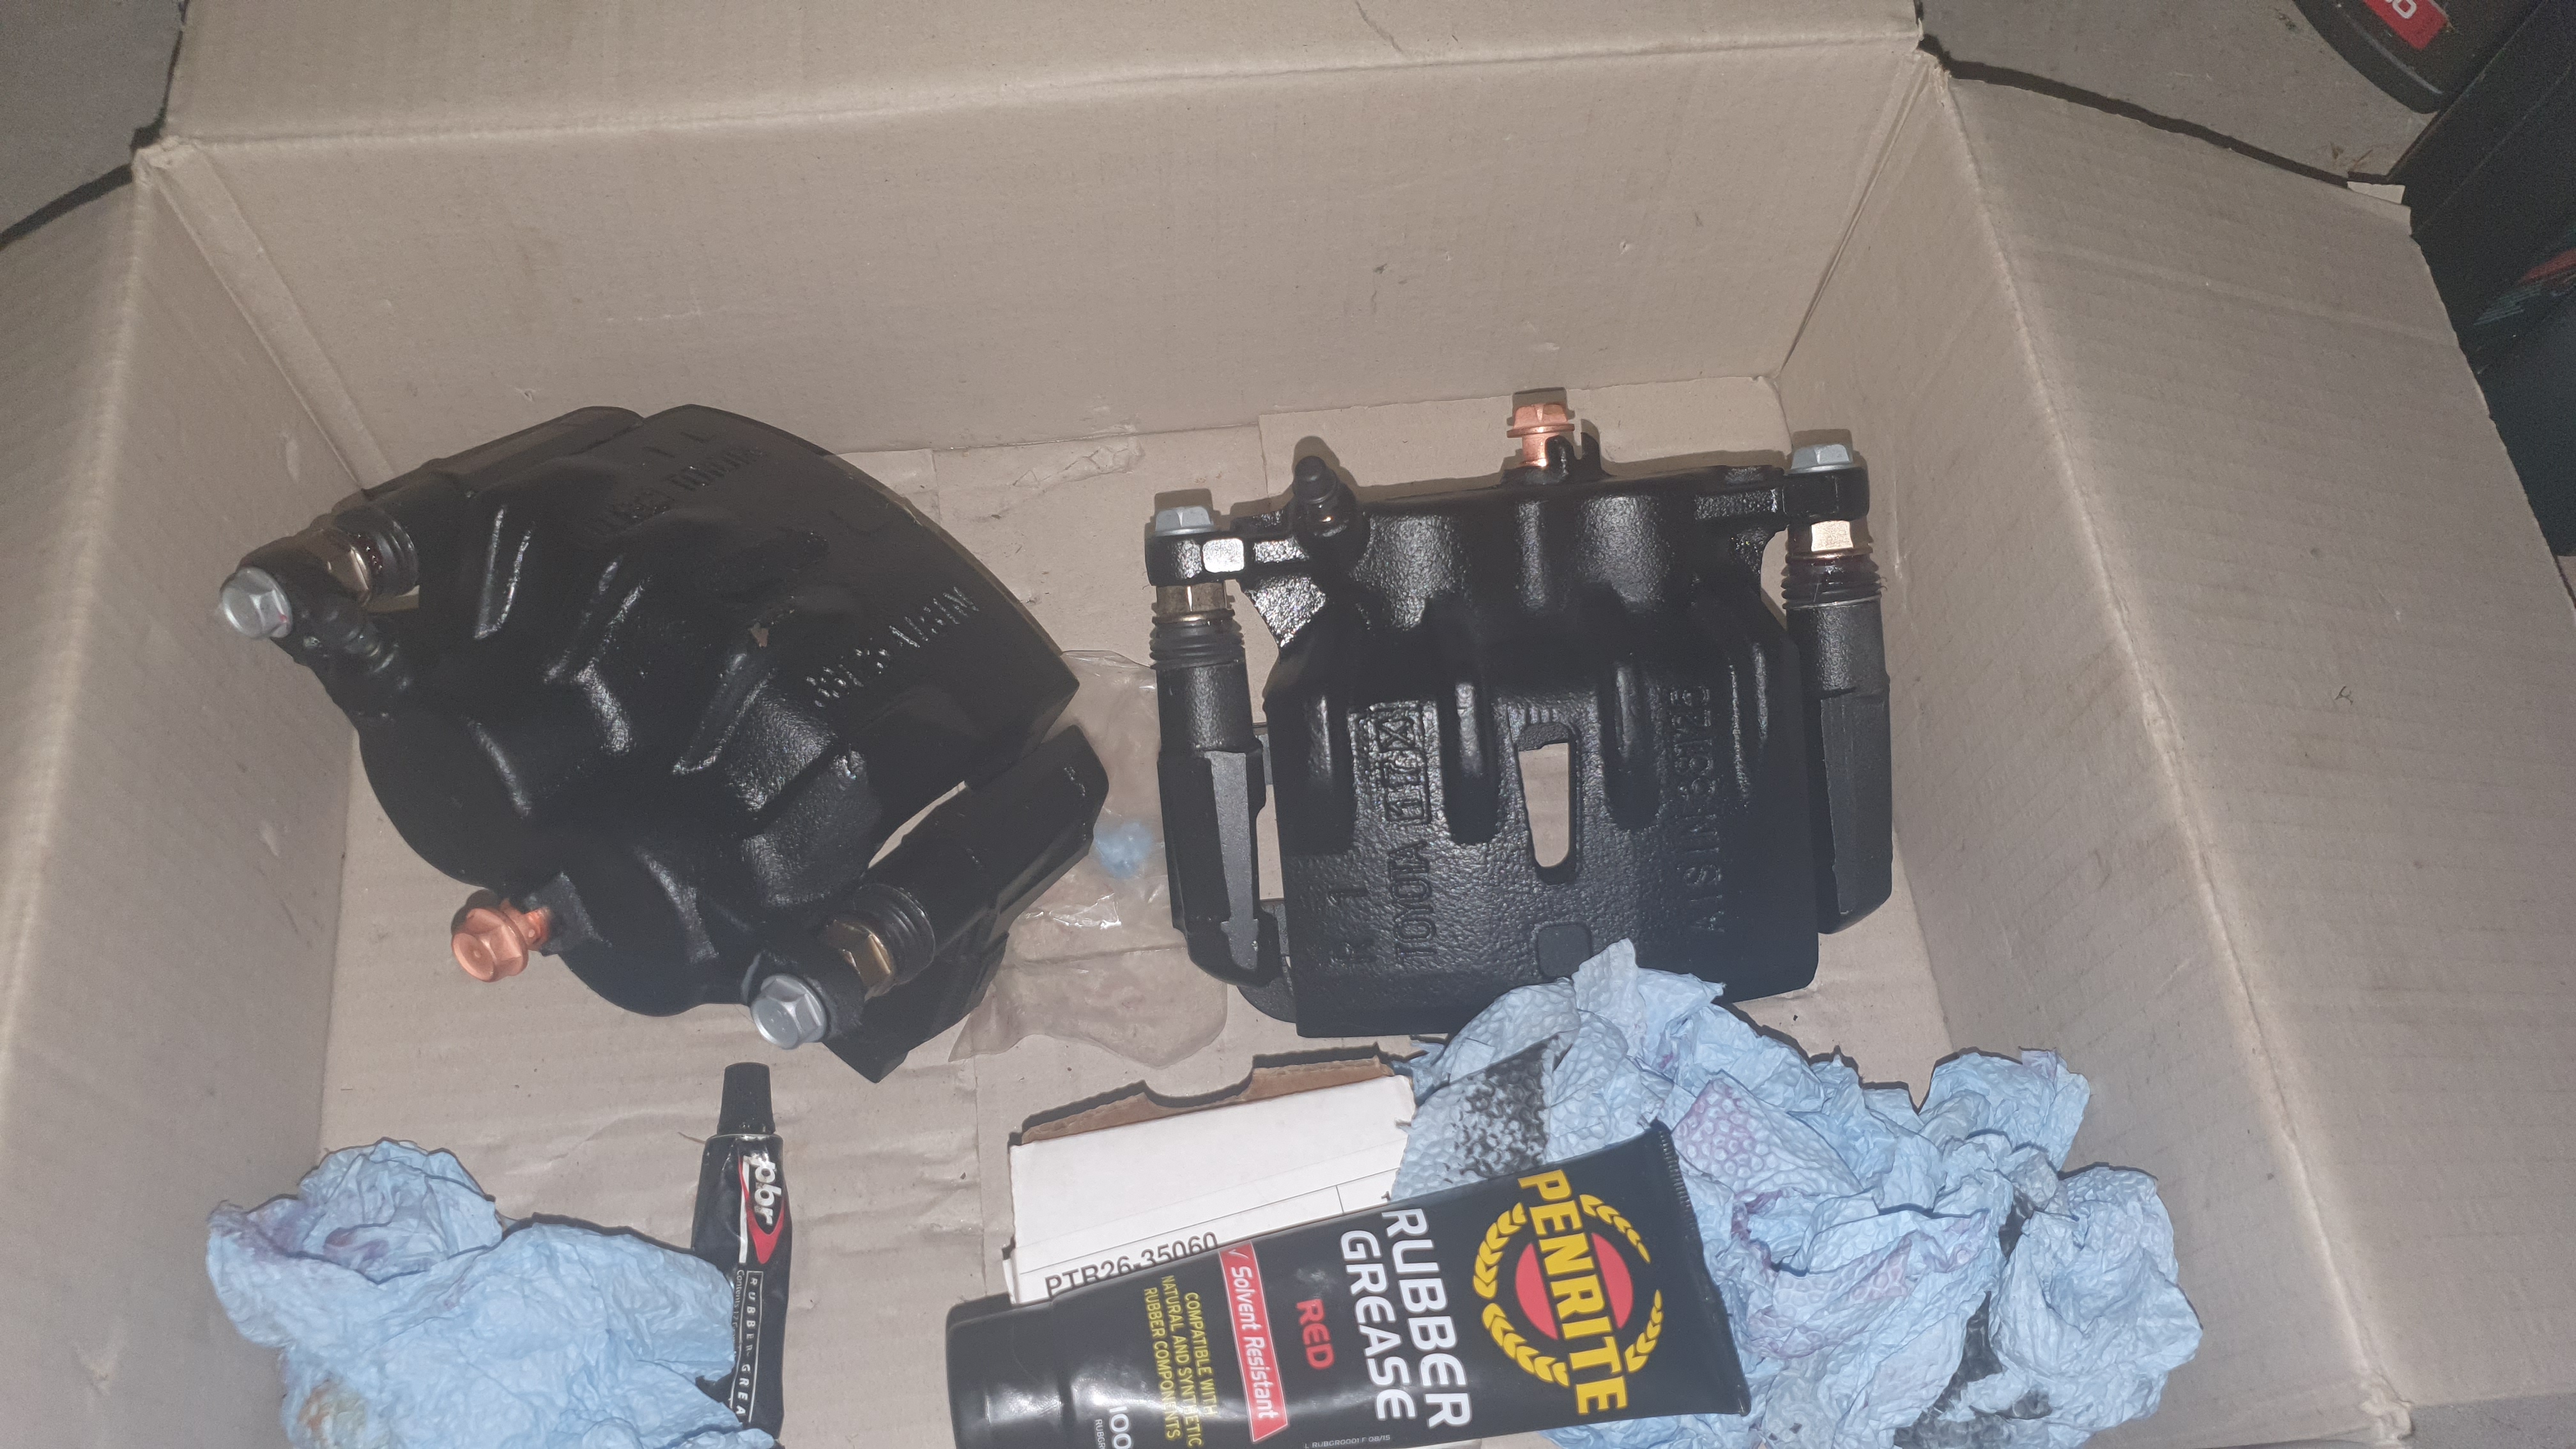 And new slide pins, boots, bolts and banjos  Interestingly when I got my wheel bearings replaced back in 2017 the new hubs came without the 55mm step in them.....so the AE111 rotors I sourced would no longer fit properly (also meant that the new rotors I got when trying to diagnose the wheel bearings have been flopping around with a mil diameter clearance for 2 and a half years, well that explains the brake shudder...). Good thing I still had the 54.1mm AE101 rotors as a backup  Rotor now centred well in the pad carrier, if I wanted to use the more commonly available DBA759 Sportivo rotor I'd probably have to get another 2mm machined off the carrier and that would be a little too much for my liking 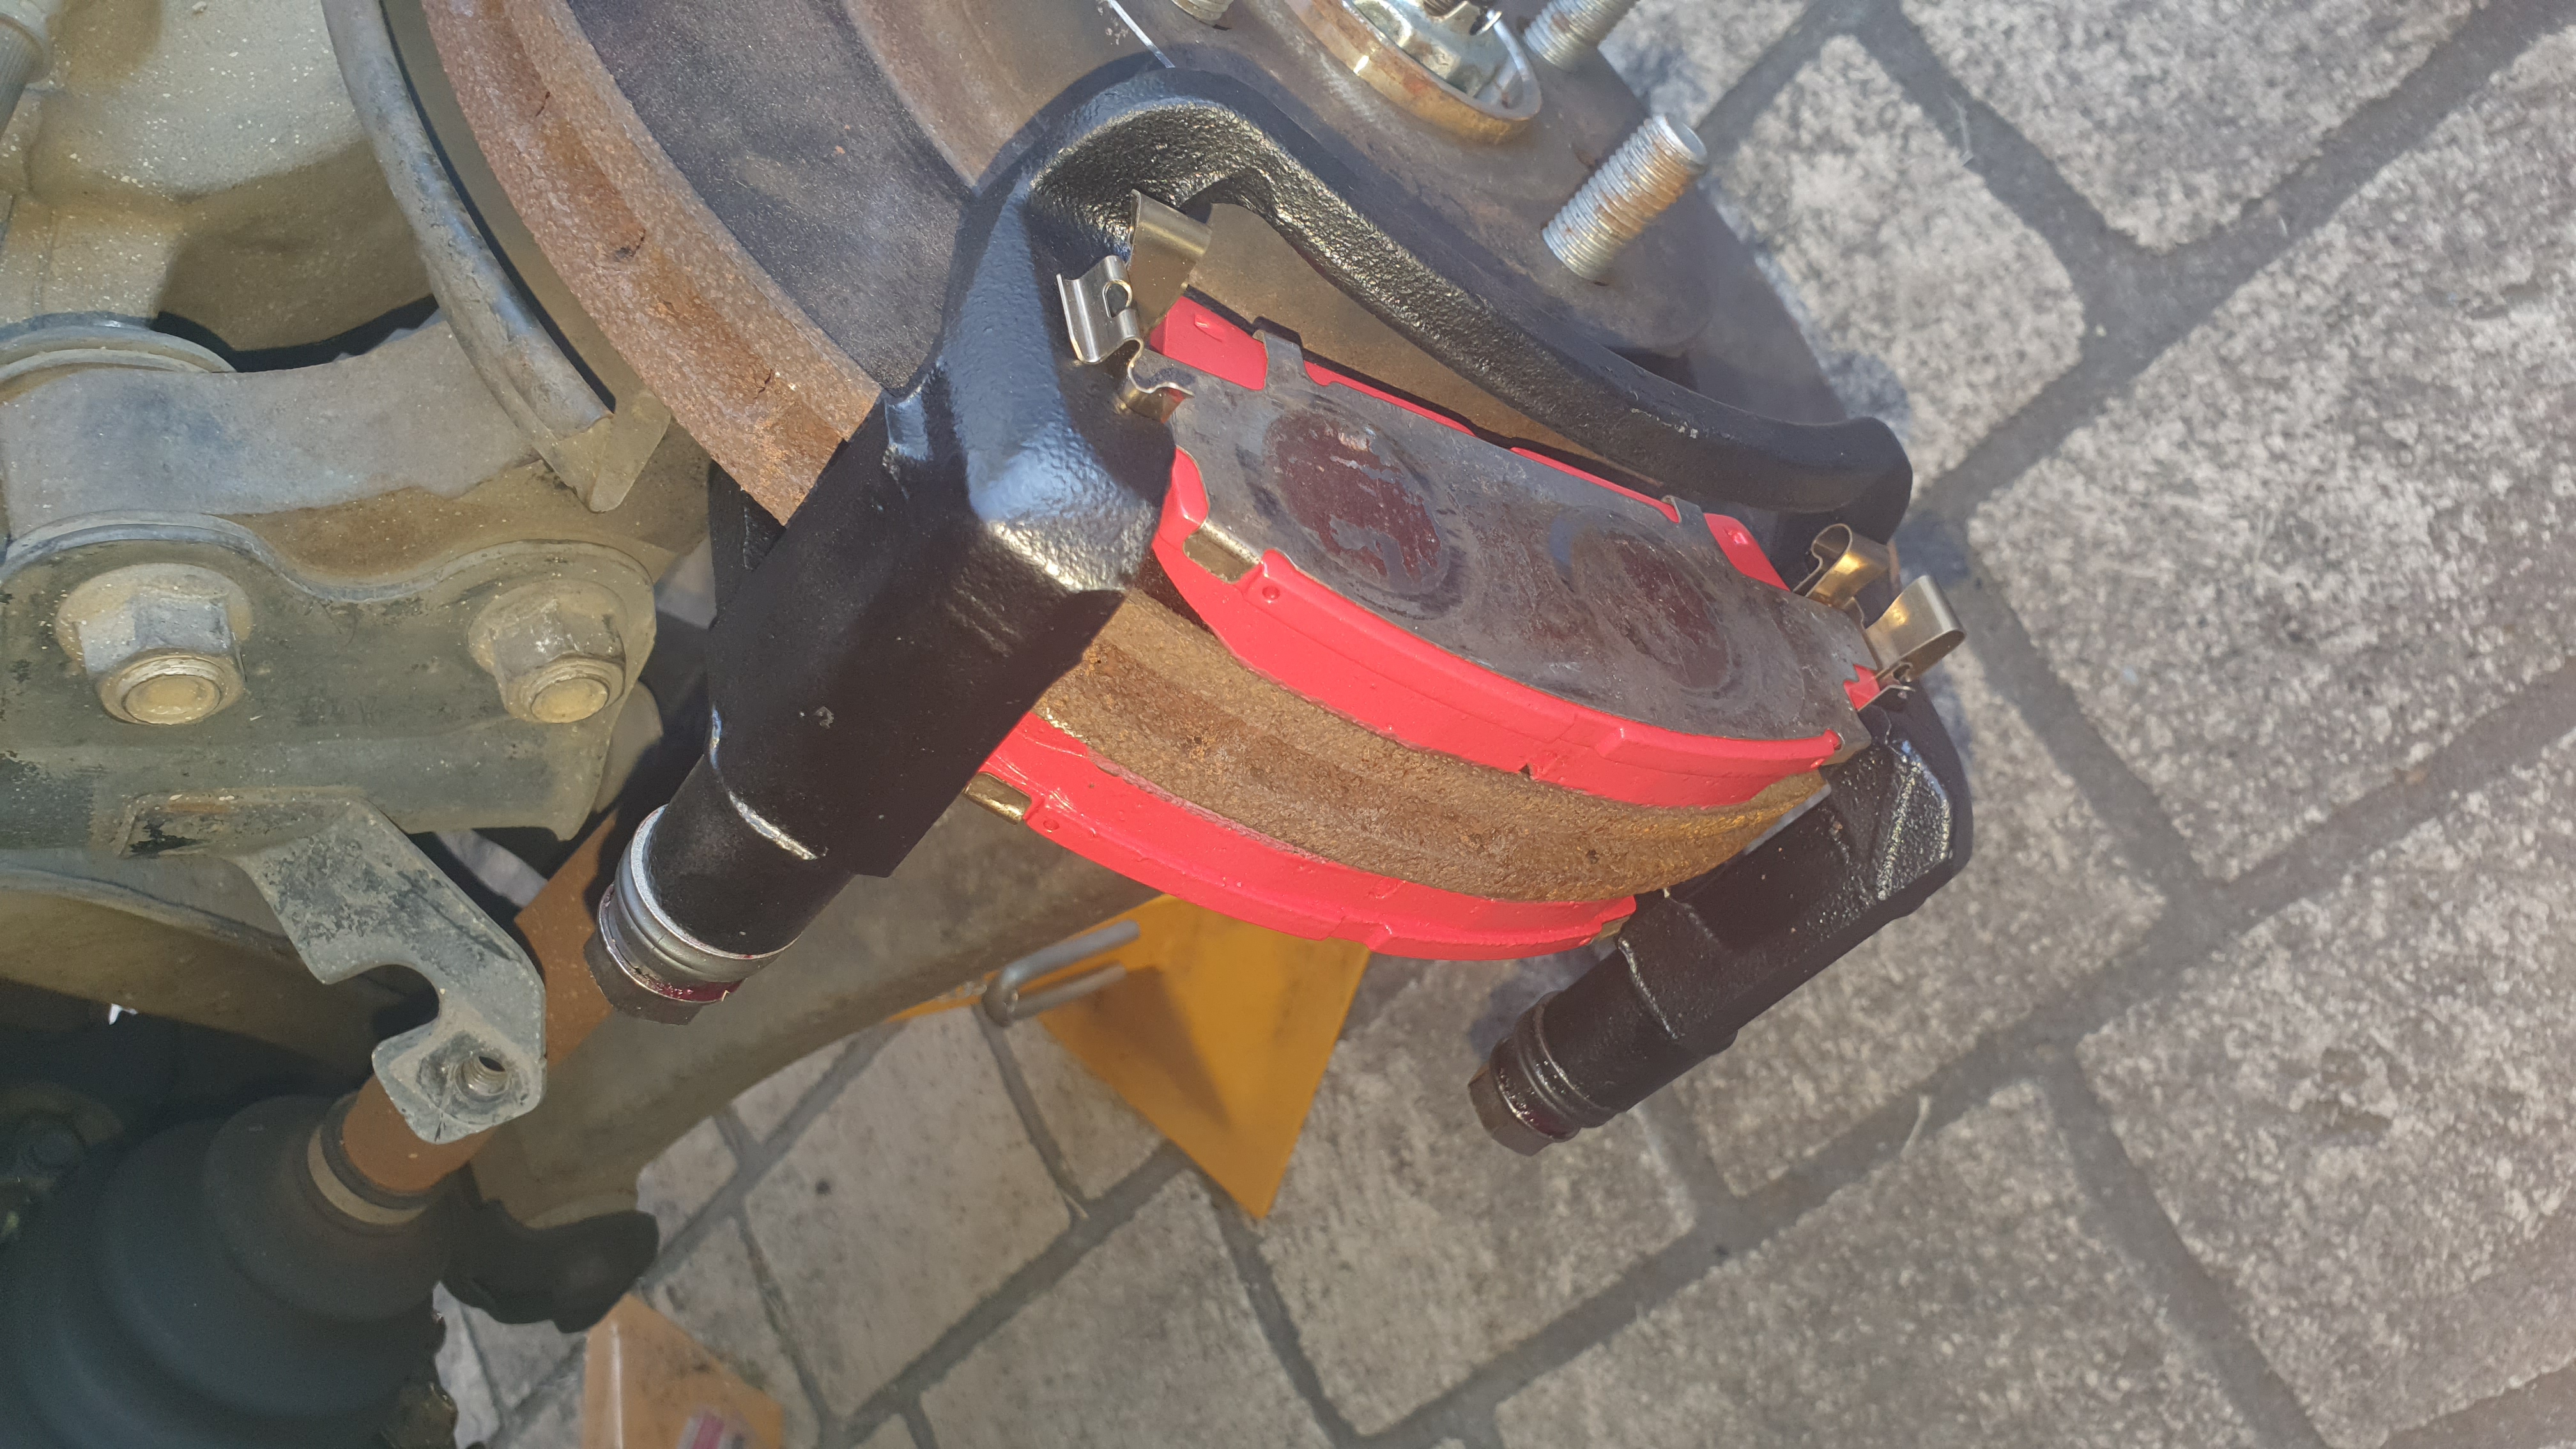 Make sure to use the SuperStrut pad not the ST204 Celica pad (Celica pads are thicker and the caliper won't fit over them), I used DP3995C EBC Redstuffs but any pad for the later SW20 MR2s will fit (same pad as the SuperStrut Corolla)  Caliper fitted  And new braided lines just for bling 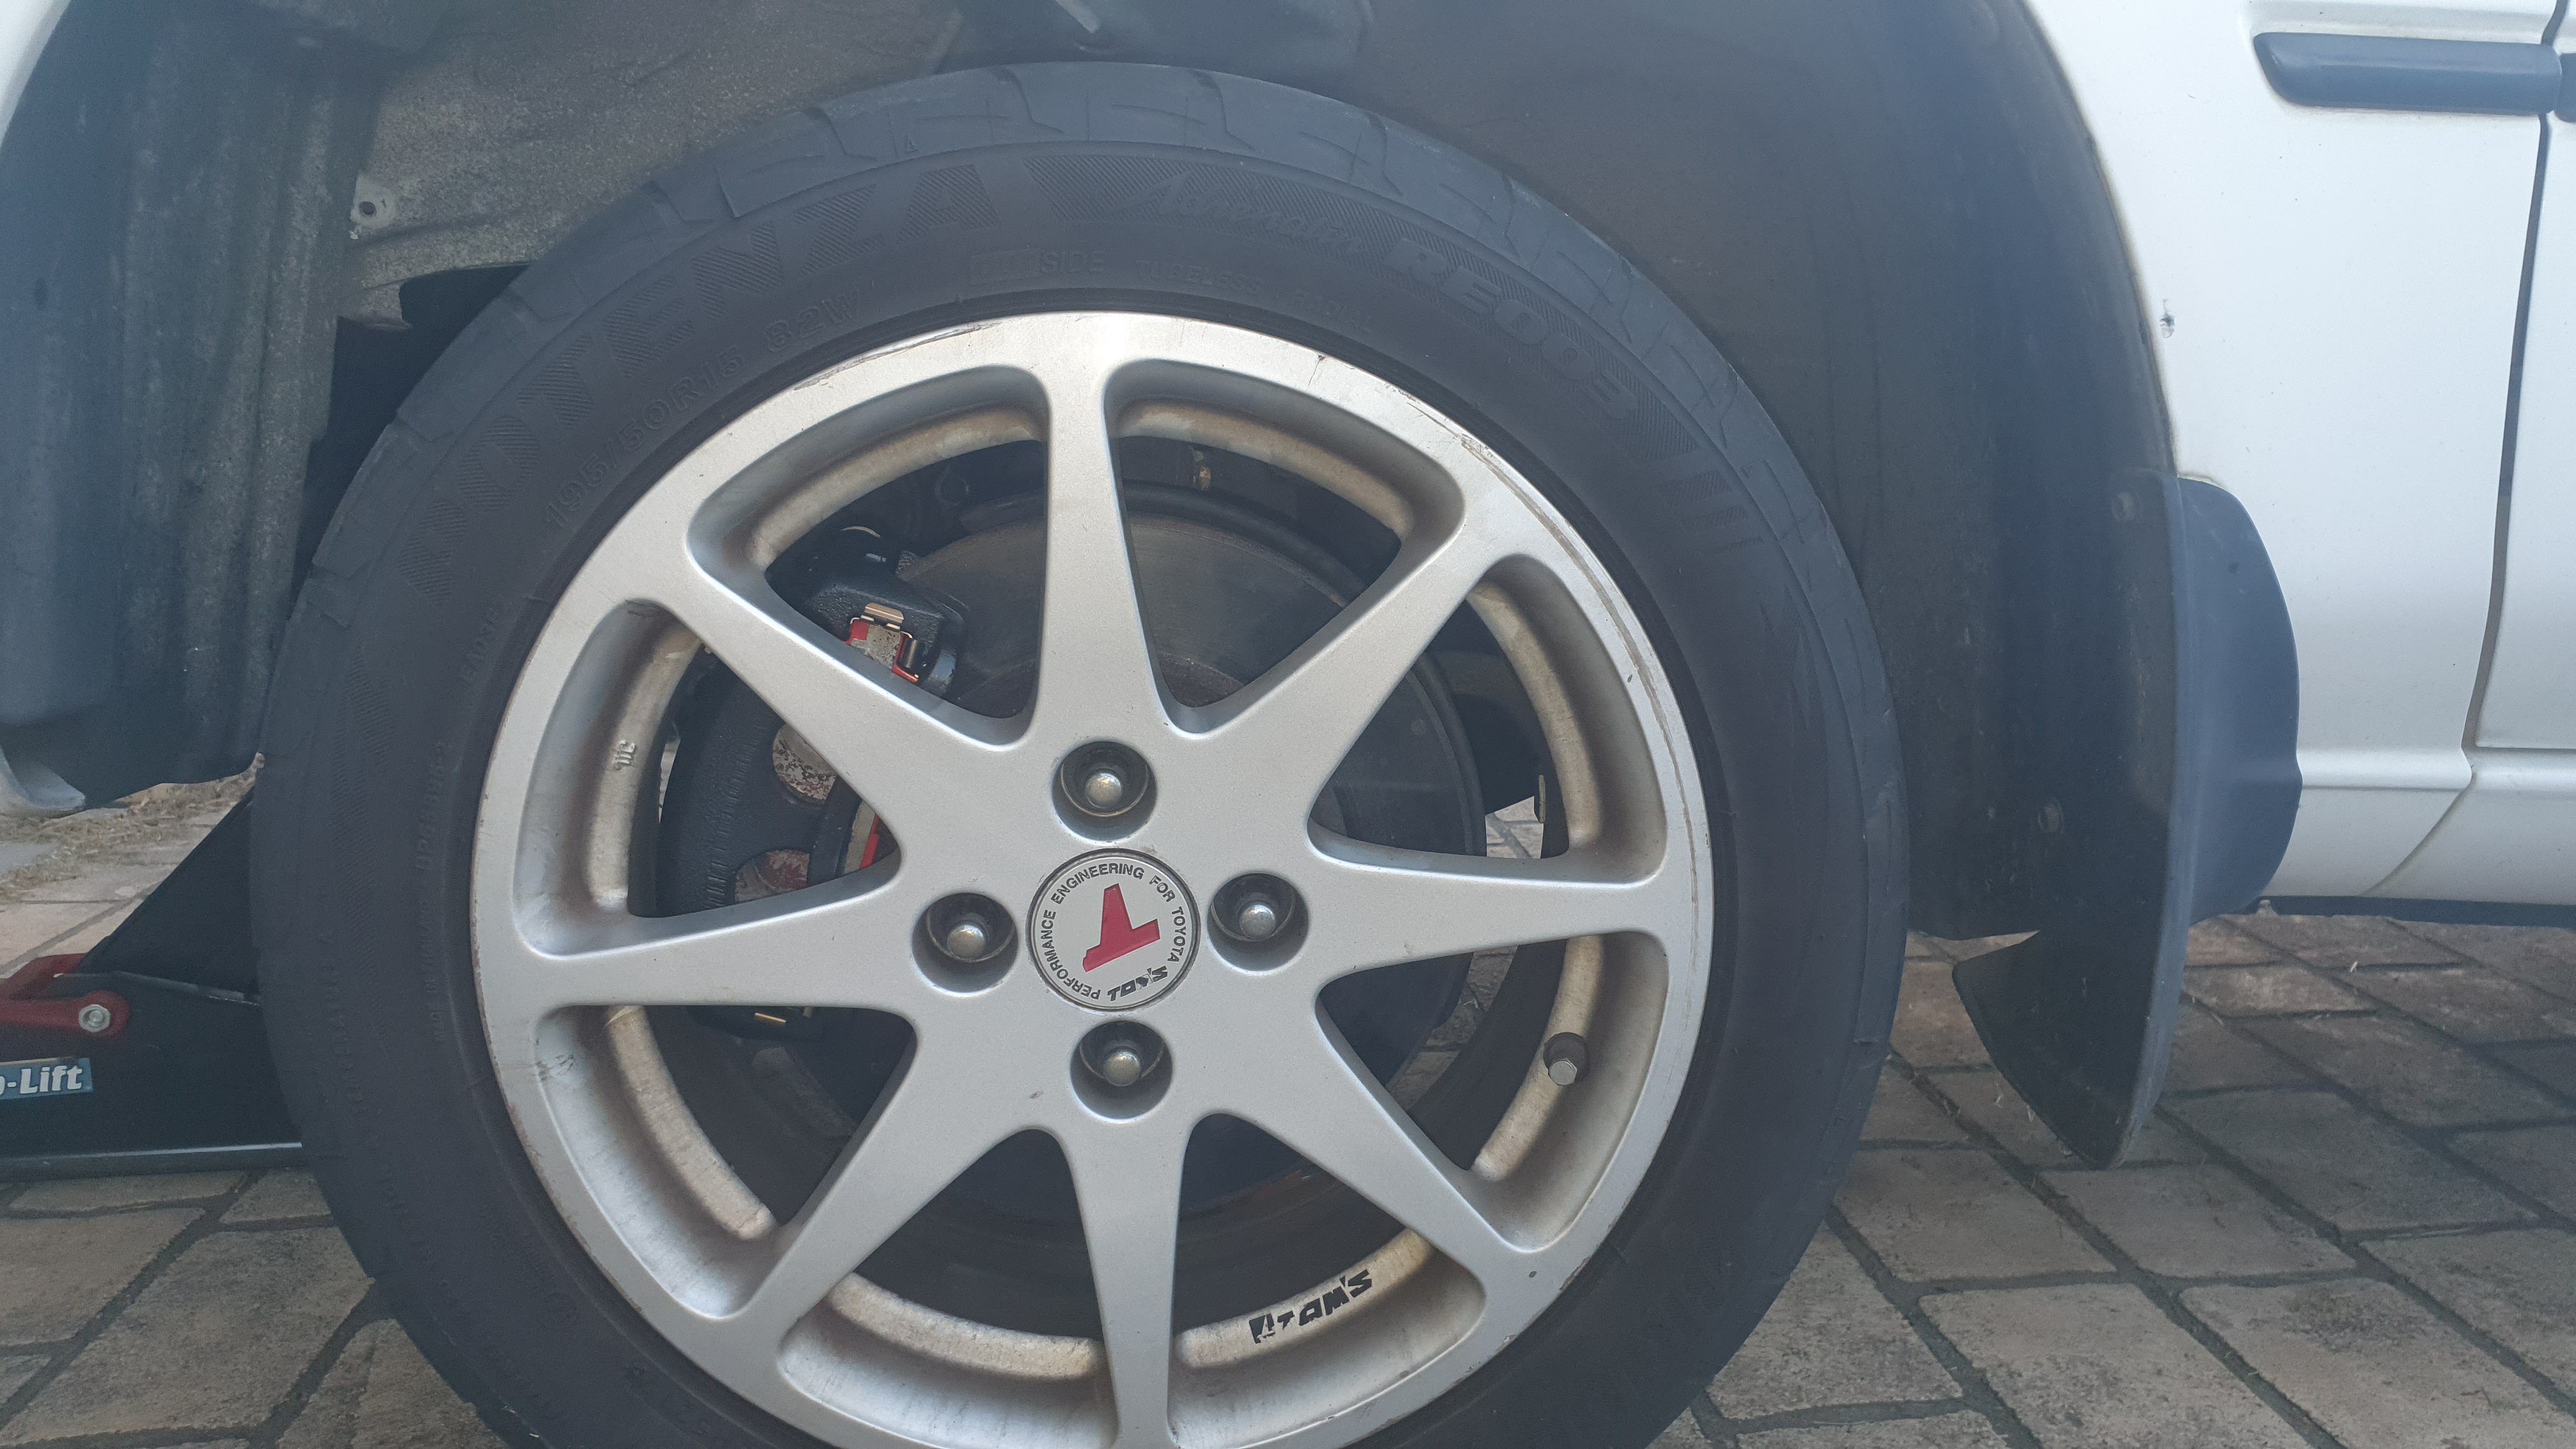 And the end result | |
|   | | Hiro
Super Member


Posts : 544
Reputation : 16
Join date : 2012-04-27
Age : 40
Location : Newcastle, Australia
 |  Subject: Re: Charlene the AE102 Subject: Re: Charlene the AE102  Thu Oct 29, 2020 11:28 am Thu Oct 29, 2020 11:28 am | |
| So, some kind of progress happened...  There's now a big empty hole in my life....I mean my engine bay  One 7AFE + C52 extracted as ordered And now the install begins... Step 1: Check Euro-spec ZZE112 timing-end mount fits.  It does (no mods required) Step 2: Check C52 gearbox mounts fit Celica C60 They do (slight mod required to stiffener on top gearbox mount but could be left off) Step 3: Check fitment of C60 in to Corolla engine bay  It fits (just), clears subframe (although will need sump/block attached to 100% confirm), however battery tray will require some surgery to allow the front-mounted Celica shifter to work (battery will be getting relocated anyway) Step 4: #getonthebeers 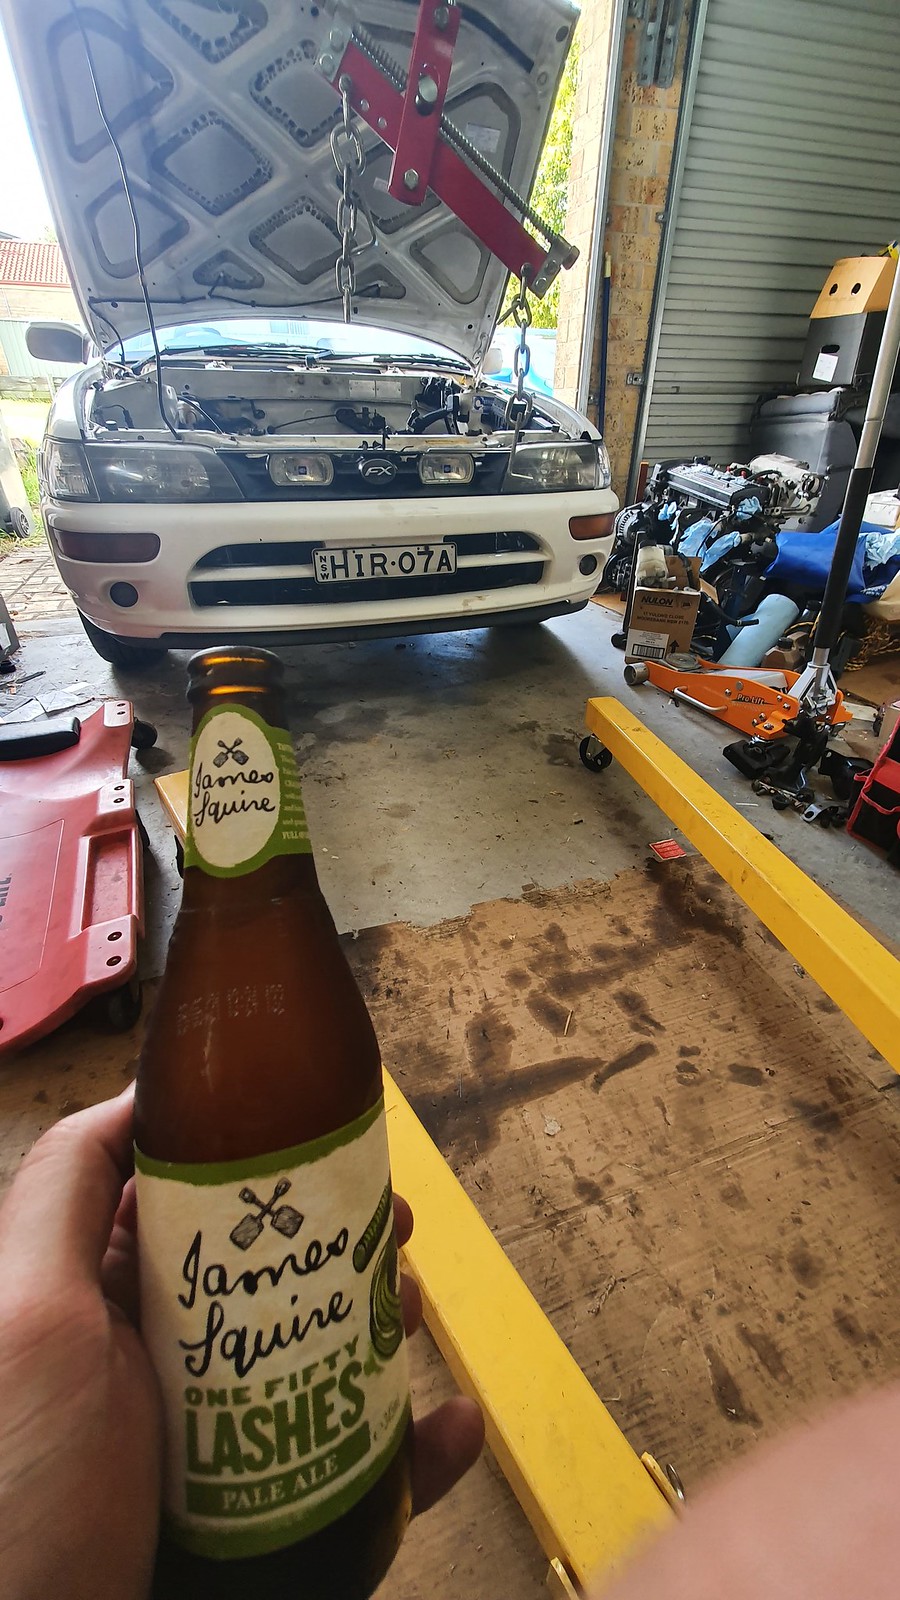 Check | |
|   | | Hiro
Super Member


Posts : 544
Reputation : 16
Join date : 2012-04-27
Age : 40
Location : Newcastle, Australia
 |  Subject: Re: Charlene the AE102 Subject: Re: Charlene the AE102  Sun May 30, 2021 2:12 pm Sun May 30, 2021 2:12 pm | |
| So, bulk update time (because I've been lazy) November 2020: Trial-fitted my AE102 Sprinter dash cluster the other day whilst I was starting to pull the interior out, the gunmetal dials look good (apart from the bubbles) but the lens has hazing in places and I would really like a 9k tacho for the 2ZZ so not sure if I'll stick with it (needs re-pinning anyway).  Shifter cables are now out, the two screws for the cover on the tunnel are a right pain as they are buried underneath the ECU (which I was taking out anyway) and the heater core (which I definitely wasn't removing), managed to get there in the end but it really isn't a job for those with large hands (nowhere near as bad as on the Celica though). Swapped the MWR short shifter and SpeedSource solid bushes back over to the 6-speed shifter housing and then chucked it back in just to double-check the washer stacks (so it doesn't bottom out on the tunnel), will need to trim the battery tray before I try and fit the Celica shifter cables however. At least the shift pattern on the TRD knob finally matches the gearbox...    May 2021: Battery tray notched to clear the selector counterweight (first time with an angle-grinder and managed to avoid setting fire to anything or cutting something unintended), selector cables test-run through the firewall (could be a little shorter) and solid brass bushes added to the eyelets. Can now officially select all 6 gears + reverse (doesn't mean much without an engine and driveshafts though :p)    Picked up a set of front knuckles, rotors/dust-shields, hubs, ball joints and tie-rods from a Corolla Sportivo (along with the whole rack because the dude couldn't be bothered splitting it) so I can be one step closer to running off-the-shelf driveshafts and rotors (SuperStrut rotors are a couple of mm different in offset to the Sportivo ones and much much rarer). Originally was just looking at the hub (to match the spline) but that snowballed to the knuckle, tie-rod and rack-end to get everything to line up and match (ZZE123 has the tie-rod attach to the bottom of the knuckle whereas the 102 is to the top, so taper would be wrong). Also did a test-fit of my headers to the in-progress 2ZZ conversion on a certain famous orange AE112, the downpipe might be tight getting between the rack and the subframe but at least the headers clear everything easily.      | |
|   | | Sponsored content
 |  Subject: Re: Charlene the AE102 Subject: Re: Charlene the AE102  | |
| |
|   | | | | Charlene the AE102 |  |
|
Similar topics |  |
|
| | Permissions in this forum: | You cannot reply to topics in this forum
| |
| |
| |
